
How to change the NetScaler MPX and VPX root password
Occasionally, you must change the root password of the NetScaler appliance occasionally, for security reasons or compliance of password rotation policy.
This document describes the steps required to change the root password of the NetScaler MPX and VPX appliances managed through NetScaler Console cloud.
If you change the NetScaler password, you must modify the NetScaler Console admin profile that is associated with the NetScaler. An NetScaler Console admin profile maintains the NetScaler credentials for REST API, SSH, SCP, or SNMP based communication with the NetScaler appliance. Through admin profiles, NetScaler Console manages NetScaler MPX and VPX appliances.
For more information about how to change the NetScaler
nsroot password on an individual appliance, see article CTX224027.
Related information
Change password using the Configuration Jobs feature
By using the NetScaler Console Configuration Jobs feature, you can simplify the repetitive password change process and apply the changes to the NetScaler appliances, without accessing the individual instances.
Follow these steps to change the password:
Step 1. Create a Configuration Template. Step 2. Create a Configuration Job. Step 3. Create an admin profile and modify it.
Note: If the NetScaler appliances are managed by other tools as well, you must change the credentials on those tools as well.
Step 1. Create a Configuration Template
-
From the NetScaler Console GUI, navigate to Infrastructure > Configuration Jobs > Configuration Templates.
-
Select Add. Create a Configuration Template with by typing the SSH command
set system user $ROOT_USER_NAME$ $ROOT_USER_PASSWORD$.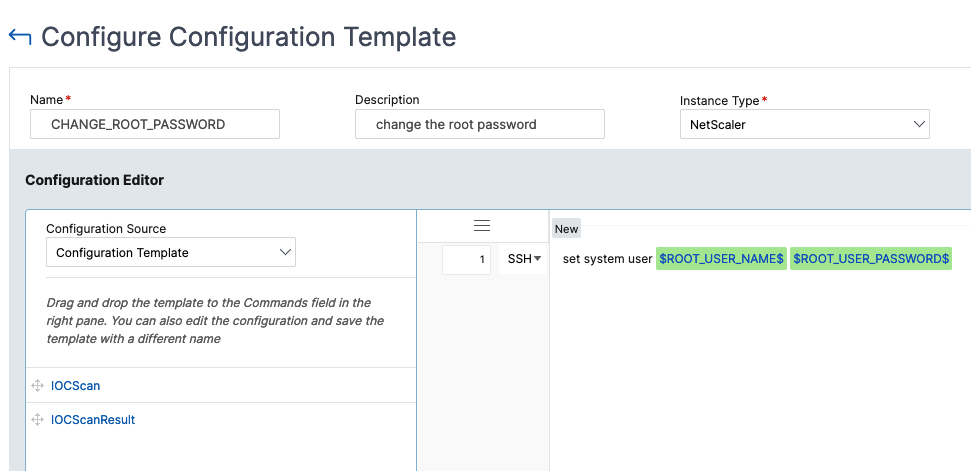
-
Select the
$ROOT_USER_NAME$variable, and select Text Field as Type. -
Optionally, provide the default value for the root user name. Select Done to save the variable settings.
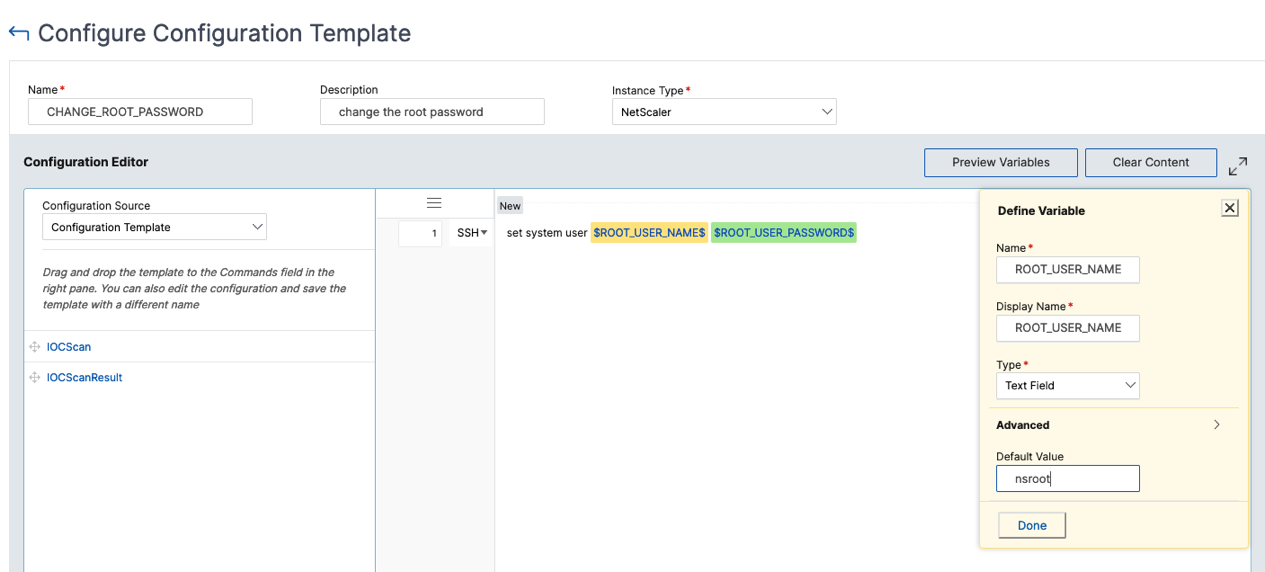
-
Select the
$ROOT_USER_PASSWORD$variable, and select Password Field as Type. Select Done to save the variable settings. -
Select OK to save the Configuration Template.
-
The new Configuration Template appears under Configuration Templates.
Create a Configuration Job
-
From the NetScaler Console GUI, navigate to Infrastructure > Configuration Jobs.
-
Select Create Job and click the "+" icon of the new configuration template. Select Next.
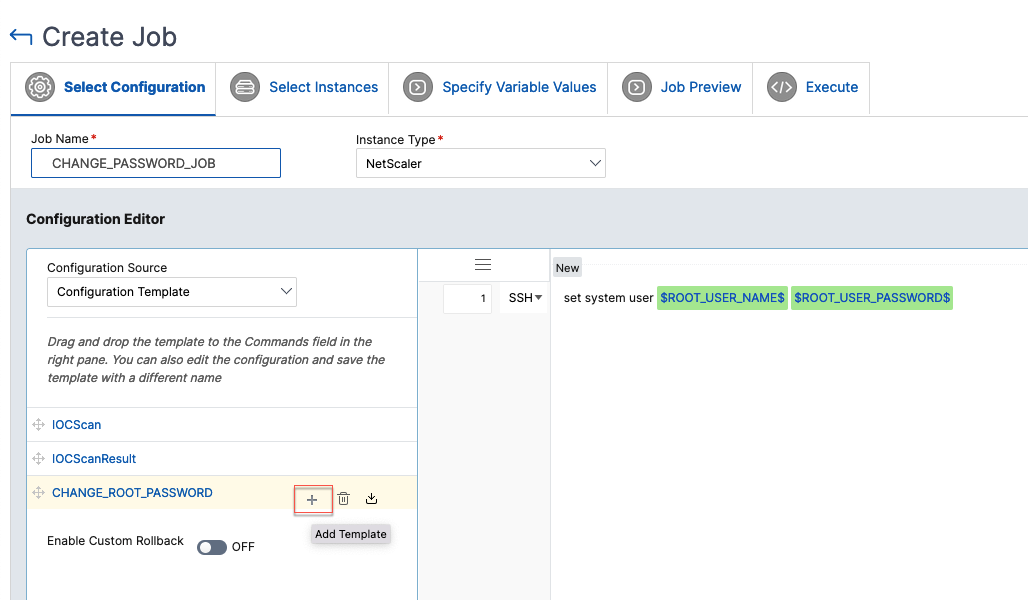
-
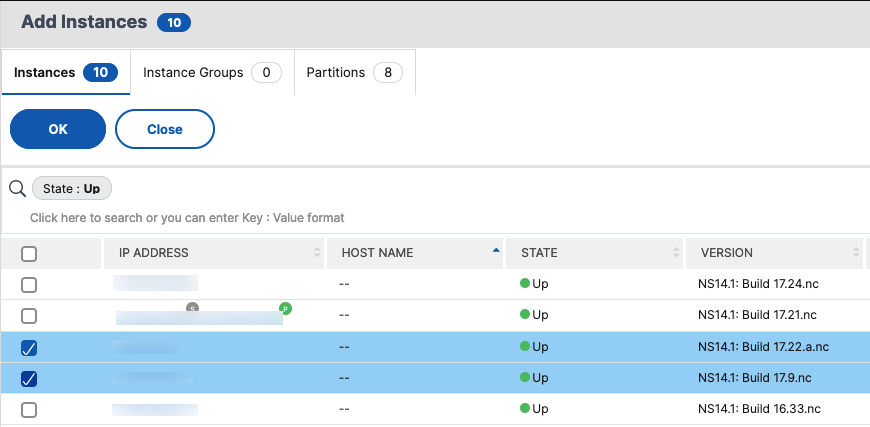
Select the NetScaler instance or instances for which the password must be modified.
-
In the Select Instances pane, select the instances, and click Next.
-
In the Specify Variable Values pane provide values for user name and password, and click Next.
-
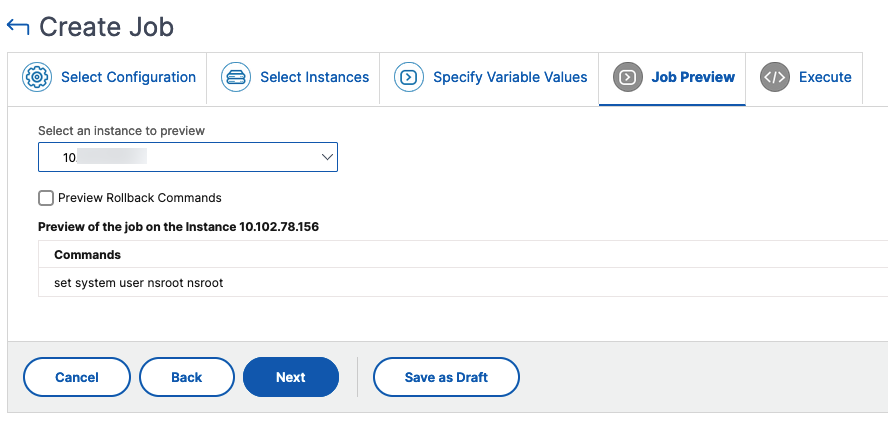
Under Job Preview, check the actual CLI commands that the NetScaler Console will run on the NetScaler instances. If the preview looks fine, click Next.
-
In the Execute pane, you have the choice to run the job immediately or schedule it for later. You can also choose to run the job in parallel on all the selected instances or do it sequentially. Select Finish after you've provided the execution details.
-
The Jobs page shows if the execution succeeded or failed.
-
Select the Job and click Details. The execution details show the status at individual instance level.
Modify the admin profile
After you've modified the NetScaler passwords, you must add and modify the admin profiles of the instances. Follow these steps:
-
Navigate to Infrastructure > Instances > NetScaler.
-
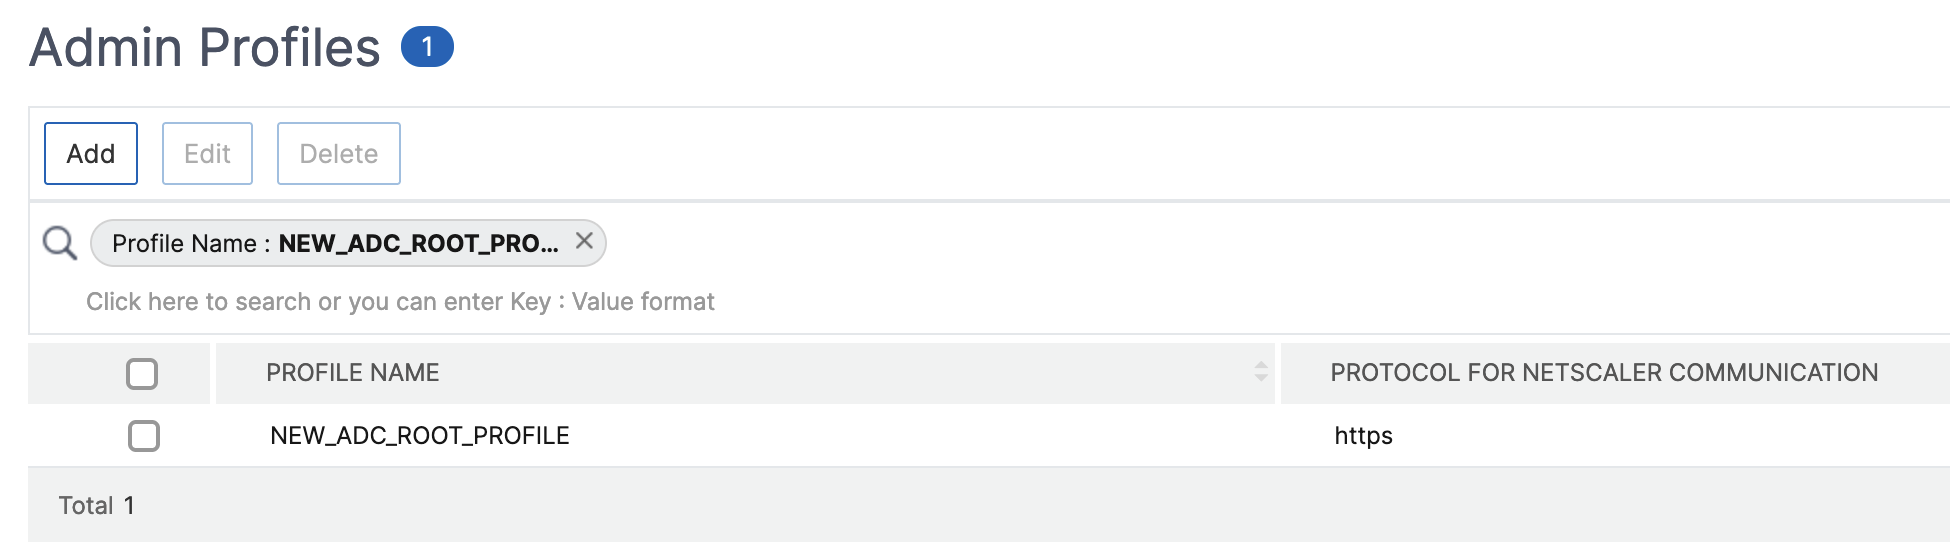
Click Select Action > Profiles to see all the admin profiles.
-
Select Add to create an admin profile and provide new NetScaler credentials.
-
The newly created profile appears under Admin Profiles.
-
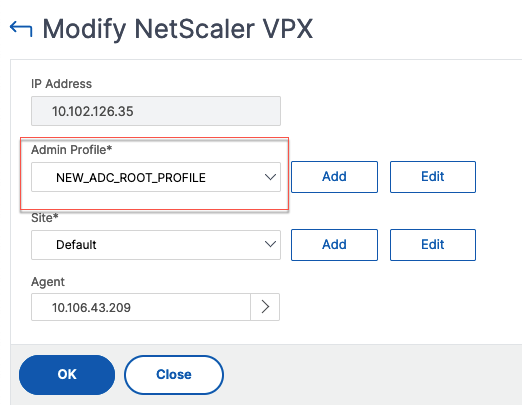
Go to Network > Instances > NetScaler. Select the NetScaler instance for which the password has been modified, and the select Edit.
-
Select the newly created Profile Name and click OK.
-
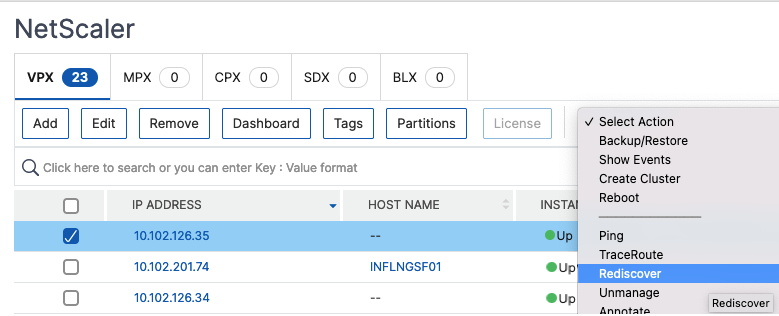
Select the instance again, right-click, select Rediscover.
These steps complete the password reset process in NetScaler Console.