
Manage admin partitions of NetScaler instances
You can configure admin partitions on your Citrix Application Delivery Controller (NetScaler) instances so that different groups in your organization are assigned different partitions on the same NetScaler instance. You can assign a network administrator to manage multiple partitions on multiple NetScaler instances.
NetScaler Console provides a seamless way of managing all partitions owned by an administrator from a single console. You can manage these partitions without disrupting other partition configurations.
To allow multiple users to manage different admin partitions, you have to create groups and then, assign users and partitions to those groups. For more information about creating a group or user, see (../../setting-up/configuring-role-based-access-control.md#configure-users-on-NetScaler Console) and (../../setting-up/configuring-role-based-access-control.md#configure-groups-on-NetScaler Console).
A user can view and manage only the partitions in the group to which the user belongs. When you discover a NetScaler instance, the admin partitions configured on that NetScaler instance get added to the system automatically. Each admin partition is considered as an instance in NetScaler Console.
Related information
View admin partitions
Consider that you have two NetScaler VPX instances and two admin partitions are configured on each instance. For example, NetScaler instance 10.xx.xx.100 has partition-1 and partition-2 and the 10.xx.xx.101 instance has first-partition and second-partition.
Perform the following steps to view admin partitions:
-
Navigate to Infrastructure > Instances > NetScaler.
-
In the VPX tab, click Partitions.
For example, if you create a group with the following conditions:
-
In Settings > Users & Roles > Create Group > Authorization Settings > Select Instances, you select "10.xx.xx.100-partition-1" and "10.xx.xx.101-first-partition" instances.
-
You assign "User1" to the group.
User1 can view and manage only those partitions that are added to the group. However, the partitions that are not added to the group are restricted to the user even though they belong to the same instances.
In this example, 10.xx.xx.100-partition-2 and 10.xx.xx.101-second-partition are restricted because the instances are not added to the group where the user is assigned.
If you want a different user to manage the admin partitions 10.xx.xx.100-partition-2 and 10.xx.xx.101-second-partition, create a group with the following conditions:
-
In the Authorization Settings tab, select the 10.xx.xx.100-partition-2 and 10.xx.xx.101-second-partition instances.
-
Assign the required user to the group.
This group enables the assigned user to view and manage the selected admin partitions.
View the revision history difference
Revision history difference for an admin partition allows you to view the difference between the five latest configuration files for a partitioned NetScaler instance. You can compare the configuration files against each other (example Configuration Revision - 1 with Configuration Revision -2) or against the current running/saved configuration with Configuration Revision. Along with the differences in configuration, the correction configurations are also shown. You can export all the corrective commands to your local folder and correct the configurations.
To view the revision history difference:
-
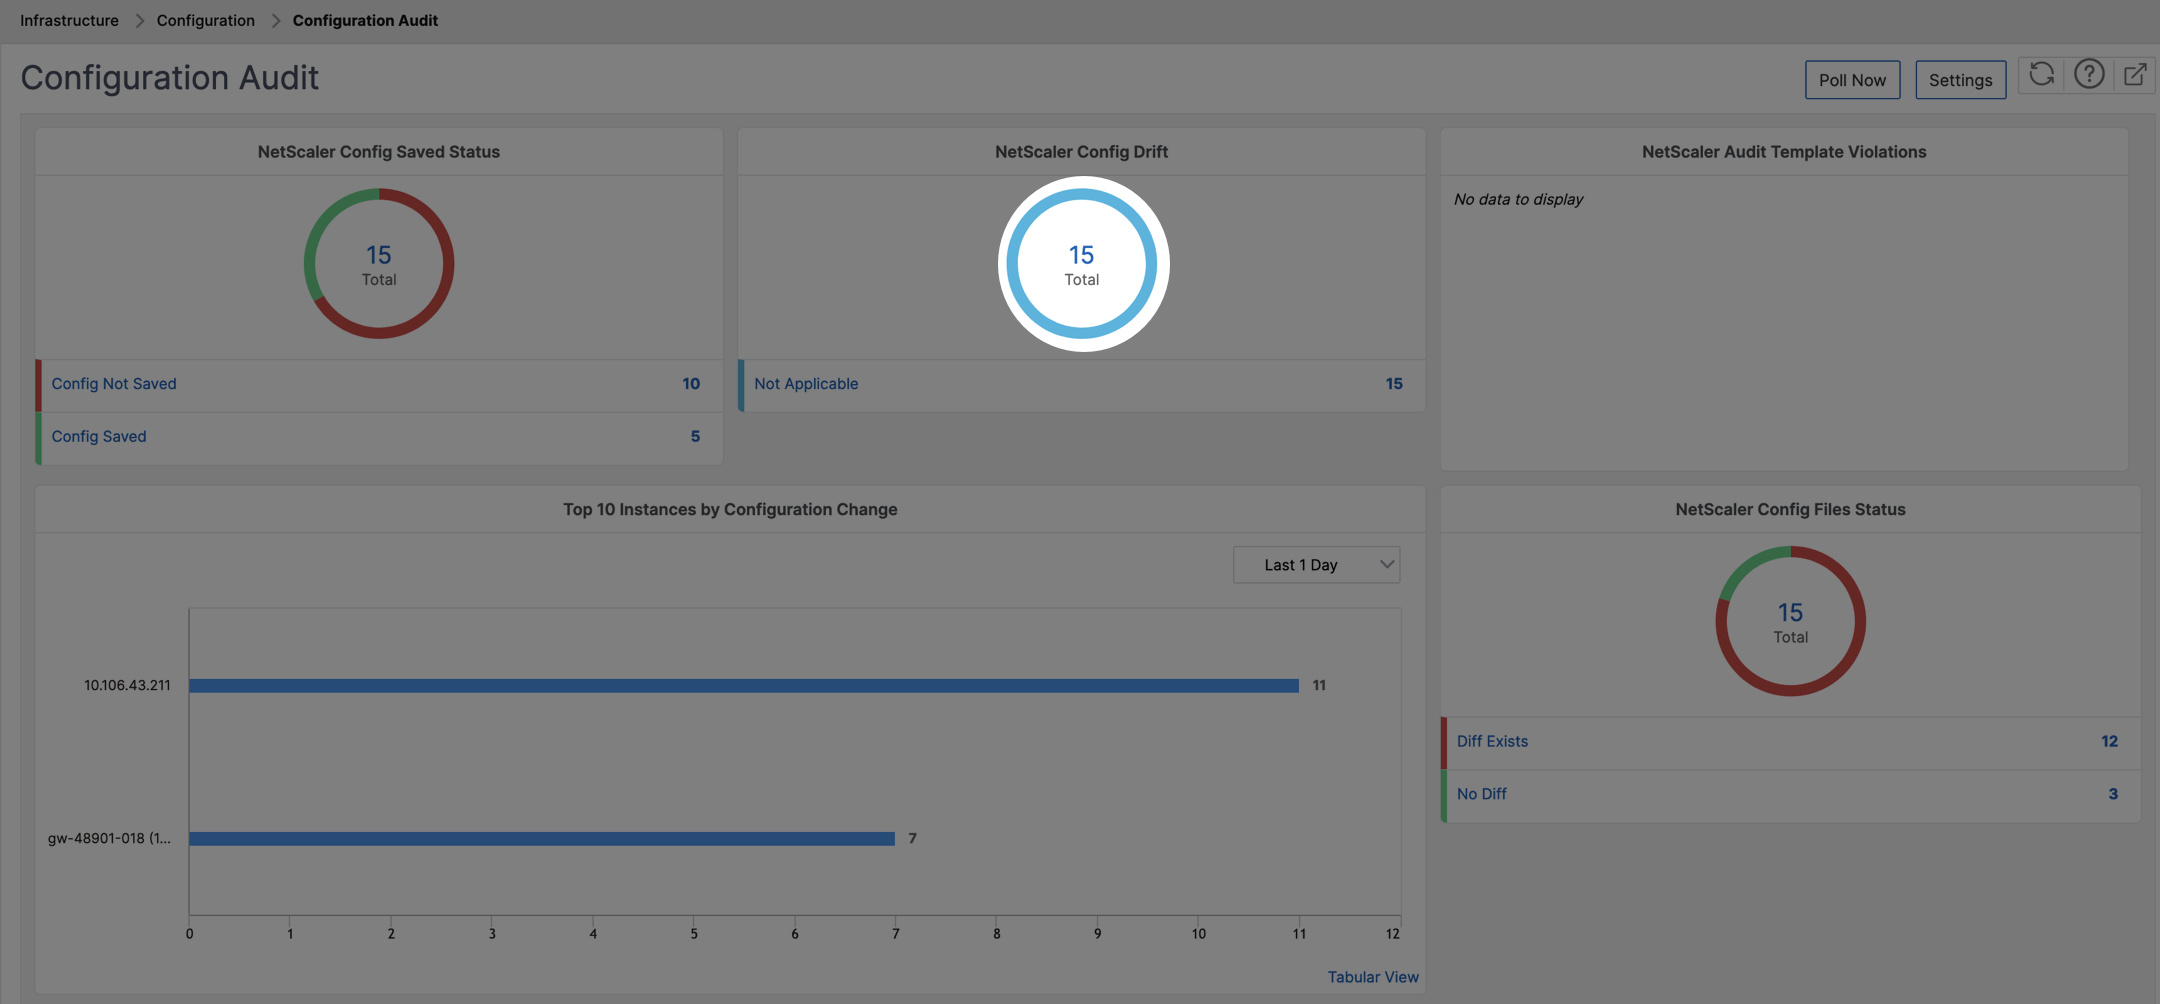
Navigate to Infrastructure > Configuration > Configuration Audit. The Configuration Audit dashboard displays various reports. Click the number displayed in the center of the donut chart.
-
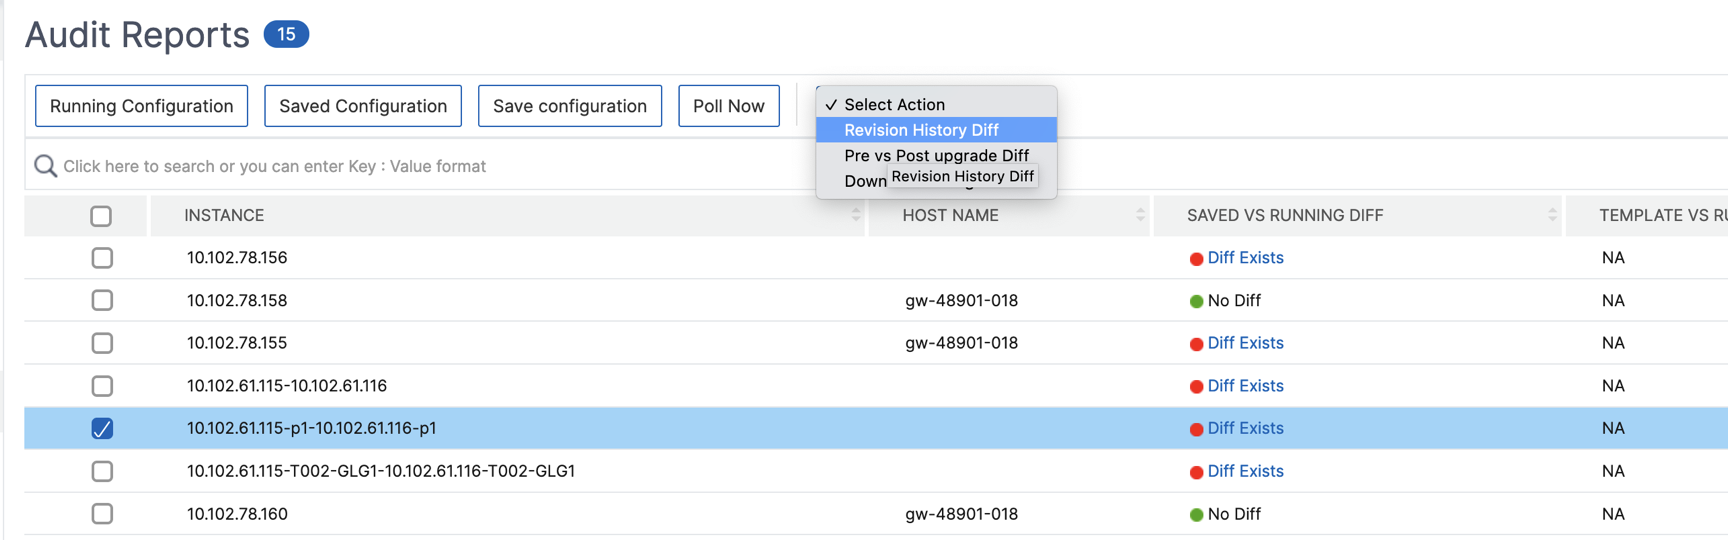
Select the partitioned NetScaler instance.
-
From the Action box, click Revision History Diff.
-
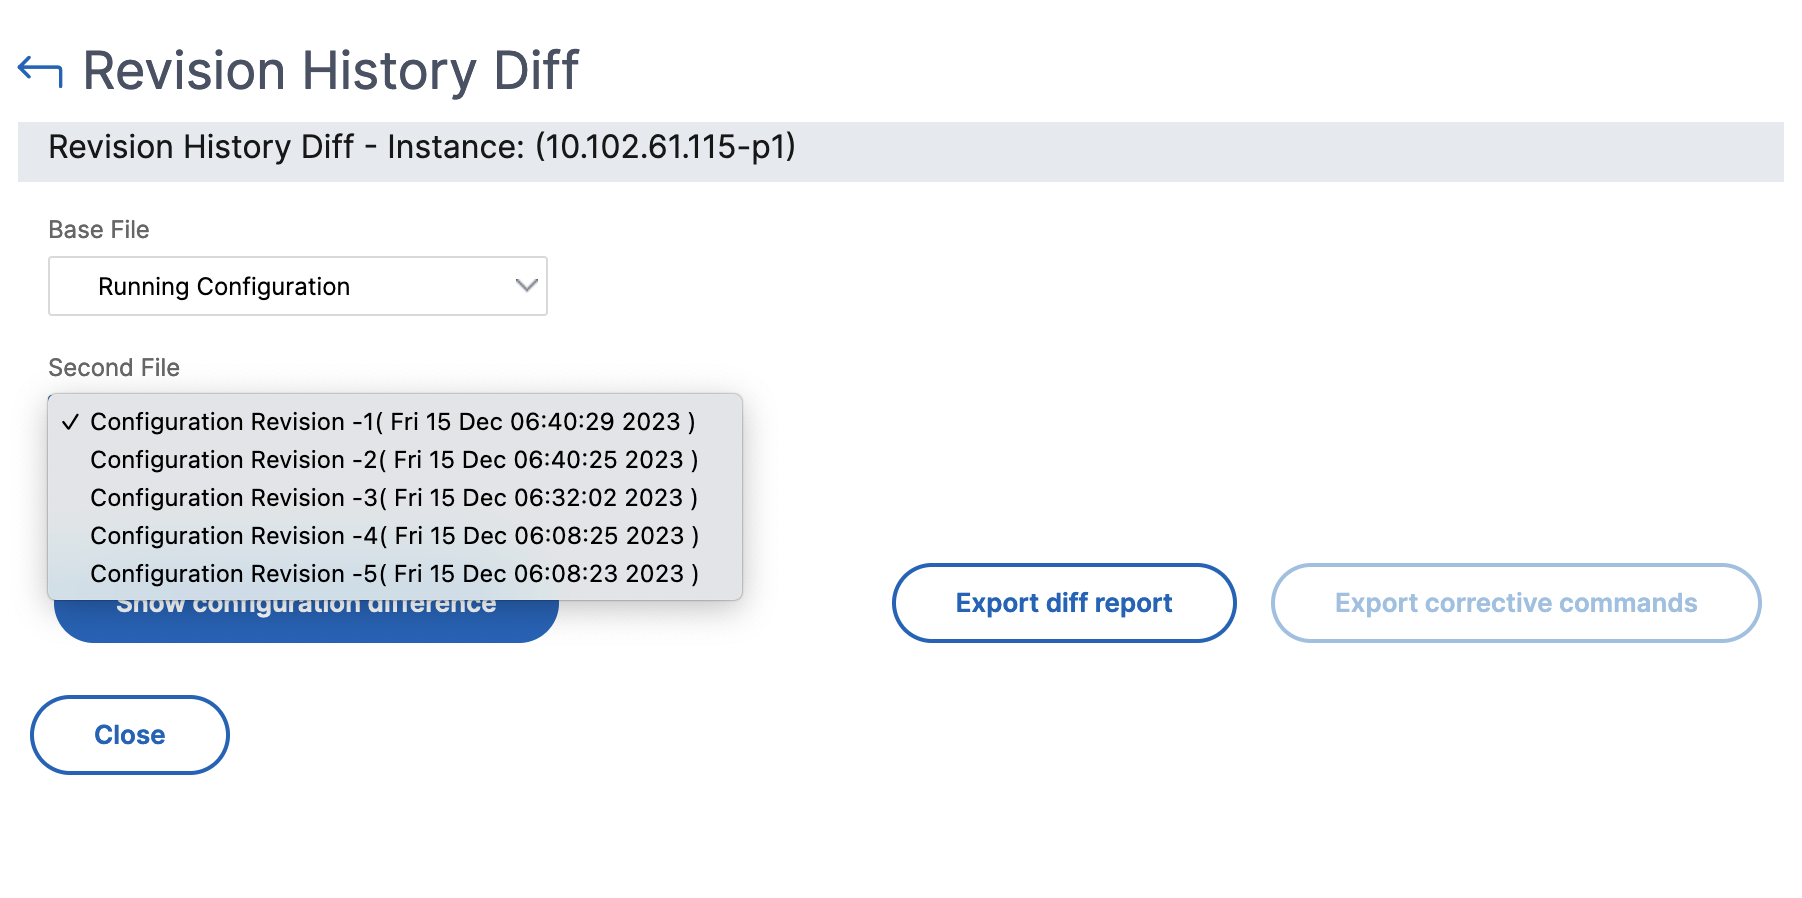
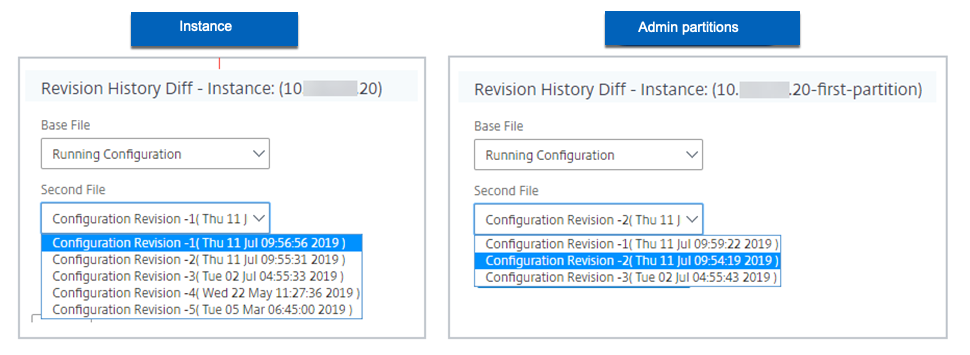
On the Revision History Diff page, select the files that you want to compare. For example, compare the Saved Configuration with Configuration Revision-2 and then, click Show configuration difference.You can then view the differences between the five latest configuration files for the selected partitioned NetScaler instance. The following is an example admin partition that has five saved configurations:
 You can also view the corrective configuration commands and export these corrective commands to your local folder. These corrective commands are the commands that need to be run on the base file to get the configuration to the desired state (configuration file that is being used for comparison).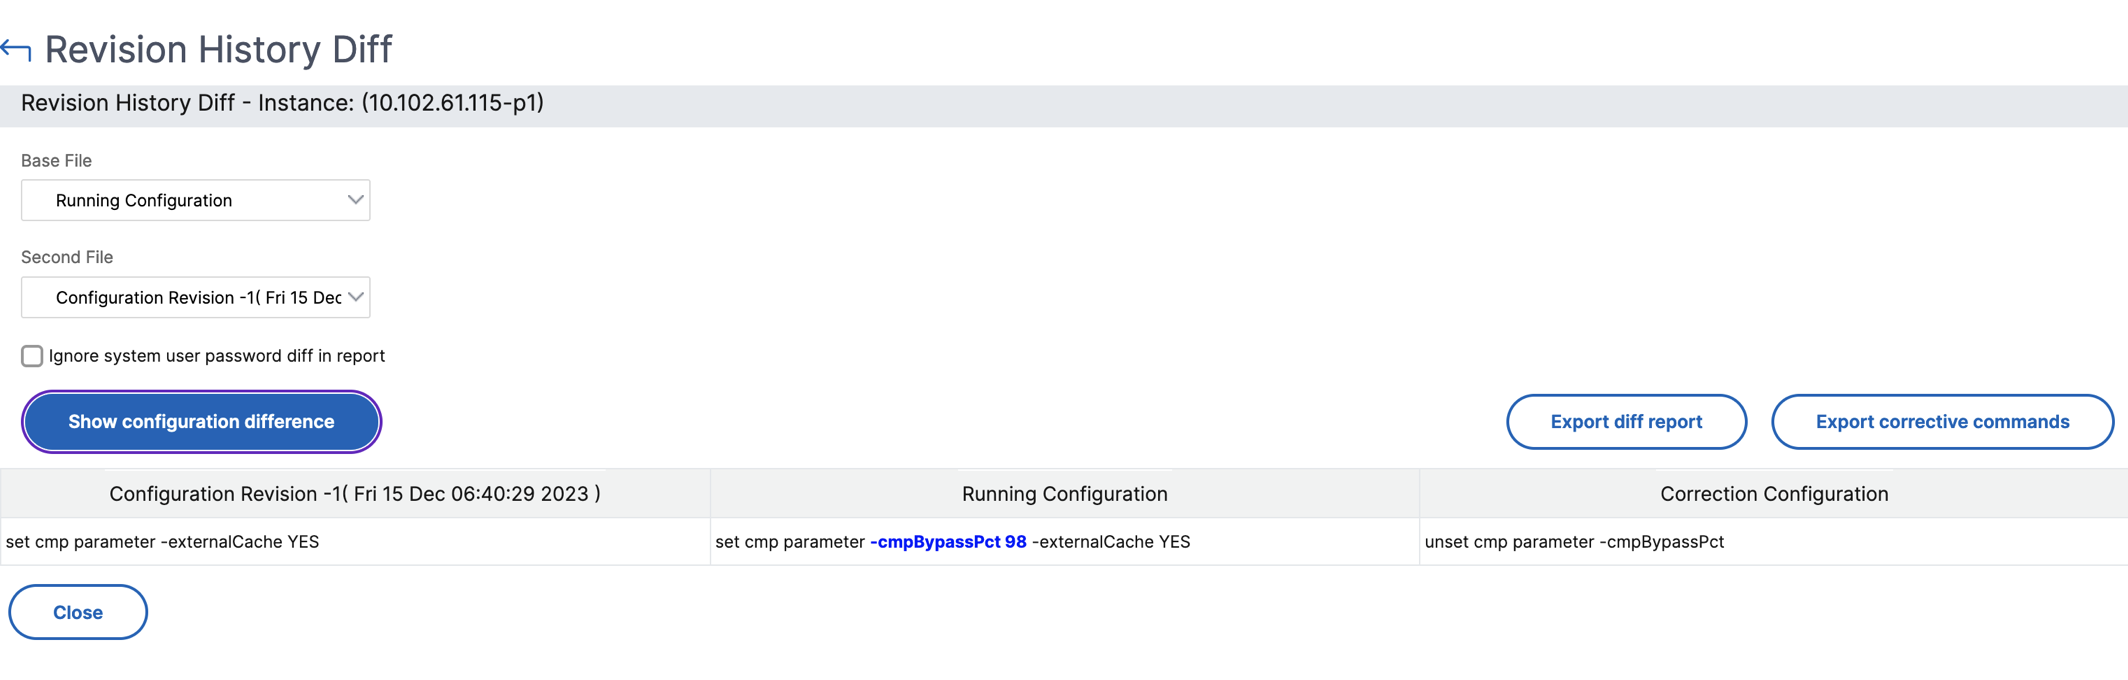
The saved configurations on an admin partition and the instance are different. In the following example, the 10.xx.xx.20 instance has five saved configurations where the admin partition of this instance has three different saved configurations:
View the template vs running difference
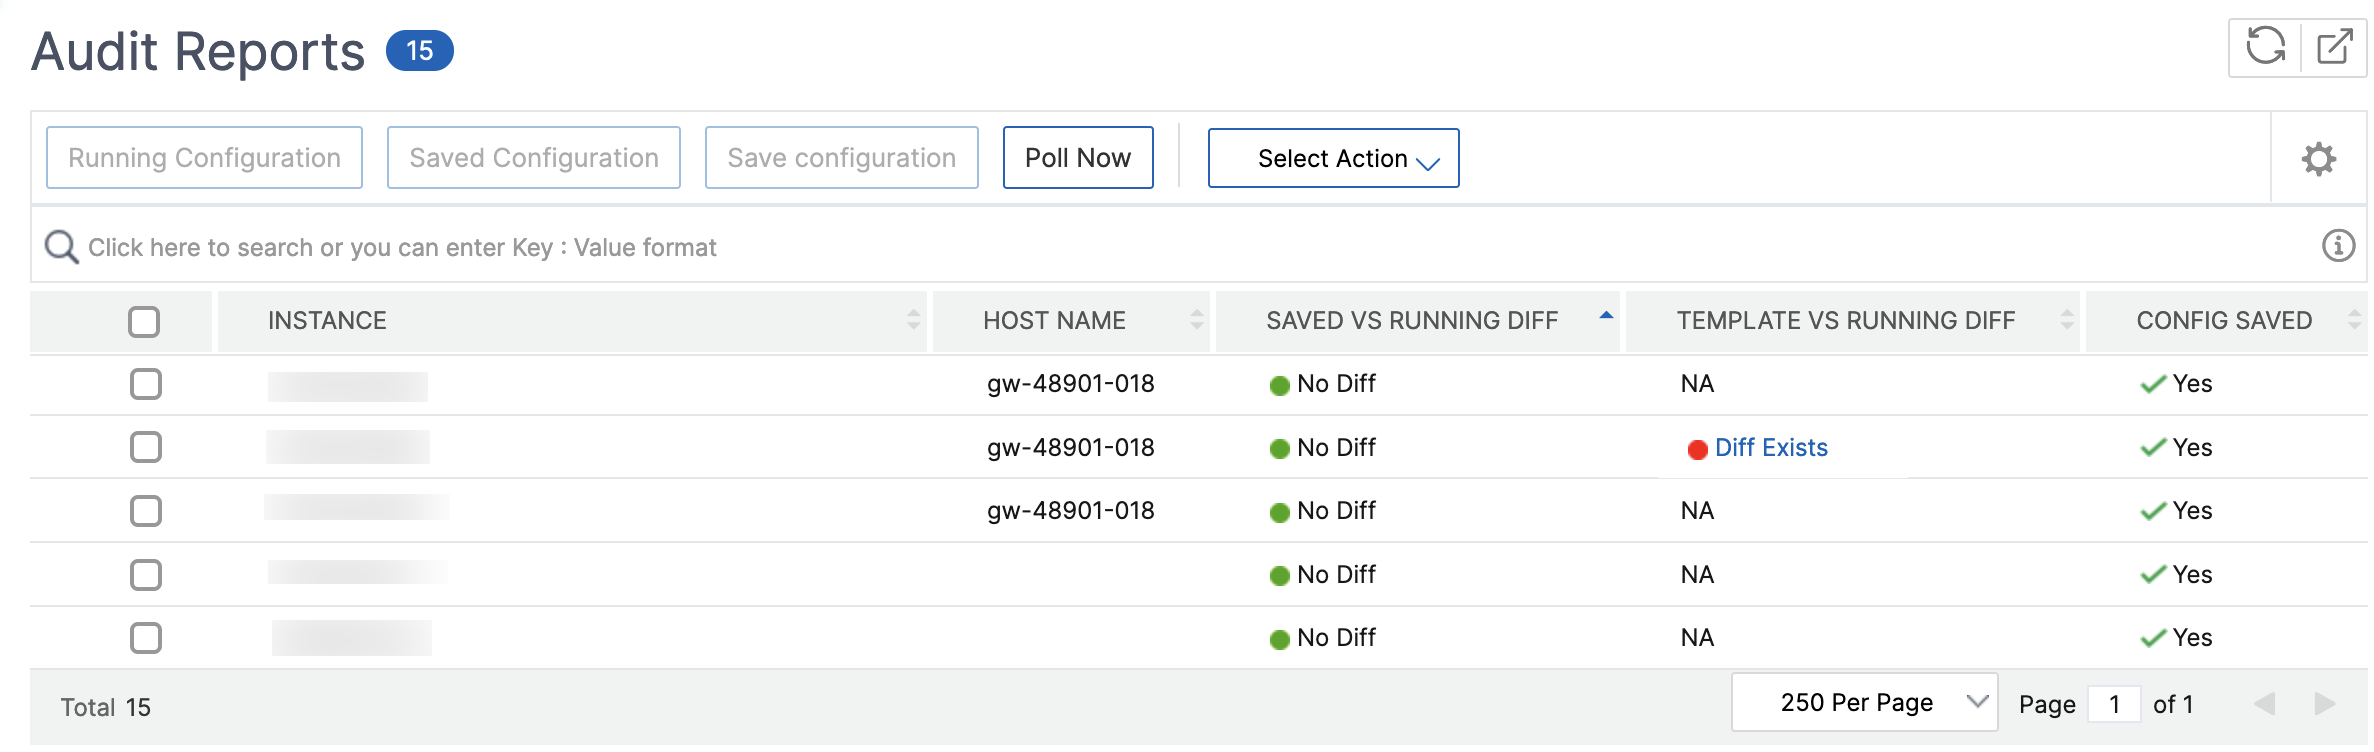
Audit templates for partition allow you to create a custom configuration template and associate it with a partition instance. Any variation in the running configuration of the instance with the audit template is shown in the "Template vs Running diff" column of the Audit Reports page. Along with the differences in configuration, the correction configurations are also shown. You can also export all the corrective commands to your local folder and correct the configurations.
-
Navigate to Infrastructure > Configuration > Configuration Audit. The Configuration Audit dashboard displays various reports. Click the number displayed in the center of the donut chart.
-
In the Audit Reports page, click the Diff Exists hyperlink under the Template vs Running Diff column.If there is any difference between the audit template and the running configuration, the difference is shown as a hyperlink. Click the hyperlink to view the differences if there is any. Along with the differences in configuration, the correction configurations are also shown. You can also export all the corrective commands to your local folder and correct the configurations.
To export the report of this dashboard:
To export the report of this page, click the Export icon on the top right side of this page. On the Export page, you can do one of the following:
-
Select Export Now tab. To view and save the report in PDF, JPEG, PNG, or CSV format.
-
Select Schedule Export tab. To schedule the report daily, weekly, or monthly and send the report over an email or a slack message.
Note:
-
If you select Weekly recurrence, ensure that you select the weekdays on which you want the report to be scheduled.
-
If you select Monthly recurrence, ensure that you enter all the days that you want the report to be scheduled separated by commas.