
View application security violation details
Web applications that are exposed to the internet have become vulnerable to attacks drastically. {{page.adm-product-name-short}} enables you to visualize actionable violation details to protect applications from attacks. Navigate to Security > Security Violations for a single-pane solution to:
-
Visualize applications with full visibility into the threat details associated in both WAF insight and bot insight. For more information, see Unified Security dashboard.
-
Access the application security violations based on its categories such as Network, Bot, and WAF.
-
Take corrective actions to secure the applications.
The Security Violations page has the following options:
-
Application Overview – Displays an overview with applications that have total violations, total WAF and Bot violations, violation by country, and so on. For more information, see Application overview.
-
All Violations – Displays the application security violation details. For more information, see All violations.
Related information
Setting up
To view the violations, you must ensure:
-
To get started with configuring protections and enabling analytics in your applications. For more information, see Unified Security dashboard.If you have configured protections either through StyleBook or directly on the {{page.citrix-adc-generic}} instance, you can follow the procedure to enable WAF Security Violations and Bot Security Violations:
-
Navigate to Infrastructure > Instances > {{page.citrix-adc-generic}} and select the instance type. For example, VPX.
-
Select the instance and from the Select Action list, select Configure Analytics.
-
Select the virtual servers and click Enable Security & Analytics.
-
On the Enable Analytics window, select WAF Security Violations and Bot Security Violations, and then click OK.
-
-
To configure Detailed Web Transaction Settings.
-
If Metrics Collector is enabled. For more information, see Configure Intelligent App Analytics.
Enable Web Transaction settings
-
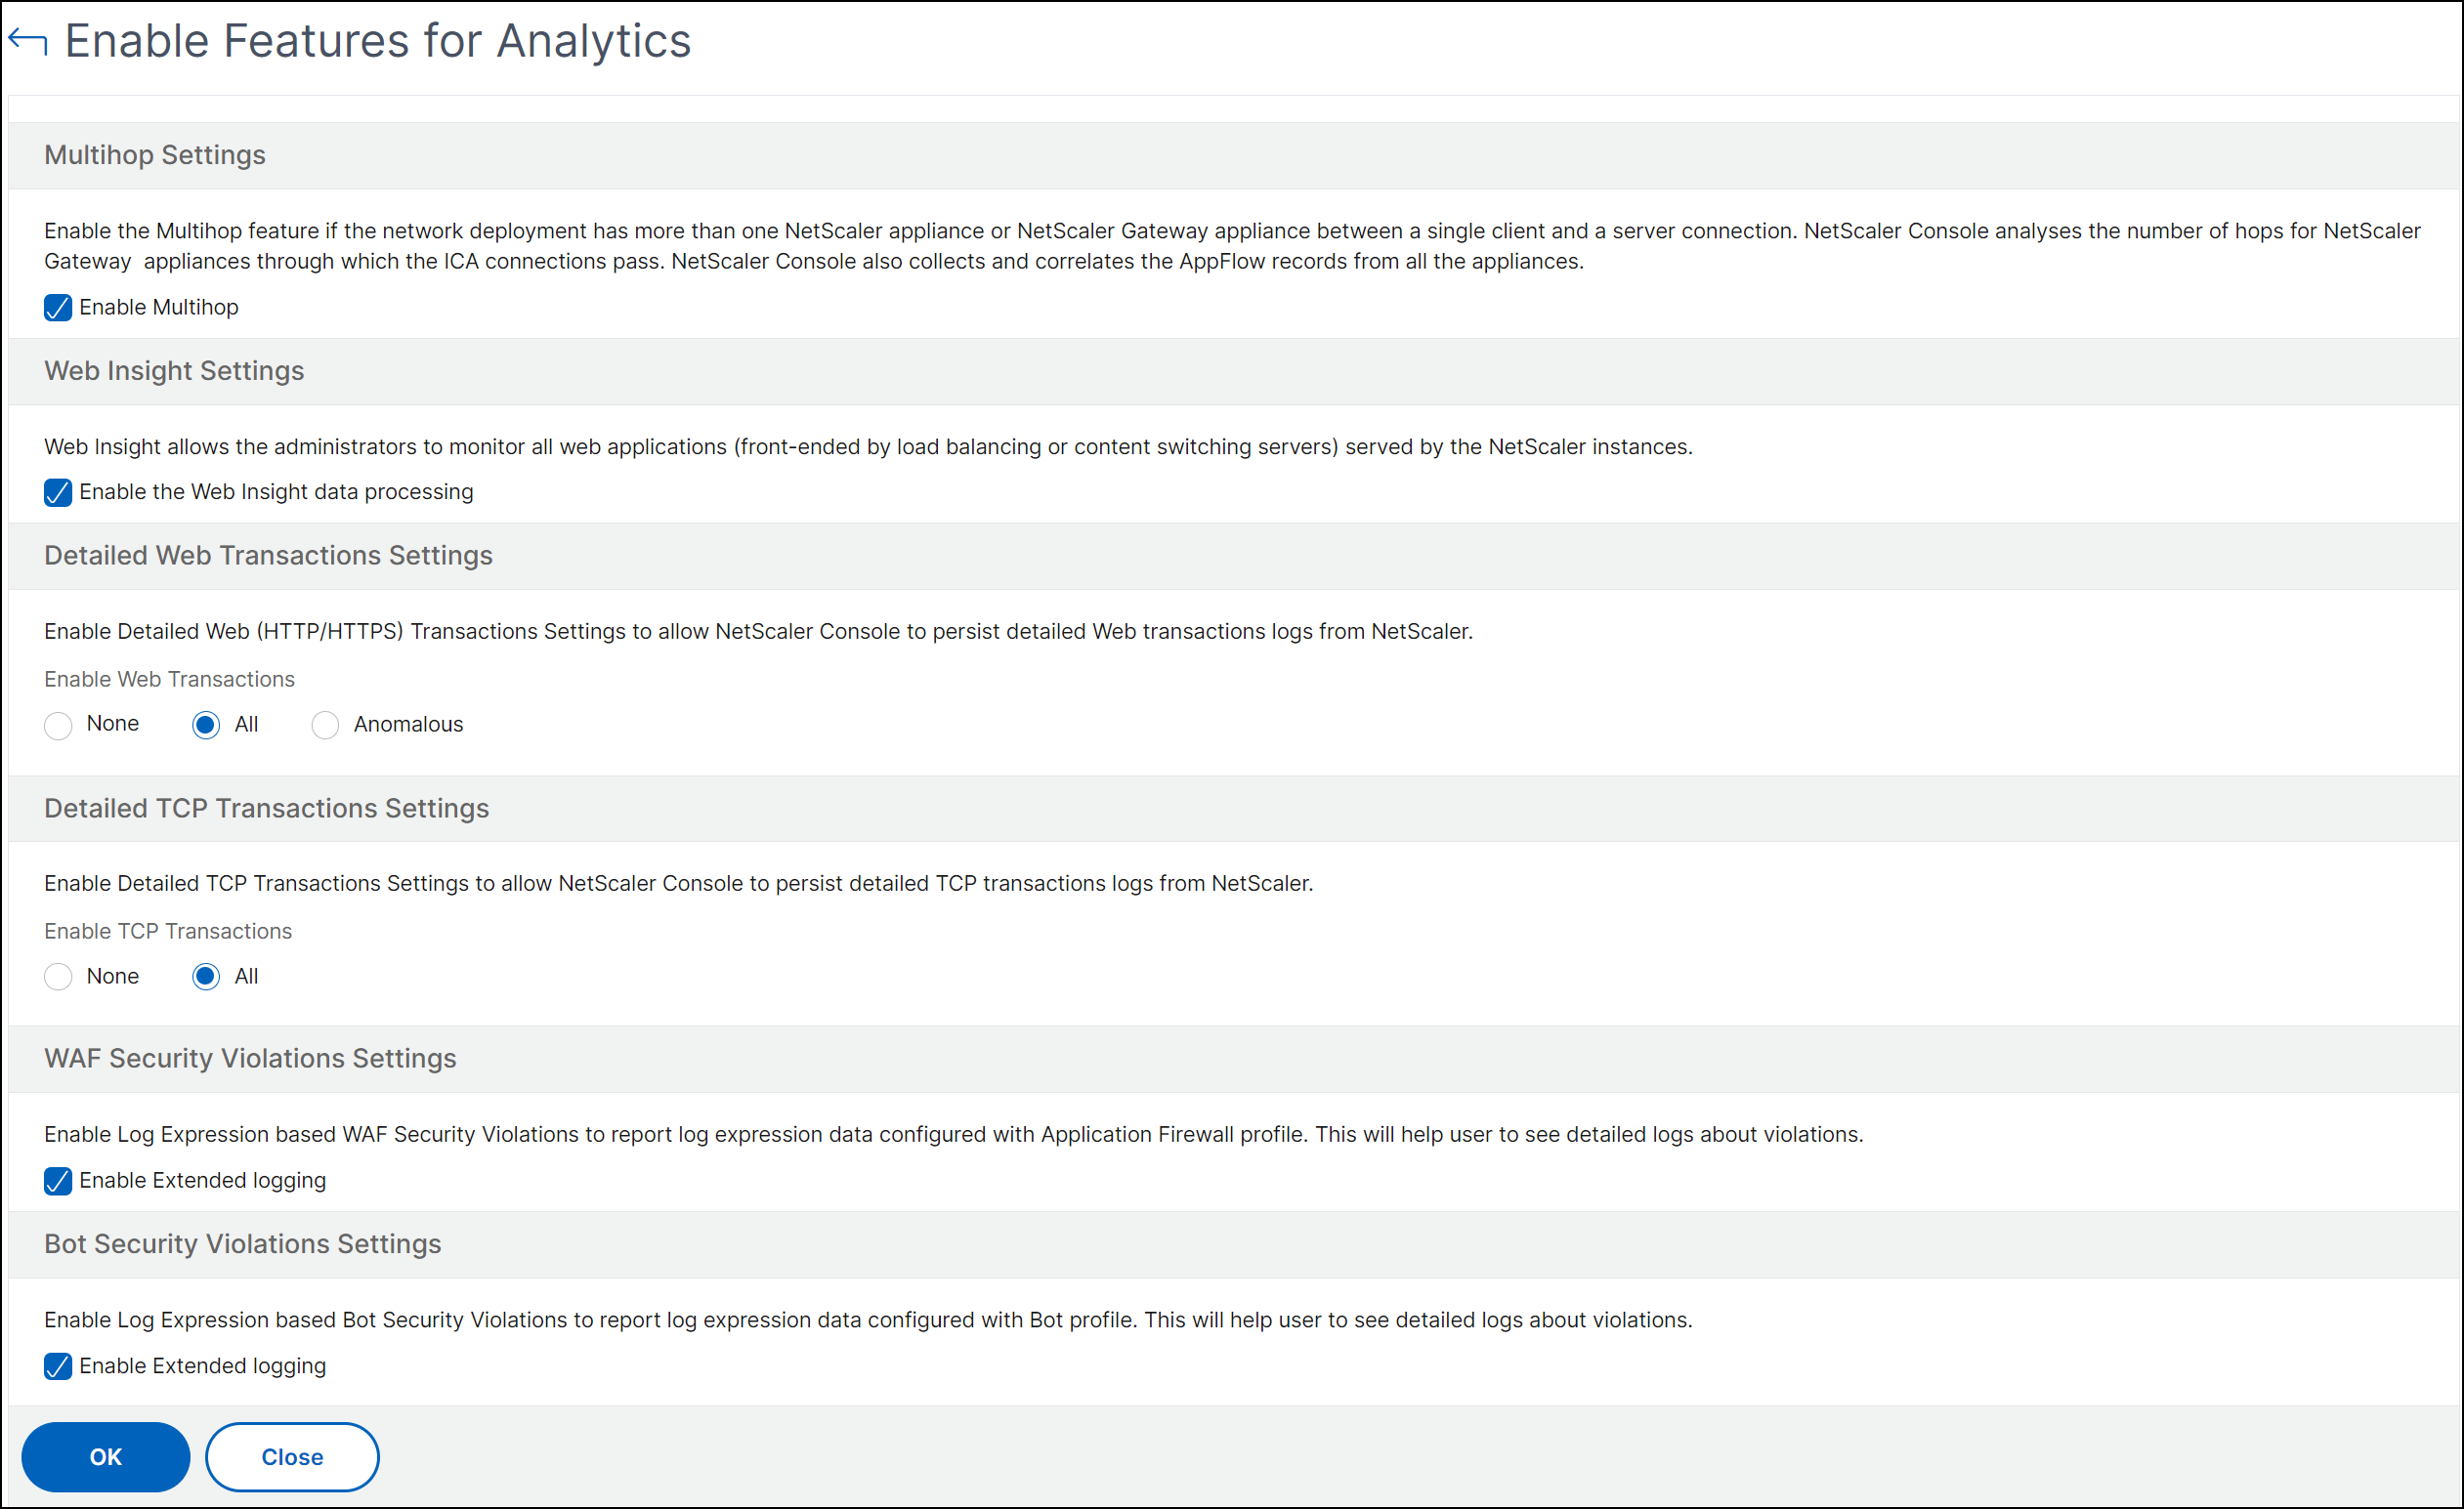
Navigate to Settings > Analytics Settings.The Analytics Settings page is displayed.
-
Click Enable Features for Analytics.
-
Under Detailed Web Transaction Settings, select All.
-
Click Ok.