
Export or schedule export reports
In {{page.adm-product-name-short}}, you can export a comprehensive report for the selected {{page.adm-product-name-short}} feature. This report provides you an overview of the mapping between the instances, partitions, and corresponding details.
{{page.adm-product-name-short}} displays feature-specific scheduled export reports under individual {{page.adm-product-name-short}} features, which you can view, edit, or delete. For example, to view the export reports of {{page.citrix-adc-generic}} instances, navigate to Infrastructure > Instances > {{page.citrix-adc-generic}} and click the export icon. You can export these reports in PDF, JPEG, PNG, and CSV file format.
In Export Reports, you can perform the following actions:
-
Export a report to a local computer
-
Schedule export reports
-
View, edit, or delete the scheduled export reports
Export a report
To export a report from the {{page.adm-product-name-short}} to the local computer, perform the following steps:
-
Click the export icon at the top-right corner of the page.
-
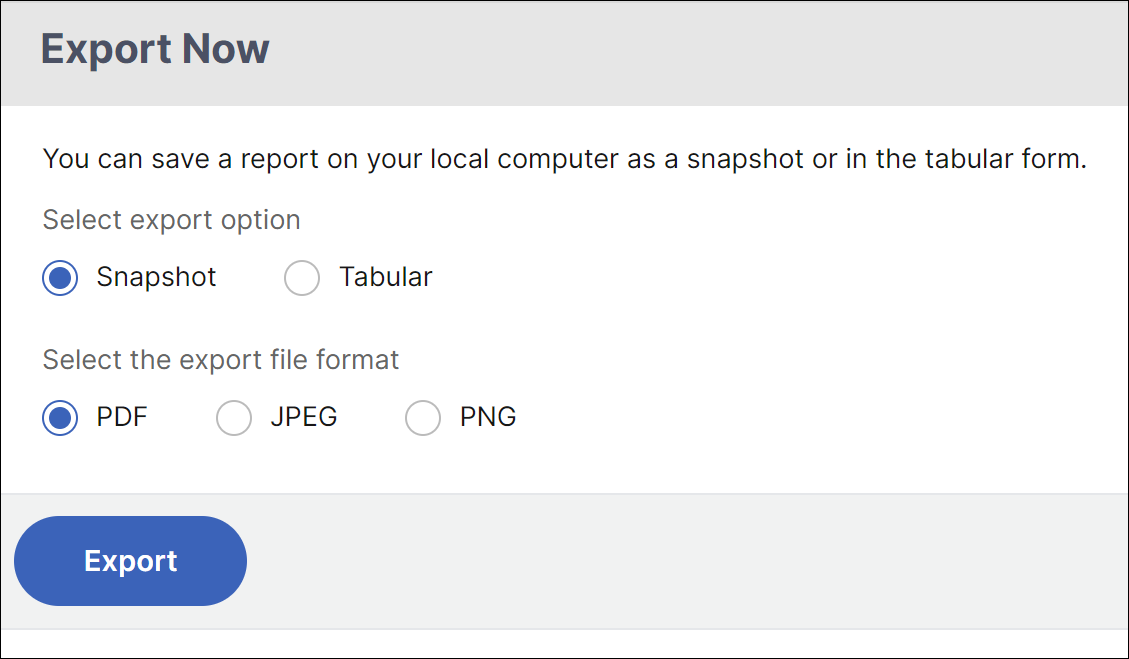
Select Export Now.
-
Select one of the following the export options:
-
Snapshot - This option export {{page.adm-product-name-short}} reports as a snapshot.
-
Tabular - This option export {{page.adm-product-name-short}} reports in a tabular format. You can also choose how many data records to export in a tabular format
-
-
Select the file format that you want to save the report on your local computer.
-
Click Export.
Schedule export report
To schedule the export report at regular intervals, specify the recurrence interval. {{page.adm-product-name-short}} sends the exported report to the configured email or slack profile.
-
Click the export icon at the top-right corner of the page.
-
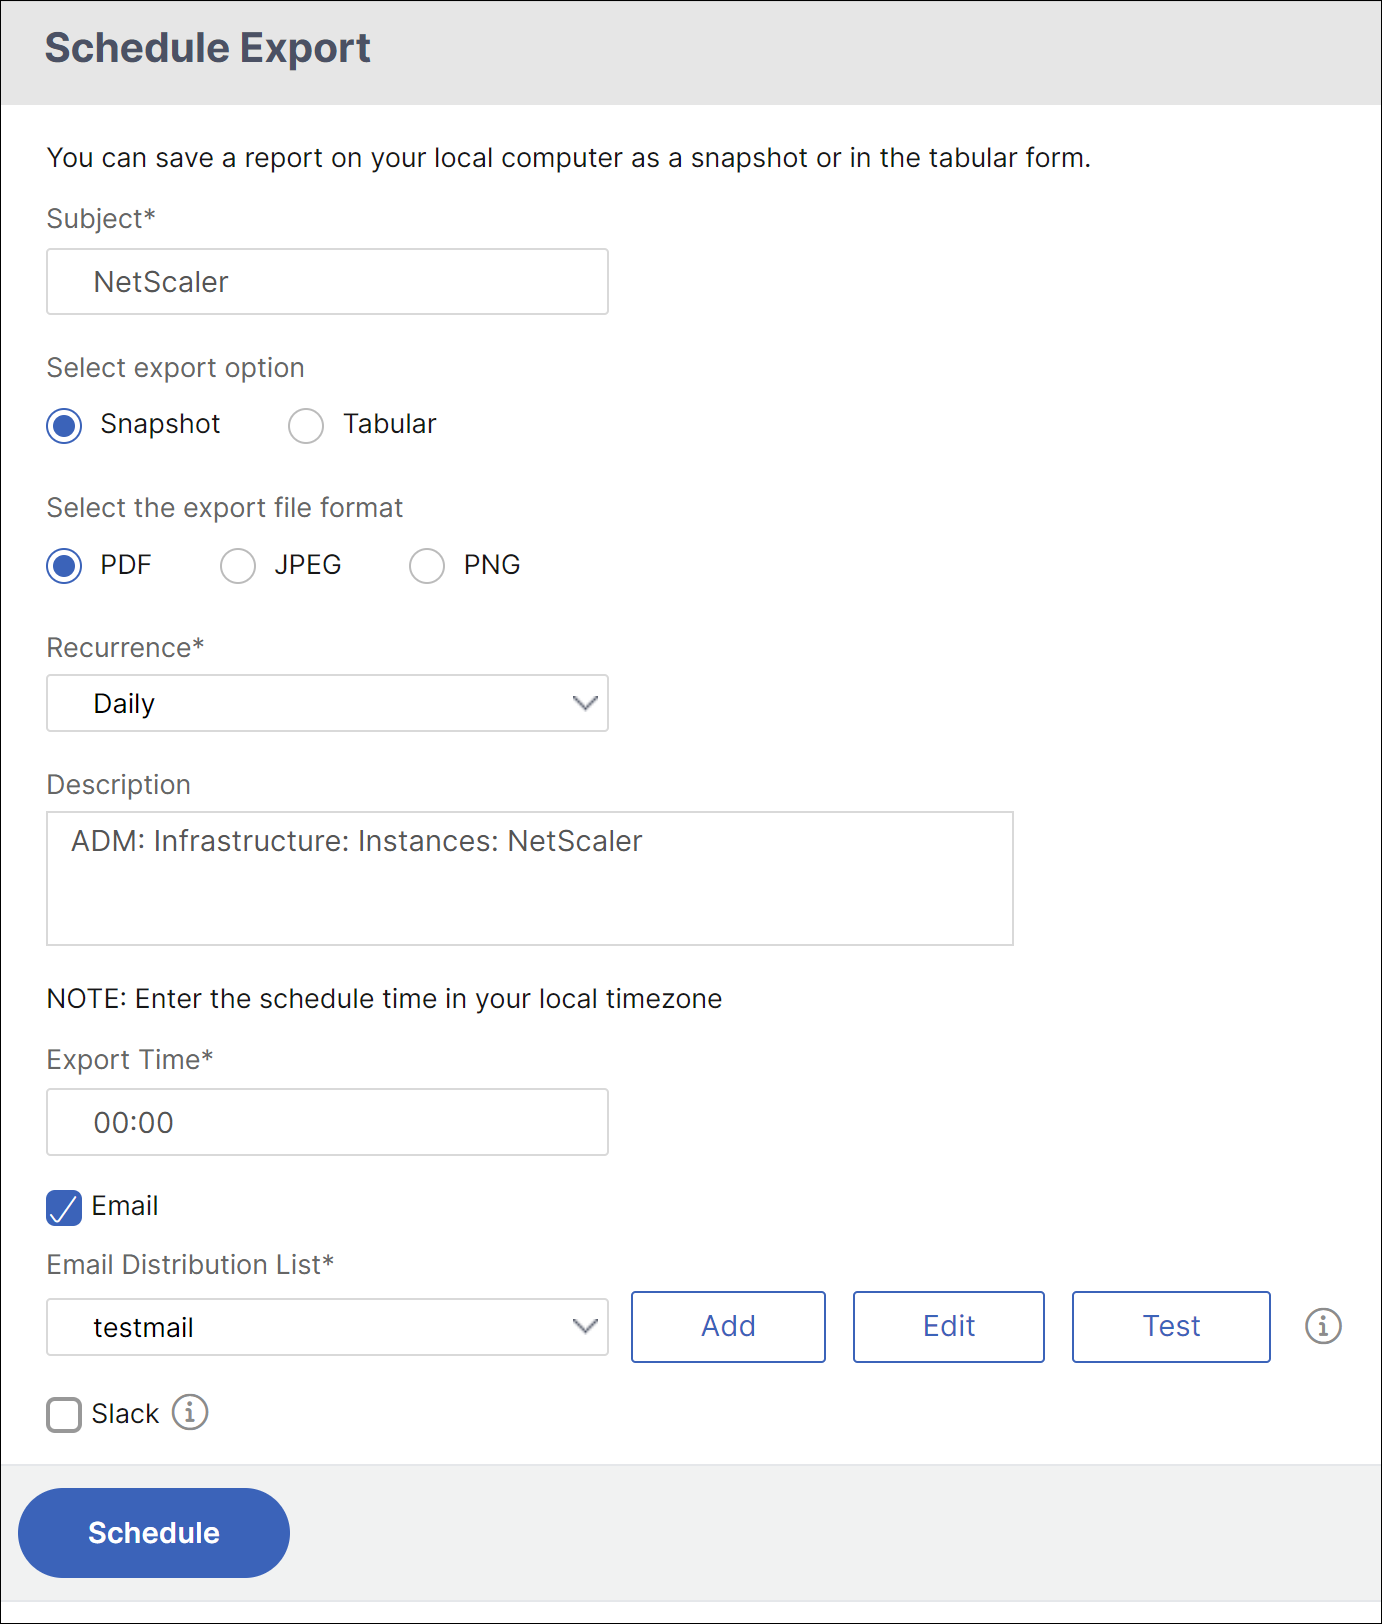
Select Schedule Export and specify the following:
-
Subject - By default, this field auto-populates the selected feature name. However, you can rewrite it with a meaningful title.
-
Export option - Export {{page.adm-product-name-short}} reports in a snapshot or a tabular format. You can also choose how many data records to export in a tabular format
-
Format - Select the file format that you want to receive the report on the configured email or slack profile.
-
Recurrence - Select Daily, Weekly, or Monthly from the list.
-
Description - Specify the meaningful description to a report.
-
Export Time - Specify at what time you want to export the report.
-
Email - Select the check box and select the profile from the list box. If you want to add a profile, click Add.
-
Slack - Select the check box and select the profile from the list box. If you want to add a profile, click Add.
-
-
Click Schedule.
View and edit the scheduled export reports
To view the export reports, perform the following:
-
Click the export icon at the top-right corner of the page.The Export Report page displays all the feature-specific export reports .
-
Select the report that you want to edit and click Edit.