
Enable data collection to monitor {{page.citrix-adc-generic}}s deployed in LAN user mode
External users who access Citrix Virtual App or Desktop applications must authenticate themselves on the {{page.citrix-adc-generic}} Gateway. Internal users, however, might not require to be redirected to the {{page.citrix-adc-generic}} Gateway. Also, in a transparent mode deployment, the administrator must manually apply the routing policies, so that the requests are redirected to the {{page.citrix-adc-generic}} appliance.
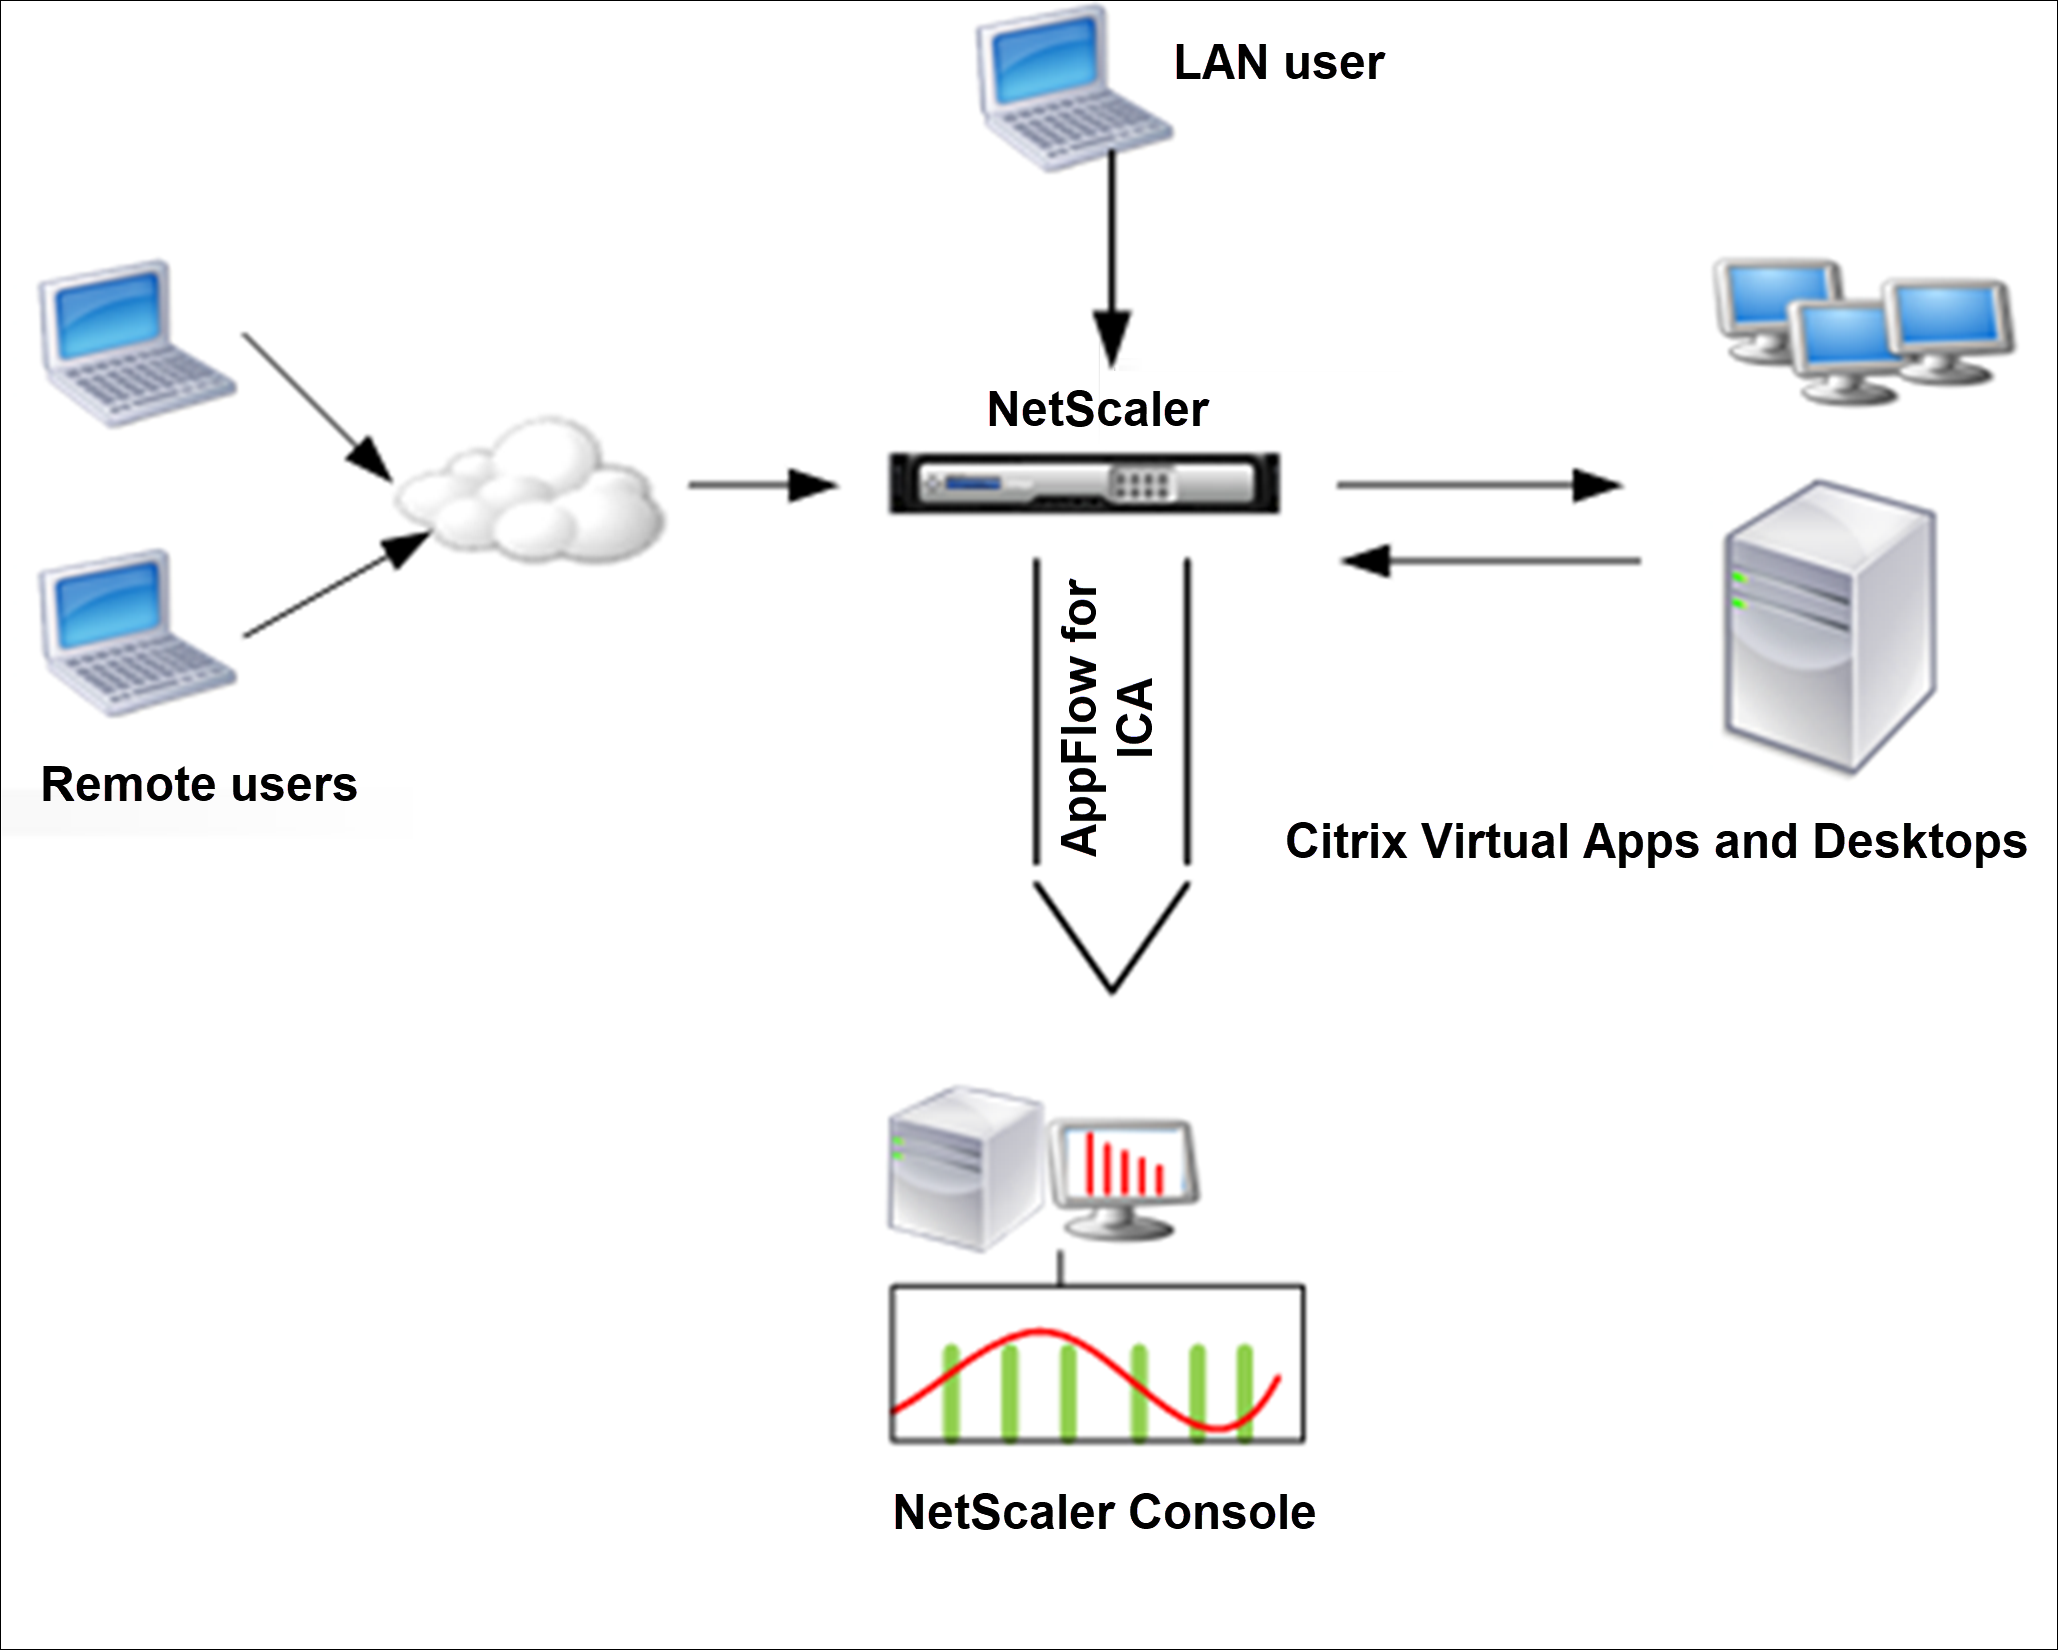
To overcome these challenges, and for LAN users to directly connect to {{page.cvad-onprem-product-name}} applications, you can deploy the {{page.citrix-adc-generic}} appliance in a LAN user mode by configuring a cache redirection virtual server. The cache redirection virtual server acts as a SOCKS proxy on the {{page.citrix-adc-generic}} Gateway appliance.
The following image illustrates {{page.adm-product-name-short}} deployed in LAN User Mode.
Note
{{page.citrix-adc-generic}} Gateway appliance must be able to reach the agent.
To monitor {{page.citrix-adc-generic}} appliances deployed in this mode, first add the {{page.citrix-adc-generic}} appliance to the {{page.citrix-adc-generic}} Insight inventory, enable AppFlow, and then view the reports on the dashboard.
After you add the {{page.citrix-adc-generic}} appliance to the {{page.adm-product-name-short}} inventory, you must enable AppFlow for data collection.
Note
-
You cannot enable data collection on a {{page.citrix-adc-generic}} deployed in LAN User mode by using the {{page.adm-product-name-short}} configuration utility.
-
For detailed information about the commands and their usage, see Command Reference.
-
For information on policy expressions, see Policies and Expressions.
To configure data collection on a {{page.citrix-adc-generic}} appliance by using the command line interface:
At the command prompt, do the following:
-
Log on to {{page.citrix-adc-generic}} appliance.
-
Add a forward proxy cache redirection virtual server with the proxy IP and port, and specify the service type as HDX.
add cr vserver <name> <servicetype> [<ipaddress> <port>] [-cacheType <cachetype>] [ - cltTimeout <secs>]Example:add cr vserver cr1 HDX 10.12.2.2 443 –cacheType FORWARD –cltTimeout 180NoteIf you are accessing the LAN network by using a {{page.citrix-adc-generic}} Gateway appliance, add an action to apply a policy that matches the VPN traffic.add vpn trafficAction** \<name\> \<qual\> \[-HDX ( ON | OFF )\]
add vpn trafficPolicy** \<name\> \<rule\> \<action\>Example:add vpn trafficAction act1 tcp -HDX ON
add vpn trafficPolicy pol1 "REQ.IP.DESTIP == 10.102.69.17" act1 -
Add {{page.adm-product-name-short}} as an AppFlow collector on the {{page.citrix-adc-generic}} appliance.
add appflow collector** \<name\> **-IPAddress** \<ip\_addr\>Example:add appflow collector MyInsight -IPAddress 192.168.1.101 -
Create an AppFlow® action and associate the collector with the action.
add appflow action** \<name\> **-collectors** \<string\> ...Example:add appflow action act -collectors MyInsight -
Create an AppFlow policy to specify the rule for generating the traffic.
add appflow policy** \<policyname\> \<rule\> \<action\>Example:add appflow policy pol true act -
Bind the AppFlow policy to a global bind point.
bind appflow global** \<policyname\> \<priority\> **-type** \<type\>Example:bind appflow global pol 1 -type ICA_REQ_DEFAULTNoteThe value of type must be ICA_REQ_OVERRIDE or ICA_REQ_DEFAULT to apply to ICA® traffic. -
Set the value of the flowRecordInterval parameter for AppFlow to 60 seconds.
set appflow param -flowRecordInterval 60Example:set appflow param -flowRecordInterval 60 -
Save the configuration.
save ns config
Related information