
Manage applications
From the dashboard, click Manage Apps to view application details and add, edit, or delete custom applications.
Related information
View application details

-
App name – Denotes the application name
-
State – Denotes the current application status, such as Up, Down, Partially Up, Out of Service, and NA
-
Up – All virtual servers associated with the application are Up.
-
Down – All virtual servers associated with the application are Down
-
Partially Up – Either one virtual associated with the application is Down or out of service
-
Out of Service – All virtual servers associated with the applications are out of service
-
NA – No virtual servers is configured for the application
-
-
Type – Denotes if the application belongs to Custom or Discrete
-
Category – Denotes the application category that is grouped
-
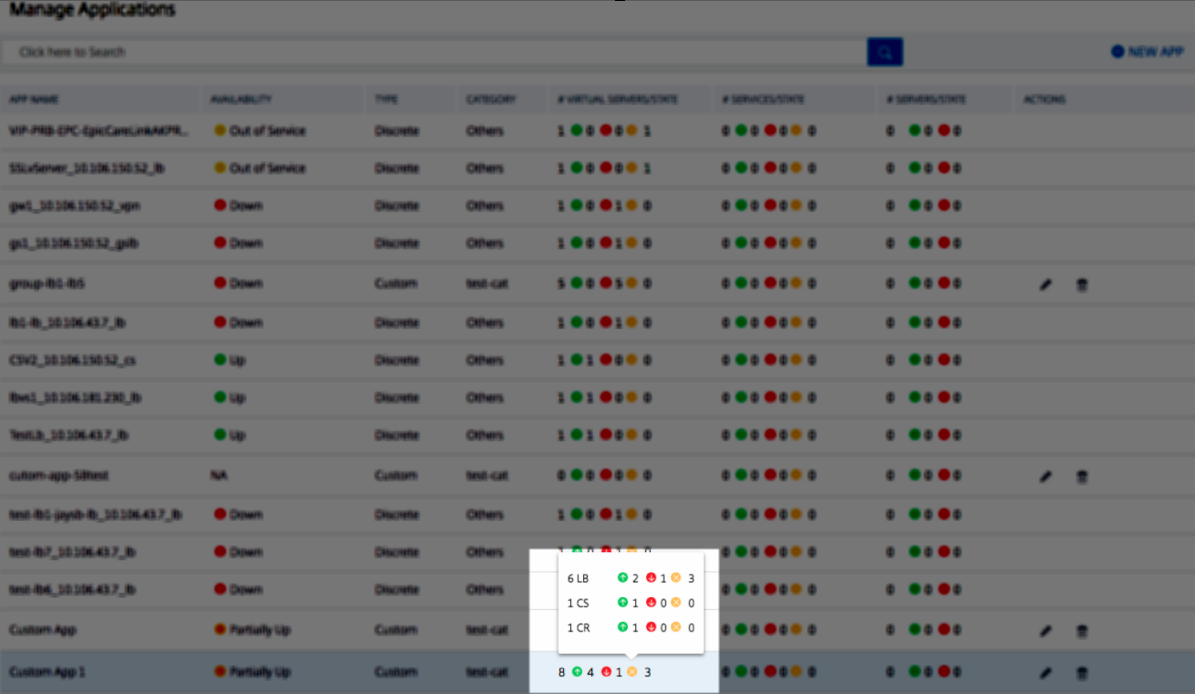
Virtual server/state – Denotes the total virtual servers configured and status of all virtual servers. Hover the mouse pointer to see the details such as total virtual servers, virtual server type, and virtual server status
-
Services/state – Denotes the total services configured and status of all services
-
Service Goups/state – Denotes the total service groups configured and status of all service groups
-
Servers/state – Denotes the total servers configured for the application and the status of all servers
-
Actions – Enables you to either edit or delete the custom applications
Add an application
-
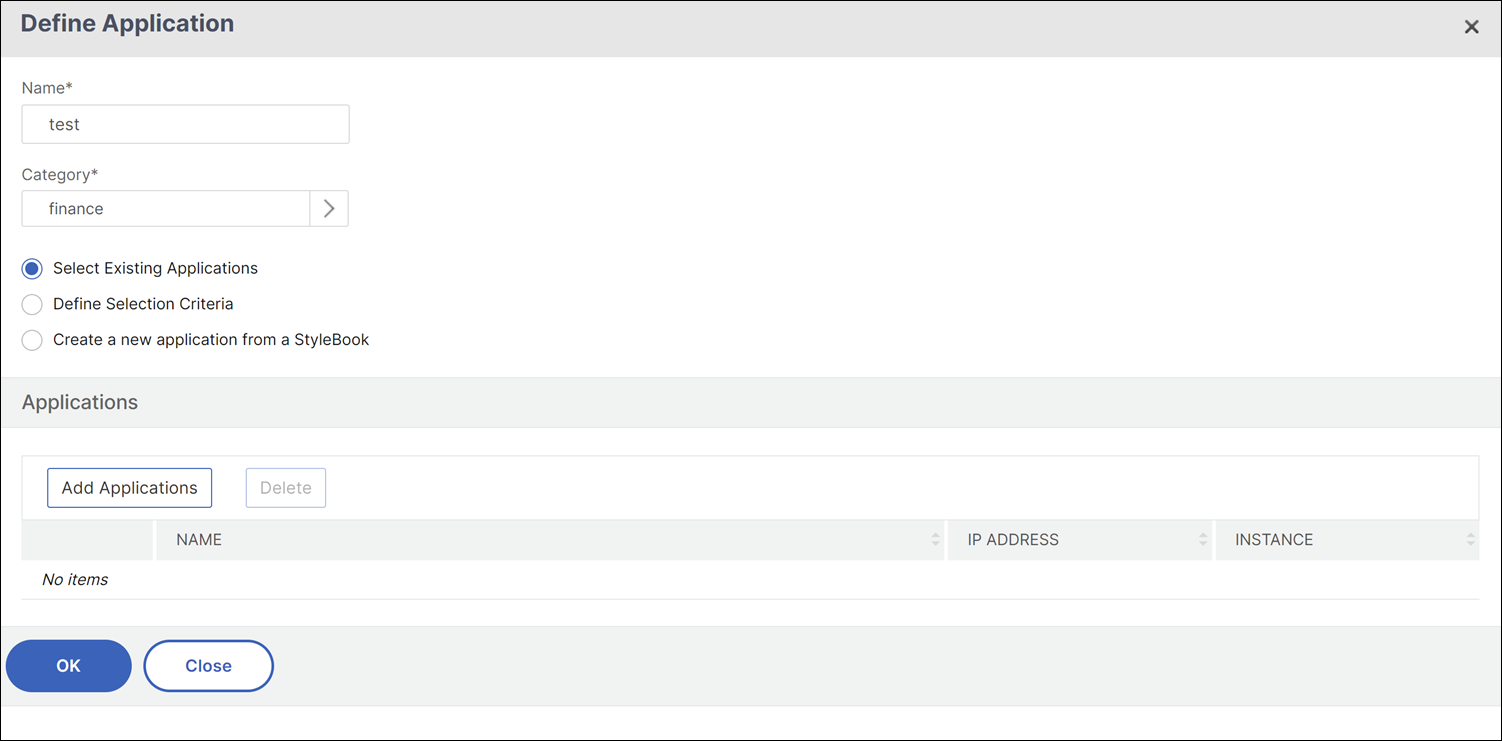
Click New Application to create an applicationThe Define Application page is displayed
-
Set the following parameters:
Field Description Name The name of the custom application. For example, LB_TEST. Category The category that you can group the applications. Click to get the Application Category page. Select the category and click Select. To add a category: 1. Click Add 2. Enter a name of your choice. 3. Click Create Select Existing Applications Enables you to select the existing applications added to the NetScaler instances. Add Application Displays all the virtual servers that are configured on the instances. Select the applications from the list and click OK. Define Selection Criteria Option to define application by virtual server range, or by origin server/service IP address range. - Server. Specify the server or service IP address, server name, or the port of the back-end server on which the applications are running. You can enter one IP address, a range of IP addresses, or a combination of both separated by commas. For example, you can enter 10.102.29.20, 10.102.43.10-60, 10.216.43.45. - Virtual Servers. You can specify either one of the following: the virtual server IP address, virtual server name, or the port of the back-end server on which the applications are running. You can enter one IP address or a range of IP addresses or a combination of both separated by commas. For example, you can enter 10.102.29.20, 10.102.43.10-60, 10.216.43.45. Create an application from a StyleBook Enables you to create an application using the StyleBook. For more information, see Create an application using the StyleBook. -
Click OK.Note:Currently, Application Dashboard supports only load balancing and content switching virtual servers.The application dashboard is now displayed with the category and all the applications are grouped underneath.When you create an application using StyleBooks, confirm the required licenses consumption during the application deployment.Click Yes to the confirmation message. The NetScaler Console allocates the required licenses to an application.
Create an application using the StyleBook
To create an application using the StyleBook:
-
In NetScaler Console, navigate to Applications > Dashboard and click Manage Apps.
-
Select the application category from the Category section. NetScaler Console allows you to define categories to group the user-defined applications. You can also add more categories if necessary.
-
Click to select Create a new application from a StyleBook and click OK.The Choose StyleBook page is displayed. This page contains all the default StyleBooks available in NetScaler Console.
-
Select the StyleBook. The Configuration Details page is displayed.
-
Type the values for all parameters in the StyleBook. You can also click View Definition to view the construct of the StyleBook before using it.For more information, see Use Default StyleBooks.
-
Click Create.A confirmation message appears to consume required licenses and deploy an application.
-
Click Yes.
You can also click Dry Run to check the configurations that NetScaler Console attempts to create on the selected NetScaler instance. This option is just for your test purpose to see the final check on the configurations. Even if Dry Run option is successful, the actual configuration on the selected NetScaler might still fail due to various reasons (IP conflict, instance not reachable, and so on.)
Edit or delete an application
From the Manage Applications page, you can either edit or delete the custom applications. Click the edit button to edit an application and click the delete button to remove the application.
Export reports of app dashboard and security dashboard
NetScaler Console allows you to take a snapshot of the current App Dashboard and export them as reports. At a frequent interval of time, the App administrators might need to use these reports to update on app usage and performance penalties.
With this feature, the administrators are able to extract this data as .png, .jpeg, or .pdf reports.
Note
Unlike other report export options in NetScaler Console, you can export the App Dashboard and Security Dashboard reports only as .pdf or .png files. The .csv format is not supported currently.
The report downloads onto your system. From the App Dashboard and App Security Dashboard pages, you can also navigate to second-level pages and export them as reports. Currently, you can download reports of only one application at a time.