
Upgrade a perpetual license in {{page.netscaler-mpx-short}} to {{page.citrix-adc-generic}} Pooled capacity
Important:
File-based licensing system (also referred to as manually managed entitlements), traditionally used for activating various on-premises components, will be End of Life (EOL) on April 15, 2026. License Activation Service (LAS) is the next generation technology for product activations across the suite of Citrix products. LAS will be the only way to activate and license NetScaler instances after April 15, 2026, supporting NetScaler Flexed licenses (CPL/UHMC), legacy NetScaler Pooled licenses, and NetScaler Fixed term Bandwidth licenses. To remain supported, your NetScaler and NetScaler Console deployments must be on a LAS compatible version.
The minimum required NetScaler® versions that are LAS compatible are:
-
NetScaler ADCs: 14.1-51.x, 13.1-60.x, 13.1-37.246 (FIPS), 14.1-66.68 (FIPS)
-
NetScaler SVM: 14.1-51.x, 13.1-60.x
-
NetScaler Console Service: Supported from early September 2025.
-
NetScaler Console on-prem: 14.1-51.xNote: LAS support for Console on-prem is from release 14.1-51.x onwards. However, file-based licensing is deprecated as of April 15 2026 from Console on-prem releases 14.1-51.x onwards and 13.1-60.x onwards. If you upgrade to Console on-prem release 14.1-51.x or release 13.1-60.x or later, you can continue using file-based licensing until 15th April 2026. However you must upgrade to Console on-prem release 14.1-51.x or later, and switch to LAS before 15th April 2026 because Console on-prem 13.1 does not support LAS.
All the other forms of legacy NetScaler licenses such as Pooled vCPU, CICO, perpetual will not be supported with LAS. NetScaler instances leveraging perpetual licenses without an active maintenance will become unlicensed upon upgrade to the above mentioned software versions.
LAS based licenses may not be available to customers where prohibited by law or regulations.
If you have questions or concerns, contact Customer Care. Citrix may limit or suspend your Citrix Maintenance for non-compliance with these requirements without liability in addition to any other remedies Citrix may have at law or equity. These requirements don’t apply where prohibited by law or regulation.
{{page.netscaler-mpx-short}} appliance with perpetual license can be upgraded to {{page.citrix-adc-generic}} Pooled capacity license. Upgrading to {{page.citrix-adc-generic}} Pooled capacity license enables you to allocate licenses from the license pool to {{page.citrix-adc-generic}} appliances on demand. {{page.citrix-adc-generic}} can use one license at a time which is either use perpetual license or use the pooled license. A customer can make a switch from a pooled license to a perpetual license. As long as the perpetual license is valid, you can reconfigure the {{page.citrix-adc-generic}} and remove the pooled licensing config. When a customer makes a switch from perpetual license to pooled license or pooled to perpetual license, all the {{page.citrix-adc-generic}} instances are restarted.
You can also configure the {{page.citrix-adc-generic}} Pooled capacity license for {{page.citrix-adc-generic}} instances configured in high availability mode. To configure {{page.citrix-adc-generic}} Pooled capacity license for {{page.netscaler-mpx-short}} instances in high availability mode, see Upgrading the perpetual license in {{page.netscaler-mpx-short}} high availability pair to {{page.citrix-adc-generic}} Pooled capacity).
Note
For upgrading {{page.netscaler-mpx-short}} appliance to {{page.citrix-adc-generic}} Pooled capacity license, you need to upload the MPX-Z license to the appliance.
To upgrade to {{page.citrix-adc-generic}} Pooled capacity:
-
In a Web browser, type the IP address of the {{page.citrix-adc-generic}} appliance, such as http://192.168.100.1.
-
In User Name and Password fields, type the administrator credentials.
-
On the Welcome page, click Continue.
-
Upload the zero capacity license (MPX-Z license). On the Configuration tab, navigate to System \> Licenses.
-
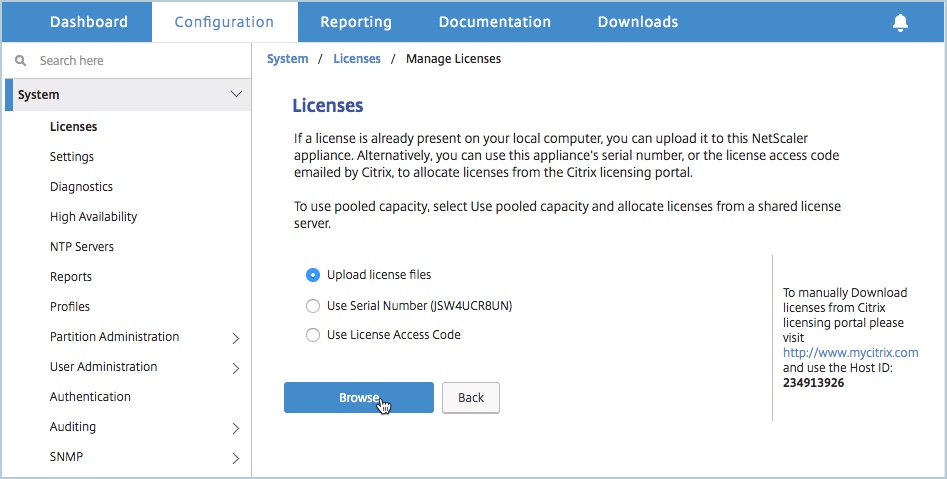
In the details pane, click Manage Licenses, click Add New License.
-
In the Licenses page, select Upload license files and click Browse to select the zero capacity license from your local machine.
-
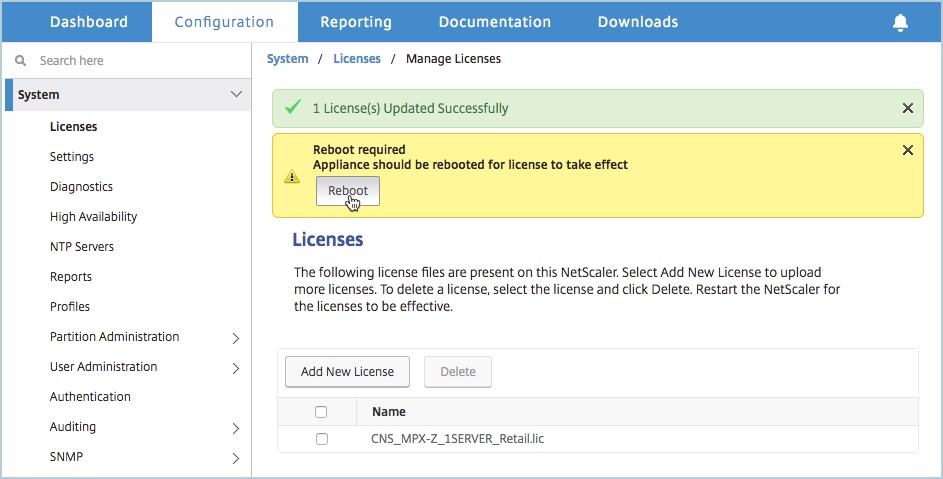
After the license is uploaded, click Reboot to reboot the appliance.WarningAfter applying the MPX-Z license, the features including SSL offloading on the appliance become unlicensed. The appliance stops processing HTTPS requests.If the Secure Access Only option is enabled on the appliance before the upgrade, you cannot connect to the appliance through {{page.adm-product-name-short}} GUI using HTTPS.
-
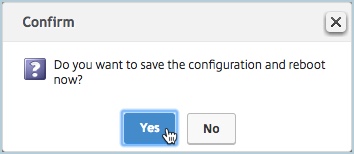
On the Confirm page, click Yes.
-
After the appliance reboots, logon to the appliance.
-
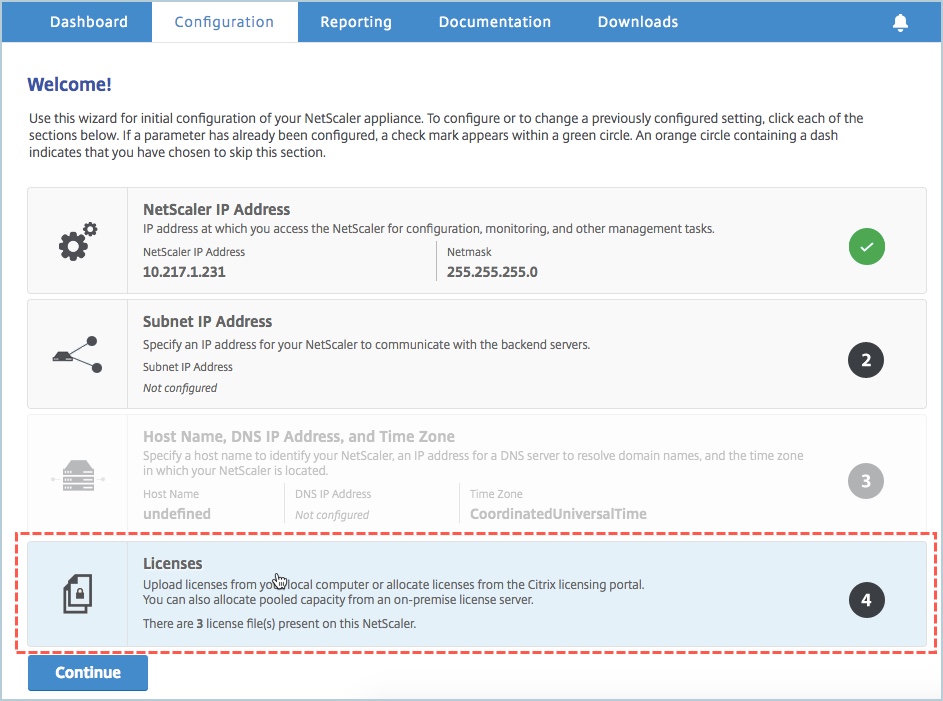
On the Welcome page, click the Licenses section.
-
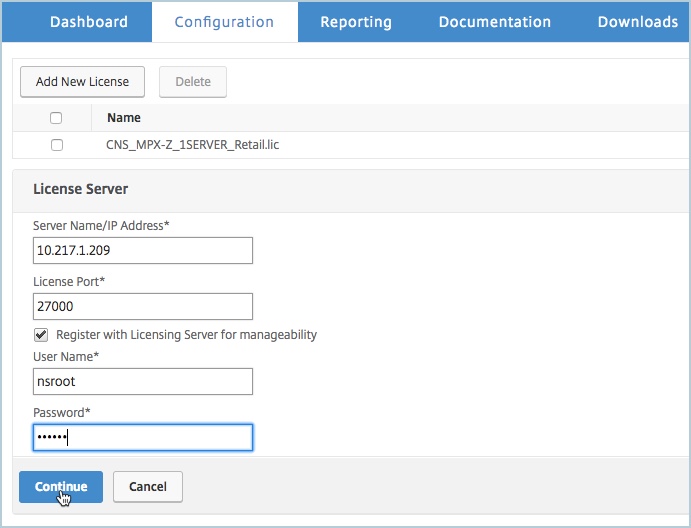
In the License Server section, do the following:
-
In the Server Name/IP Address field, enter the license server details.
-
In the License Port field, enter the license server port. Default value: 27000.
-
If you want to manage your instance's pool licenses through {{page.adm-product-name-short}}, select the Register with Licensing Server for manageability checkbox and enter {{page.adm-product-name-short}} credentials.
-
Click Continue.
-
-
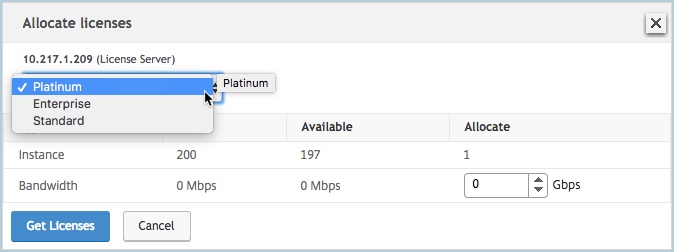
In the Allocate licenses window, do the following:
-
Select the license edition from the drop-down list.
-
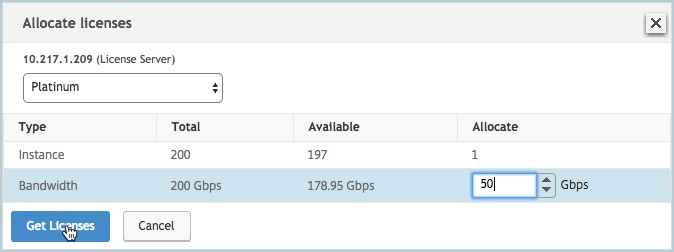
Allocate the bandwidth to the {{page.citrix-adc-generic}} appliance from the Allocate menu and click Get Licenses.
-
When prompted, click Reboot to reboot the appliance.
-
-
Once the {{page.netscaler-mpx-short}} appliance reboots, logon to the {{page.netscaler-mpx-short}} appliance. On the Welcome page, click Continue.
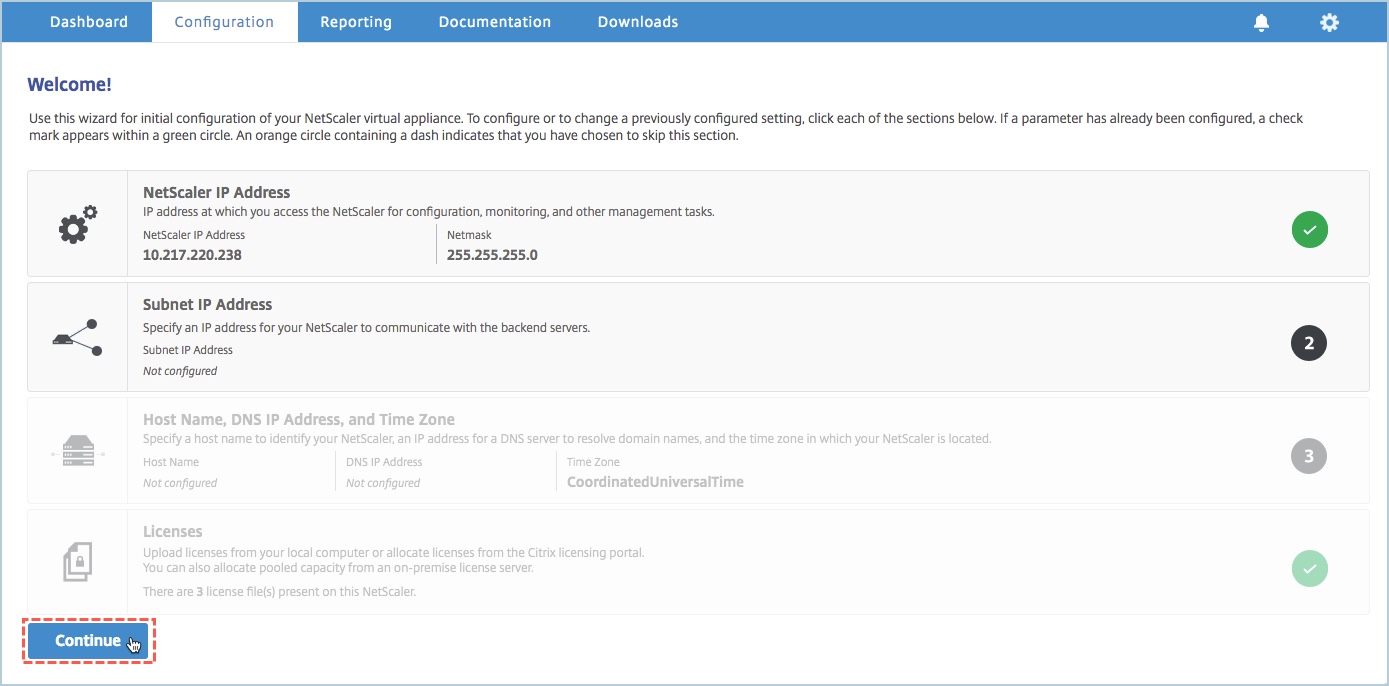 The Licenses page lists all the licensed features.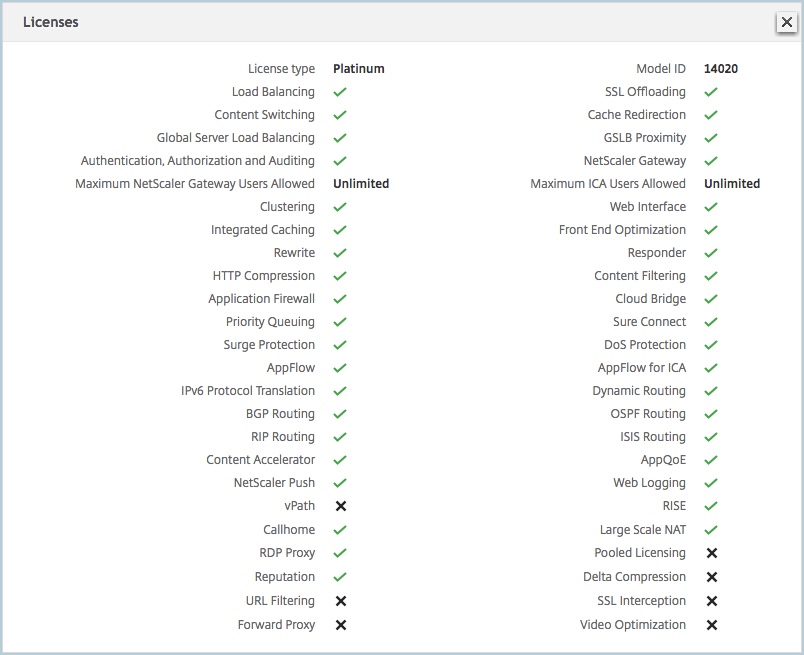
-
Navigate to System \> Pooled Licensing and click Manage Licenses.
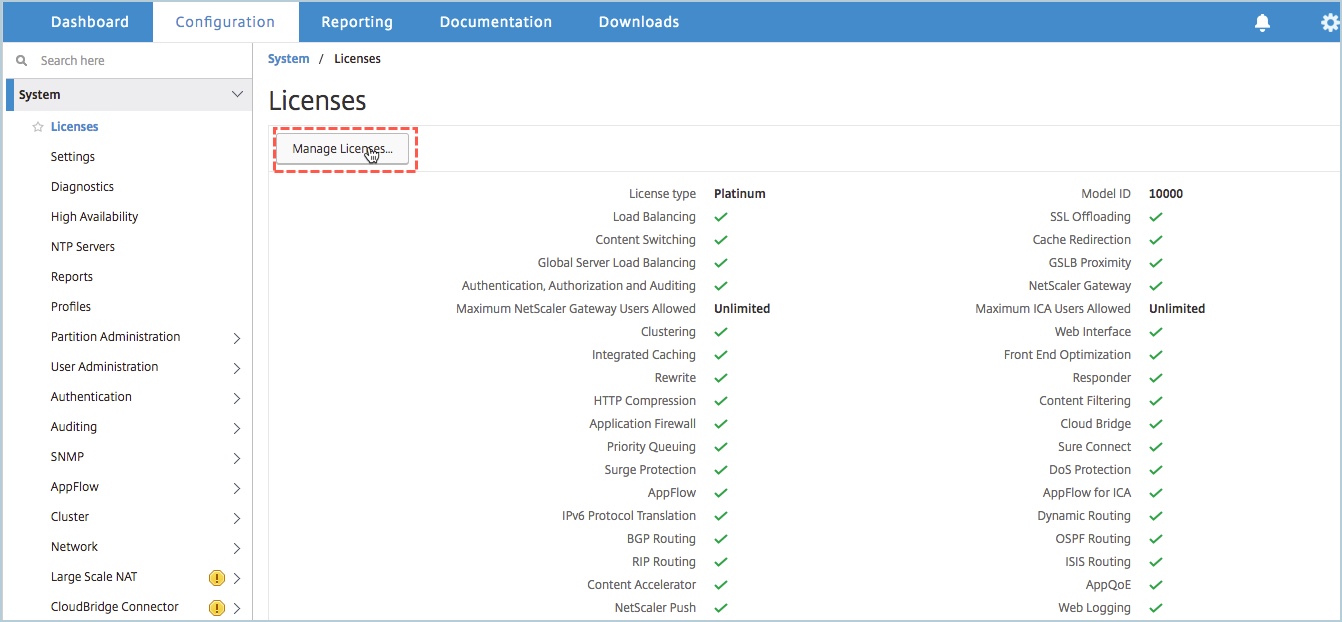 On the Manage Licenses page, you can view the details of the license server, license edition and the allocated bandwidth.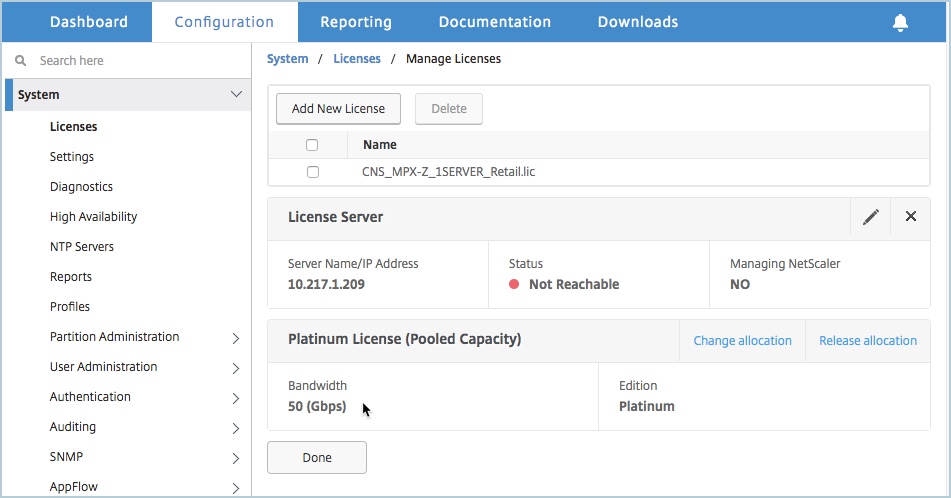
Upgrading the perpetual license in {{page.netscaler-mpx-short}} high availability pair to {{page.citrix-adc-generic}} Pooled capacity
For the {{page.netscaler-mpx-short}} appliances configured in high availability mode, you have to configure {{page.citrix-adc-generic}} Pooled capacity on both the primary and secondary {{page.citrix-adc-generic}} instances in the HA pair. You need to allocate licenses of the same capacity to both the primary and secondary {{page.citrix-adc-generic}} instances in the HA pair. For example, if you want 1 Gbps capacity from each instance in the HA pair, you need to allocate 2 Gbps capacity from the common pool so that you can allocate 1 Gbps capacity each to the primary and secondary {{page.citrix-adc-generic}} instances in the HA pair.
Important
For upgrading {{page.netscaler-mpx-short}} appliance to use {{page.citrix-adc-generic}} Pooled capacity license, you need to upload the MPX-Z to the appliance.
Prerequisites
Make sure that you upload the MPX-Z license to both the primary and secondary instances in the HA pair.
To upload the MPX-Z license to the {{page.netscaler-mpx-short}} instances in the HA pair:
-
In a Web browser, type the IP address of the appliance, such as http://192.168.100.1.
-
In User Name and Password fields, type the administrator credentials.
-
On the Welcome page, click Continue.
-
Upload the zero capacity license (MPX-Z license). On the Configuration tab, navigate to System \> Licenses.
-
In the details pane, click Manage Licenses, click Add New License.
-
In the Licenses page, select Upload license files and click Browse to select the zero capacity license from your local machine.
Once the license is uploaded you are prompted to reboot the appliance.
-
Click Reboot to reboot the appliance.
-
On the Confirm page, click Yes.
To upgrade an exisiting HA setup to {{page.citrix-adc-generic}} Pooled capacity:
-
Log on to the secondary {{page.netscaler-mpx-short}} Instance. In a Web browser, type the IP address of the {{page.citrix-adc-generic}} appliance, such as http://192.168.100.1.
-
In User Name and Password fields, type the administrator credentials.
-
On the Welcome page, click the Licenses section.
-
In the License Server section, do the following:
-
In the Server Name/IP Address field, enter the license server details.
-
In the License Port field, enter the license server port. Default value: 27000.
-
If you want to manage your instance's pool licenses through {{page.adm-product-name-short}}, select the Register with Licensing Server for manageability checkbox and enter {{page.adm-product-name-short}} credentials.
-
Click Continue.
-
-
In the Allocate licenses window, do the following:
-
Select the license edition from the drop-down list.
-
Allocate the bandwidth to the {{page.citrix-adc-generic}} appliance from the Allocate menu and click Get Licenses.
-
When prompted, click Reboot to reboot the appliance.After the secondary {{page.netscaler-mpx-short}} appliance reboots, it becomes the primary {{page.netscaler-mpx-short}} appliance in the HA pair.
-
-
Log on to the existing primary {{page.netscaler-mpx-short}} appliance and reboot the appliance. Perform the following:
-
In a Web browser, type the IP address of the {{page.citrix-adc-generic}} appliance, such as http://192.168.100.1.
-
In User Name and Password fields, type the administrator credentials.
-
On the Welcome page, click Continue.
-
On the Configuration tab, click System.
-
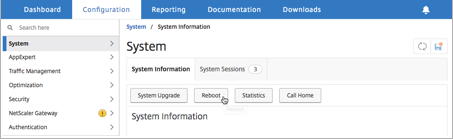
On the System page, click Reboot.
-
On the Reboot page, select Warm reboot and click OK.
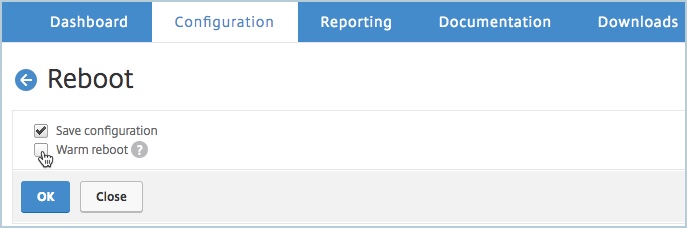
After the primary {{page.netscaler-mpx-short}} appliance reboots, it becomes the secondary {{page.netscaler-mpx-short}} appliance in the HA pair. If required, you can change the primary and secondary instances in the HA pair to your original HA pair configuration by using the following command on any instance in the HA pair:> force ha failover -