
How to monitor globally distributed sites
As a network administrator, you might have to monitor and manage network instances deployed across geographical locations. However, it is not easy to gauge the requirements of the network when managing network instances in geographically distributed data centers.
Geomaps in {{page.adm-product-name-short}} provides you with a graphical representation of your sites and breaks down your network monitoring experience by geography. With geomaps, you can visualize your network instance distribution by location and monitor network issues.
The following sections explain how you can monitor data centers in {{page.adm-product-name-short}}.
Related information
Monitoring globally distributed sites in
{{page.adm-product-name-short}} site is a logical grouping of Citrix Application Delivery Controller ({{page.citrix-adc-generic}}) instances in a specific geographical location. For example, while one site is assigned to Amazon Web Services (AWS) and another site might be assigned to Azure. Still another site is hosted on the premises of the tenant. {{page.adm-product-name-short}} manages and monitors all {{page.citrix-adc-generic}} instances connected to all sites. You can use {{page.adm-product-name-short}} to monitor and collect syslog, AppFlow, SNMP, and any such data originating from the managed instances.
Geomaps in {{page.adm-product-name-short}} provides you with a graphical representation of your sites. Geomaps also breaks down your network monitoring experience by geography. With geomaps, you can visualize your network instance distribution by location and monitor all network issues. You can click Infrastructure on the menu and this displays the Instances Dashboard for a visual representation of the sites created on the world map.
Use case
A leading mobile carrier company, ExampleCompany, was relying on private service providers for hosting their resources and applications. The company already had two sites - one at Minneapolis in the United States and another in Alice Springs in Australia. In this image, you can see that two markers represent the two existing sites.
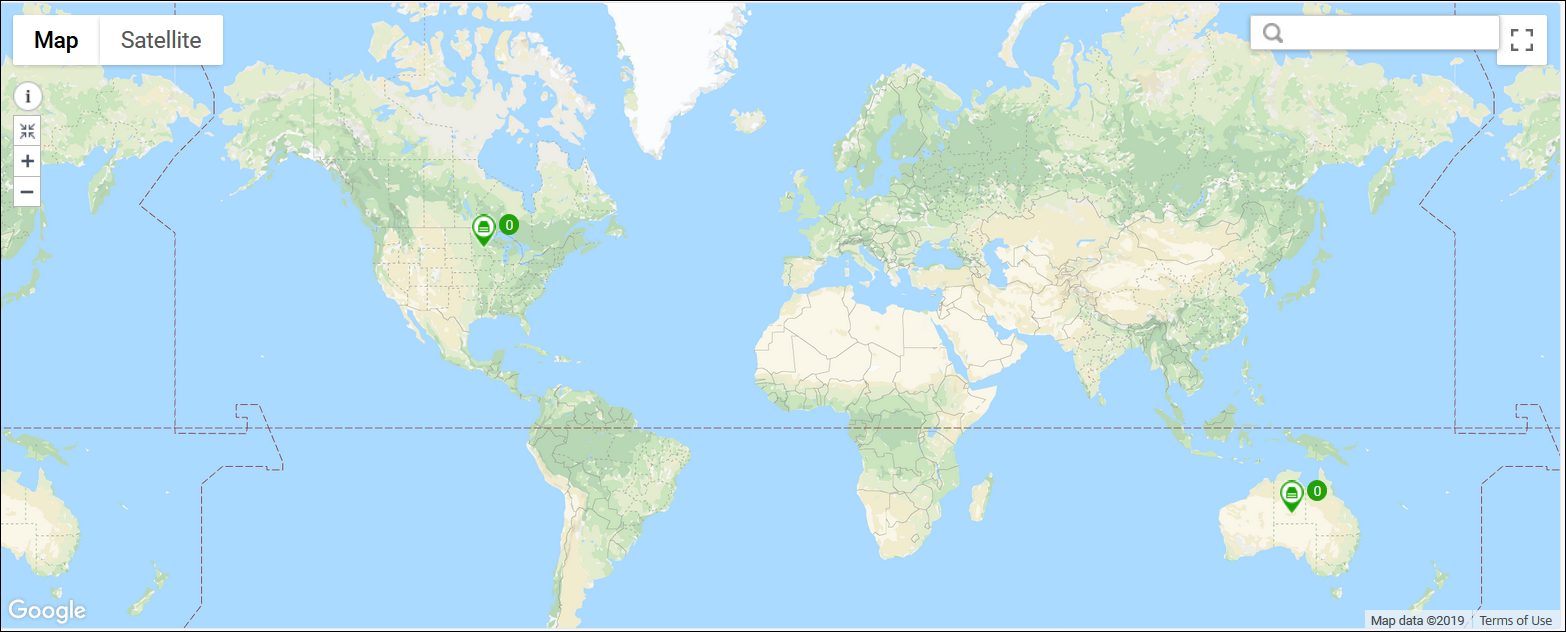
The markers also display the count of the following components on the site:
-
Instances: Indicates the number of instances available.
-
Applications: Indicates the number of applications hosted.
-
Virtual Servers: Indicates the number of virtual servers available.
-
Critical Events: Indicates the count of critical events occurred on the instances.
-
Major Events: Indicates that the count of major events occurred on the instances.
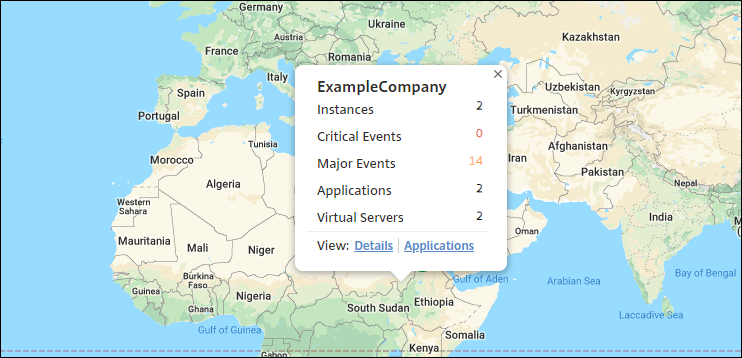
Click Applications to see all custom applications created in each site.
Click Details to see a list of {{page.citrix-adc-generic}} instances added in each site. Click the tabs to view more information:
-
Instances tab: View the following in this tab:
-
IP address of each network instance
-
Type of the {{page.citrix-adc-generic}} instance
-
Number of critical events
-
Significant events and all events raised on a {{page.citrix-adc-generic}} instance.
-
-
Events tab: View a list of critical and significant events raised on the instances.
-
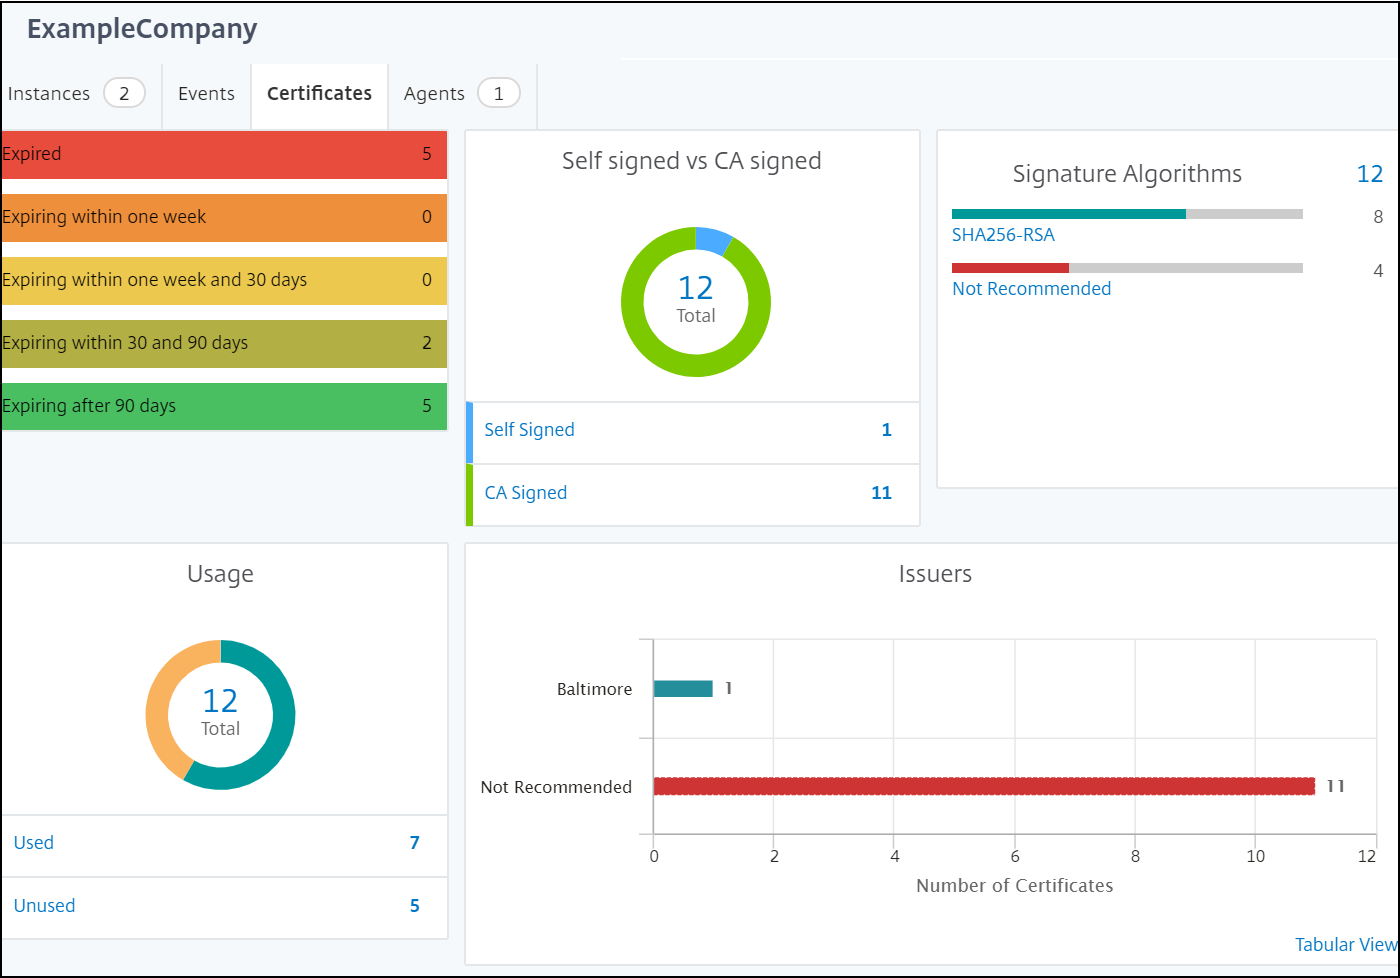
Certificates tab: View the following in this tab:
-
List of certificates of all the instances
-
Expiration status
-
Vital information and the top 10 instances by many certificates in use.
-
-
Agents tab: View a list of agents to which the instances are bound.
Configuring Geomaps
ExampleCompany decided to create a third site in Bangalore, India. The company wanted to test the cloud by offloading some of their less-critical, internal IT applications to the Bangalore office. The company decided to use the AWS cloud computing services.
As an administrator, you must first create a site, and next add the {{page.citrix-adc-generic}} instances in {{page.adm-product-name-short}}. You must also add the instance to the site, add an agent, and bind the agent to the site. {{page.adm-product-name-short}} then recognizes the site that the {{page.citrix-adc-generic}} instance and the agent belong.
For more information on adding {{page.citrix-adc-generic}} instances, see Adding Instances.
Create a Site
Create sites before you add instances in {{page.adm-product-name-short}}. Providing location information allows you to precisely locate the site.
To create a site:
-
Navigate to Infrastructure > Instances > Site. Click Add.
-
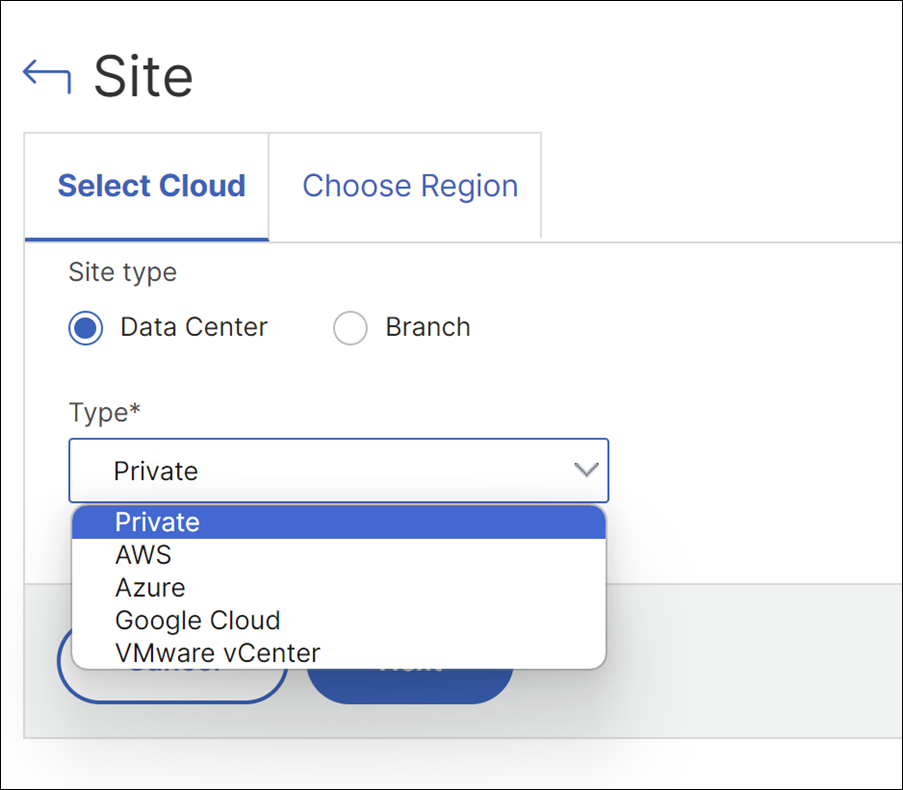
On the Select Cloud tab, choose the Site type. You can create a site of type Data Center or Branch.
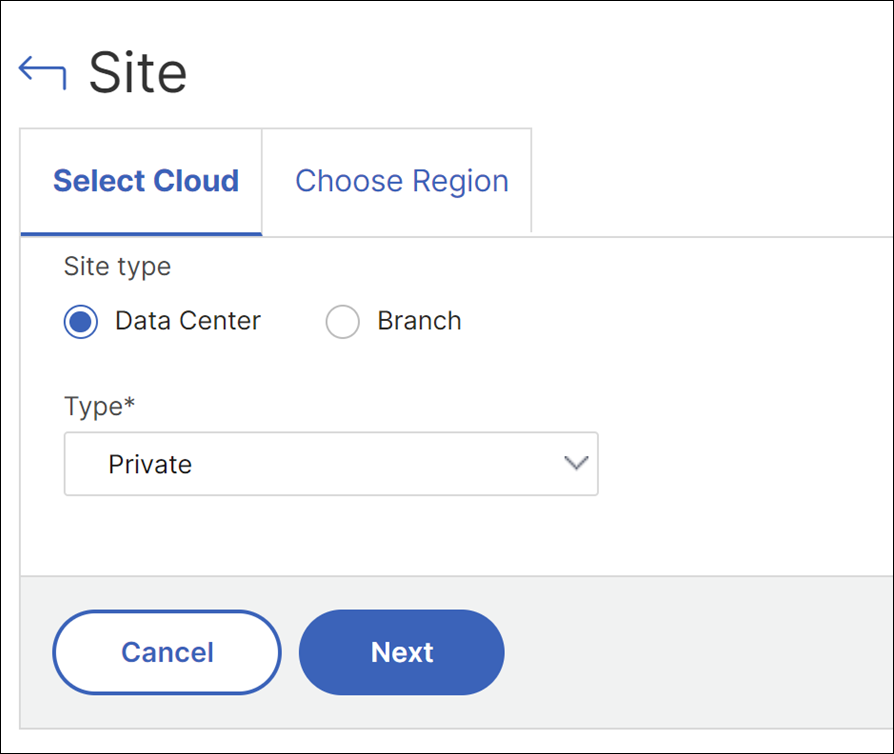 For Data Center site type, select the Type from the list:
-
Private
-
AWS
-
Azure
-
Google Cloud
-
VMware vCenter
-
-
Click Next.
-
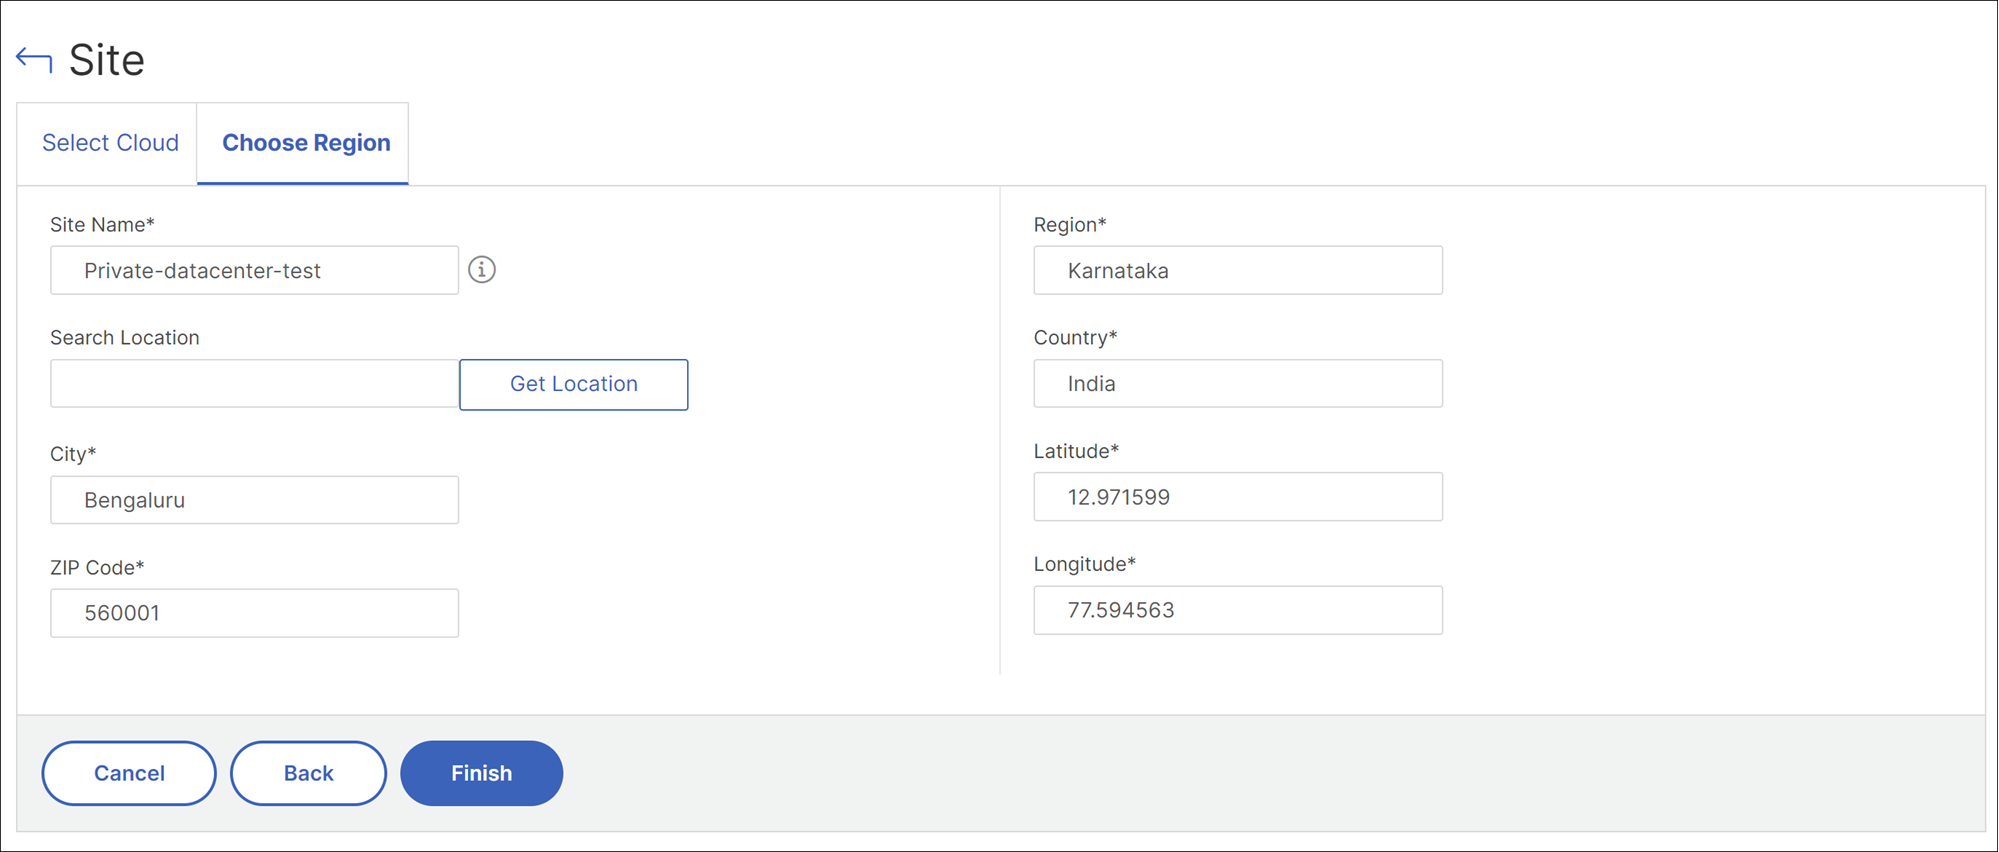
On the Choose Region tab, enter the following details:
-
Site Name
-
City
-
Zip Code
-
Region
-
Country
-
Latitude
-
Longitude
 Alternatively, you can enter the location in Search Location and click Get Location to precisely locate the site. The City, Zip code, Region, Country, Latitude, and Longitude fields are automatically filled in.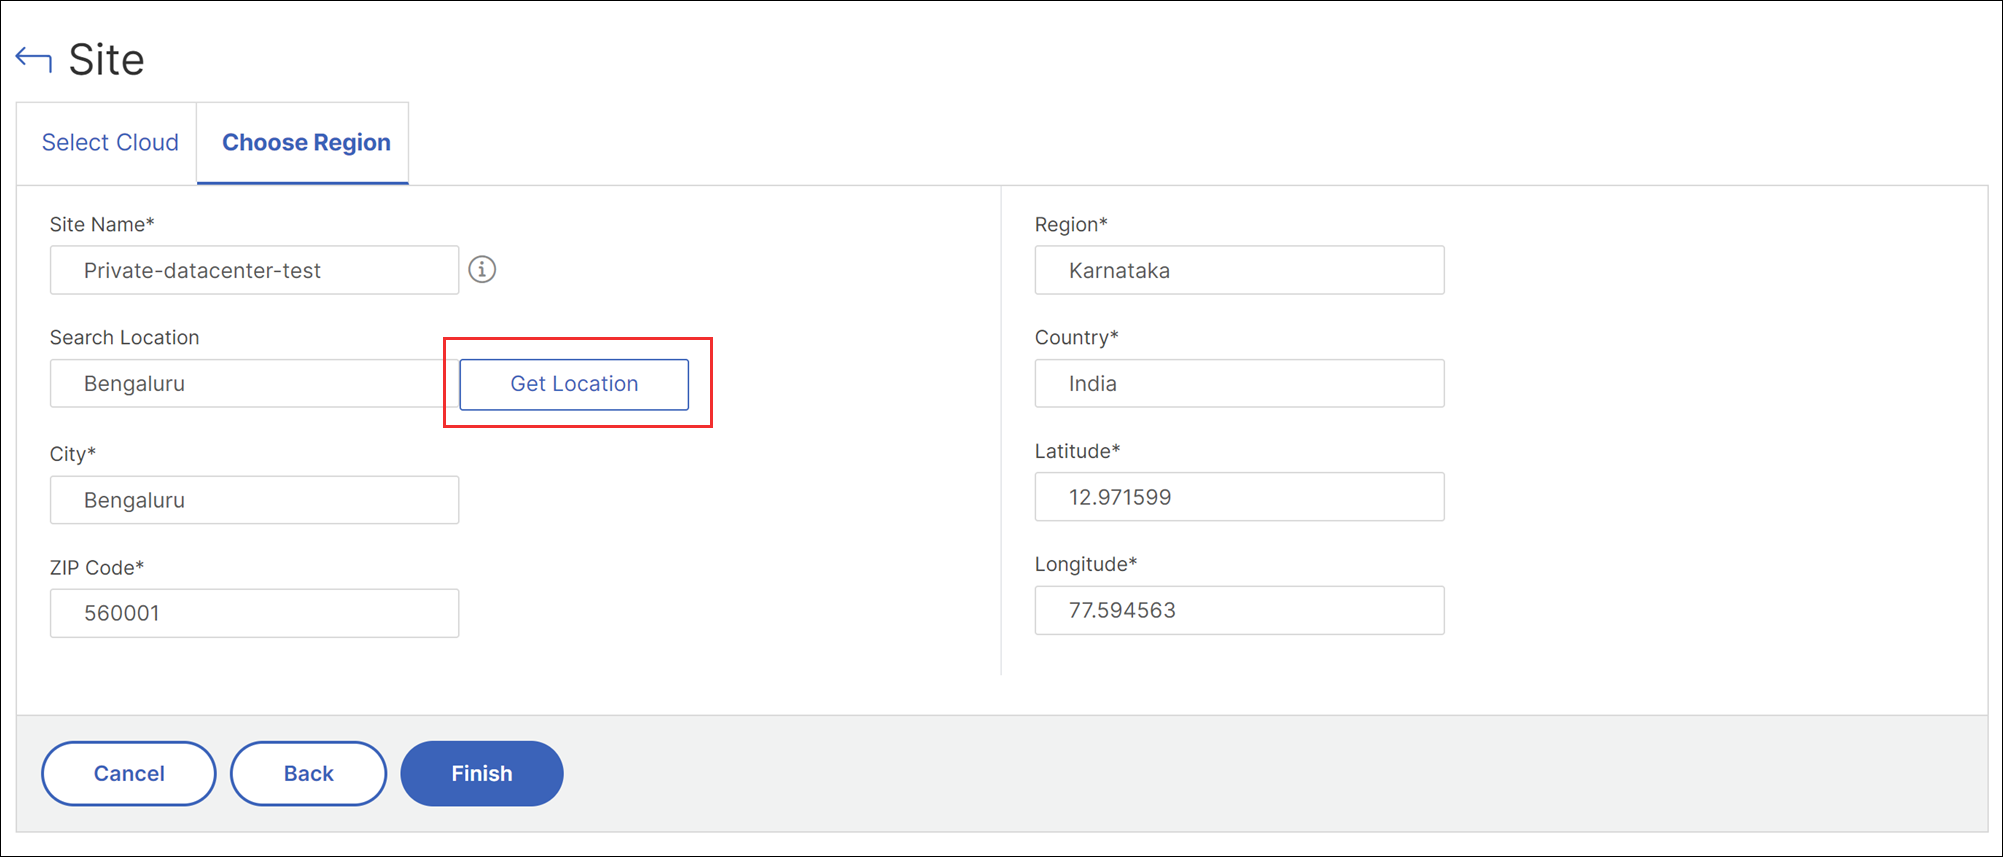
-
-
Click Finish.
Notes:
The outlined steps are applicable for:
-
Branch site type.
-
Data Center site type with the Private type.
-
When the fetch option is not selected for the cloud provider types.
Create a site for cloud provider types
You can create a site with a cloud provider type and choose whether to enable or disable the Fetch option. By default, the Fetch option is not selected.
The Fetch option is available only for AWS, Azure and Google Cloud platforms.
For detailed instructions on creating a site for specific cloud providers, refer to the following sections:
-
Create a site in AWS
-
Create a site in Azure
-
Create a site in Google Cloud
-
Create a site in VMware vCenter
Edit a Site
To modify an existing site:
-
Select the site and click Edit.
-
On the Configure Site page, you can update the Site type. For example, if you have selected Branch previously, you can update to Data Center.
-
Depending on the site type, you can modify the Type. For example, you can change the type from a Private Data Center to a Public Cloud from the list.
Delete a Site
-
To delete a site, select the site and click Delete.
-
On the Confirm page, click Yes.
To add instances and select sites:
After creating sites, you must add instances in {{page.adm-product-name-short}}. You can select the previously created site, or you can also create a site and associate the instance.
-
In {{page.adm-product-name-short}}, navigate to Infrastructure > Instances > {{page.citrix-adc-generic}}.
-
Select the VPX, and click Add.
-
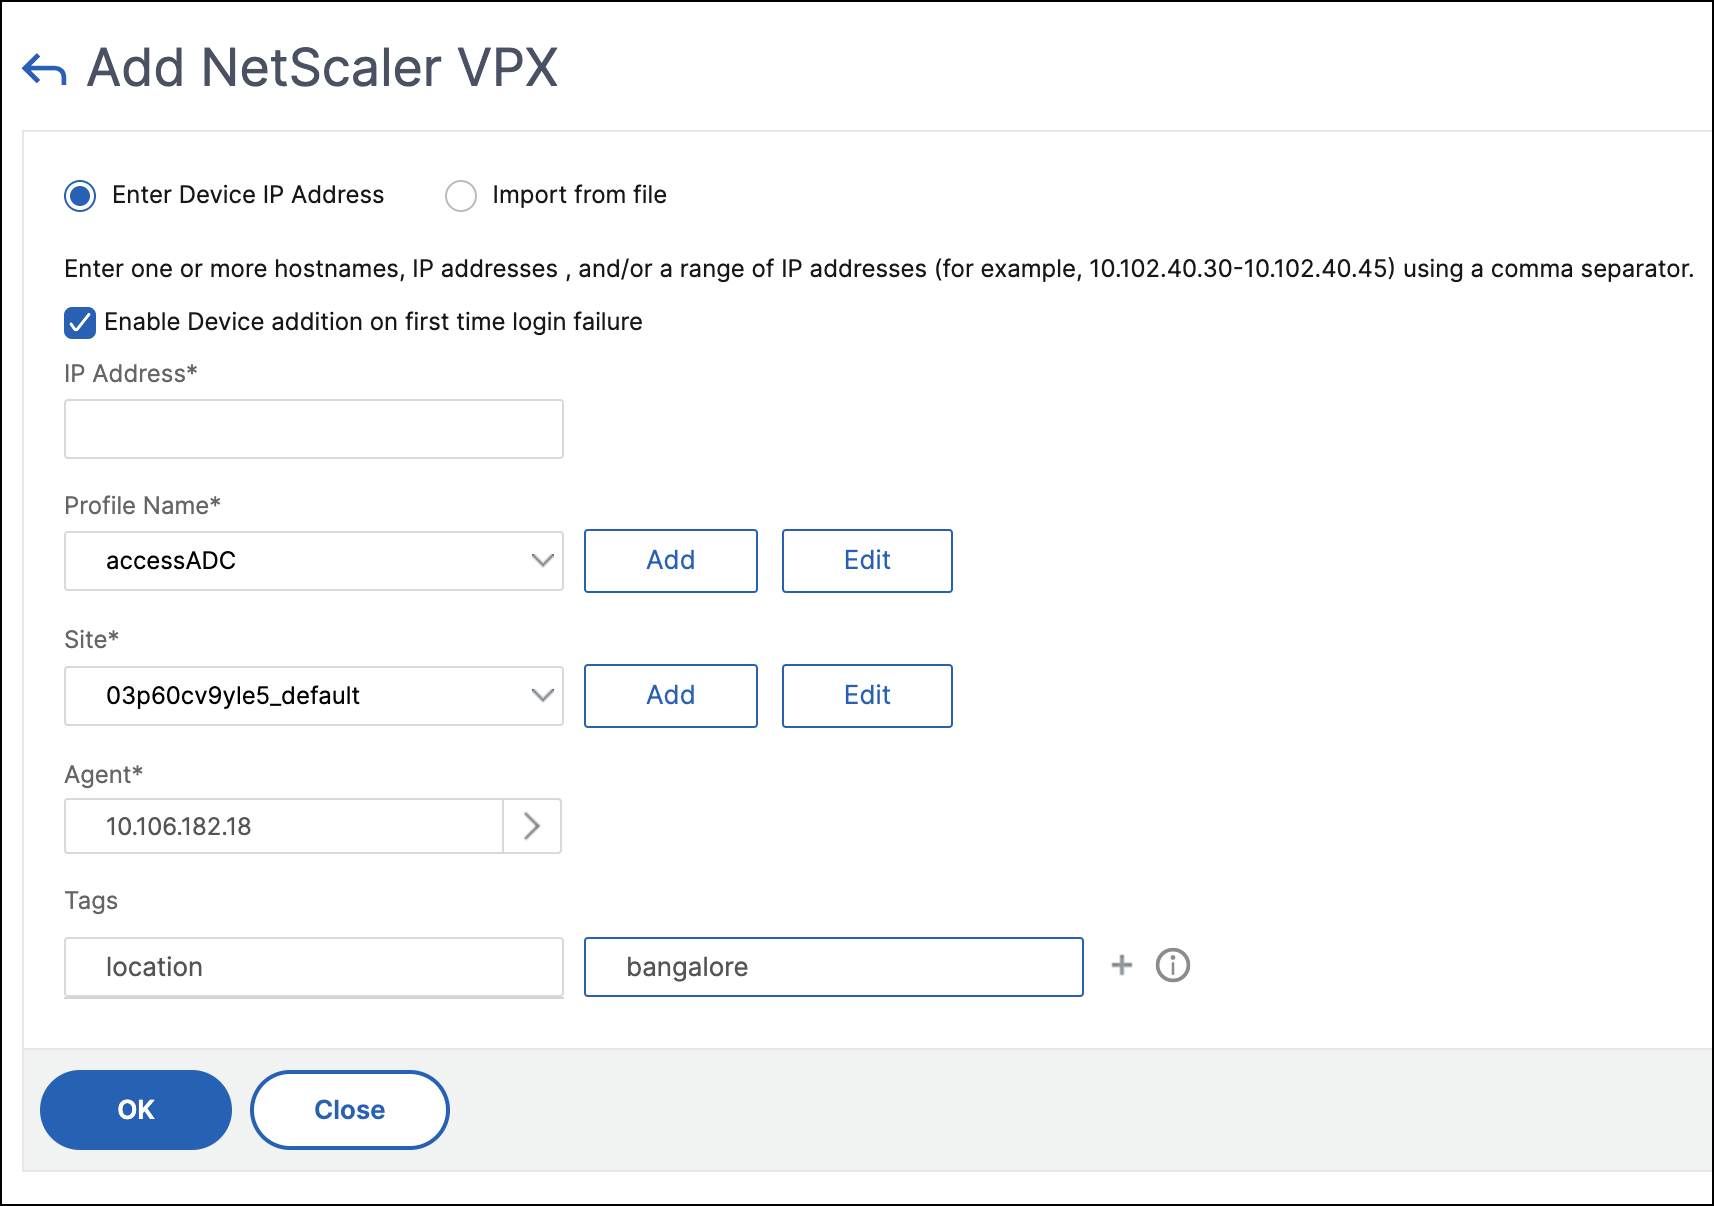
On the Add {{page.netscaler-vpx-short}} page, type the IP address and select the profile from the list.
-
Select the site from the list. You can click the Add button next to Site field to create a site or click the Edit button to change the details of the default site.
-
Click the right arrow and select the agent from the list that displays.
-
After choosing the agent, you must associate the agent with the site. This step allows the agent to be bound to the site. Select the agent and click Attach Site.

-
Select the site from the list and click Save.
-
-
Optionally, you can enter key and value fields for Tags.
-
Click OK.
You can also attach an agent to a site by navigating to Infrastructure > Instances > Agents.
To associate an agent with the site:
-
In {{page.adm-product-name-short}}, navigate to Infrastructure > Instances > Agents.
-
Select the agent, and click Attach Site.
-
You can associate the site and click Save.
{{page.adm-product-name-short}} starts monitoring the {{page.citrix-adc-generic}} instances added in the Bangalore site along with the instances at the other two sites as well.
To export the report of this dashboard:
To export the report of this page, click the Export icon in the top right side of this page. On the Export page, you can do one of the following:
-
Select Export Now tab. To view and save the report in PDF, JPEG, PNG, or CSV format.
-
Select Schedule Export tab. To schedule the report daily, weekly, or monthly and send the report over an email or a slack message.
Note:
-
If you select Weekly recurrence, ensure that you select the weekdays on which you want the report to be scheduled.
-
If you select Monthly recurrence, ensure that you enter all the days that you want the report to be scheduled separated by commas.