
Kerberos authentication using the iOS Kerberos extension
This topic outlines the end-to-end configuration required to enable Kerberos-based Single Sign-On (SSO) for internal web apps via the Citrix Secure Access for iOS app.
-
iOS client configuration
-
MDM server configuration
-
IIS configuration
-
Domain controller configuration
Related information
iOS client configuration
Prerequisites
Ensure that the iOS device is MDM enrolled. The iOS device must be enrolled in an MDM solution (for example, Microsoft Intune) before any SSO configuration can be applied. MDM enrollment allows the Kerberos SSO extension profile to be pushed to the device.
Validate MDM enrollment on the iOS device
-
On the iOS device, go to Settings > General > VPN & Device Management.Under Device Management, you must see your organization's MDM profile listed (for example, Microsoft Intune or your company's MDM profile name).
-
Tap the profile to confirm it is installed and the status displays Verified or Installed.
-
To confirm the Kerberos SSO extension was pushed by MDM:
-
Go to Settings > General > VPN & Device Management.
-
Tap the MDM profile, look for Single Sign-On Extensions or Kerberos under the profile details.
-
Alternatively, go to Settings > General > VPN & Device Management > Single Sign-On and verify that the Kerberos extension is listed.
If the device is not enrolled or the profile is missing, contact your MDM administrator to enroll the device before proceeding. -
MDM server configuration
Note:
The MDM SSO extension payload configuration is based on the official Apple documentation.
Ensure that the following fields are configured in the MDM SSO extension payload:
-
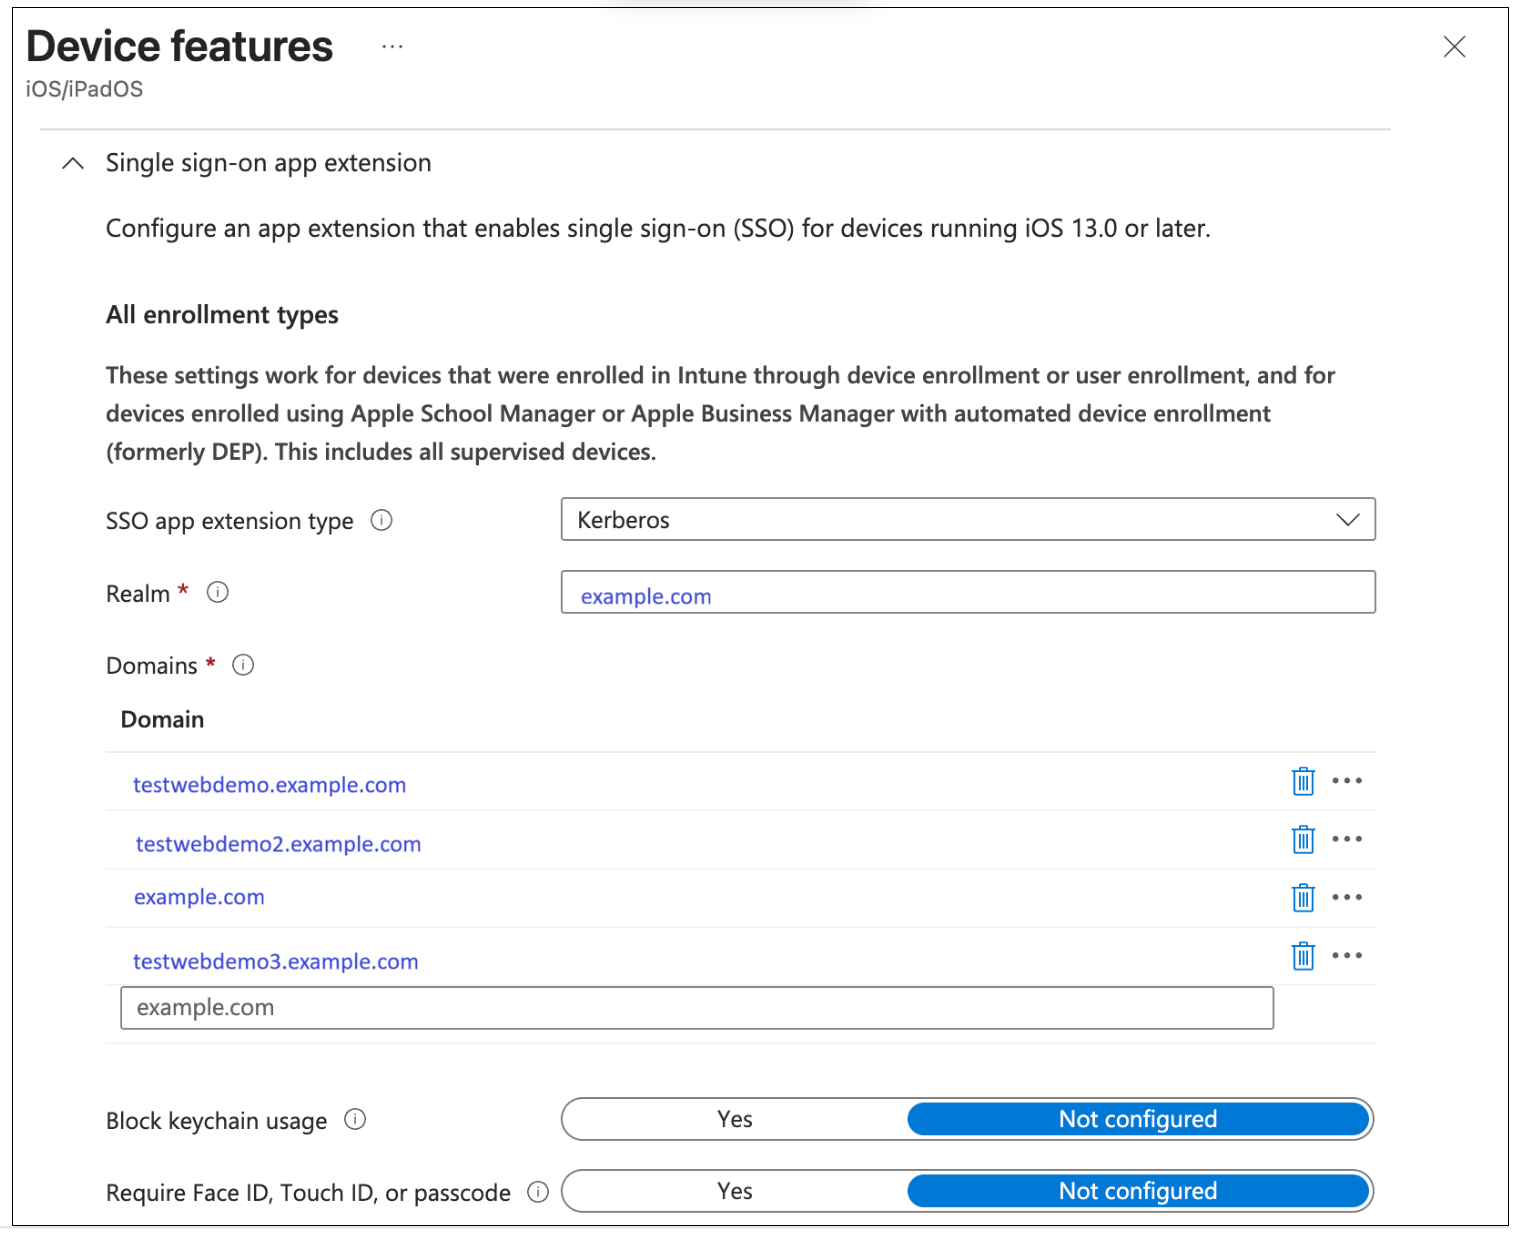
Domain: The URLs that are used for Kerberos.
-
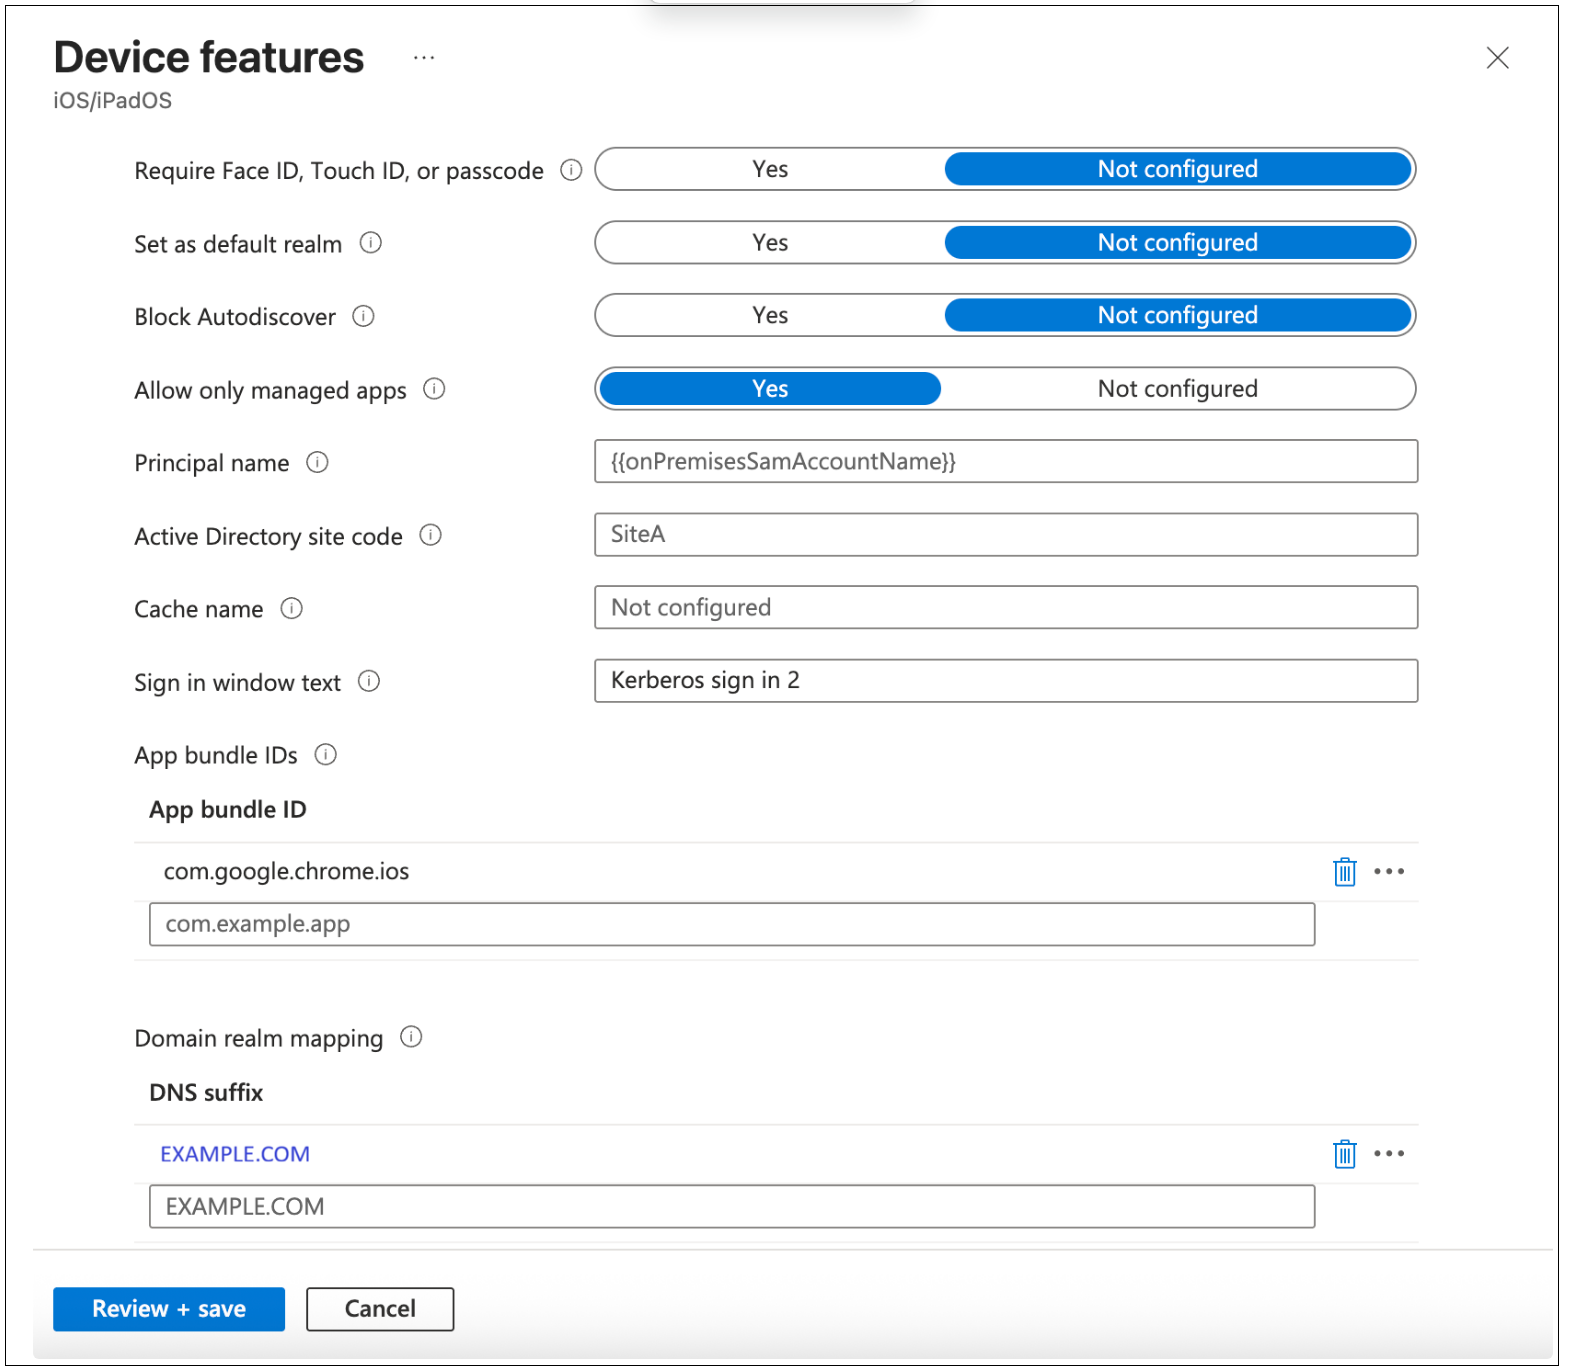
AppBundleIDs: Allow list of apps that will be used. (For example, Chrome:
com.google.chrome.ios, Citrix Secure Access:com.citrix.securehub) -
Realm: Location of your data center.
Intune policy configuration
Prerequisites: Ensure that the iOS device is enrolled into Intune.
-
In the Intune Admin console, go to Home > Devices
|iOS/iPadOS → iOS/iPadOS|Configuration. -
Create a new policy.
-
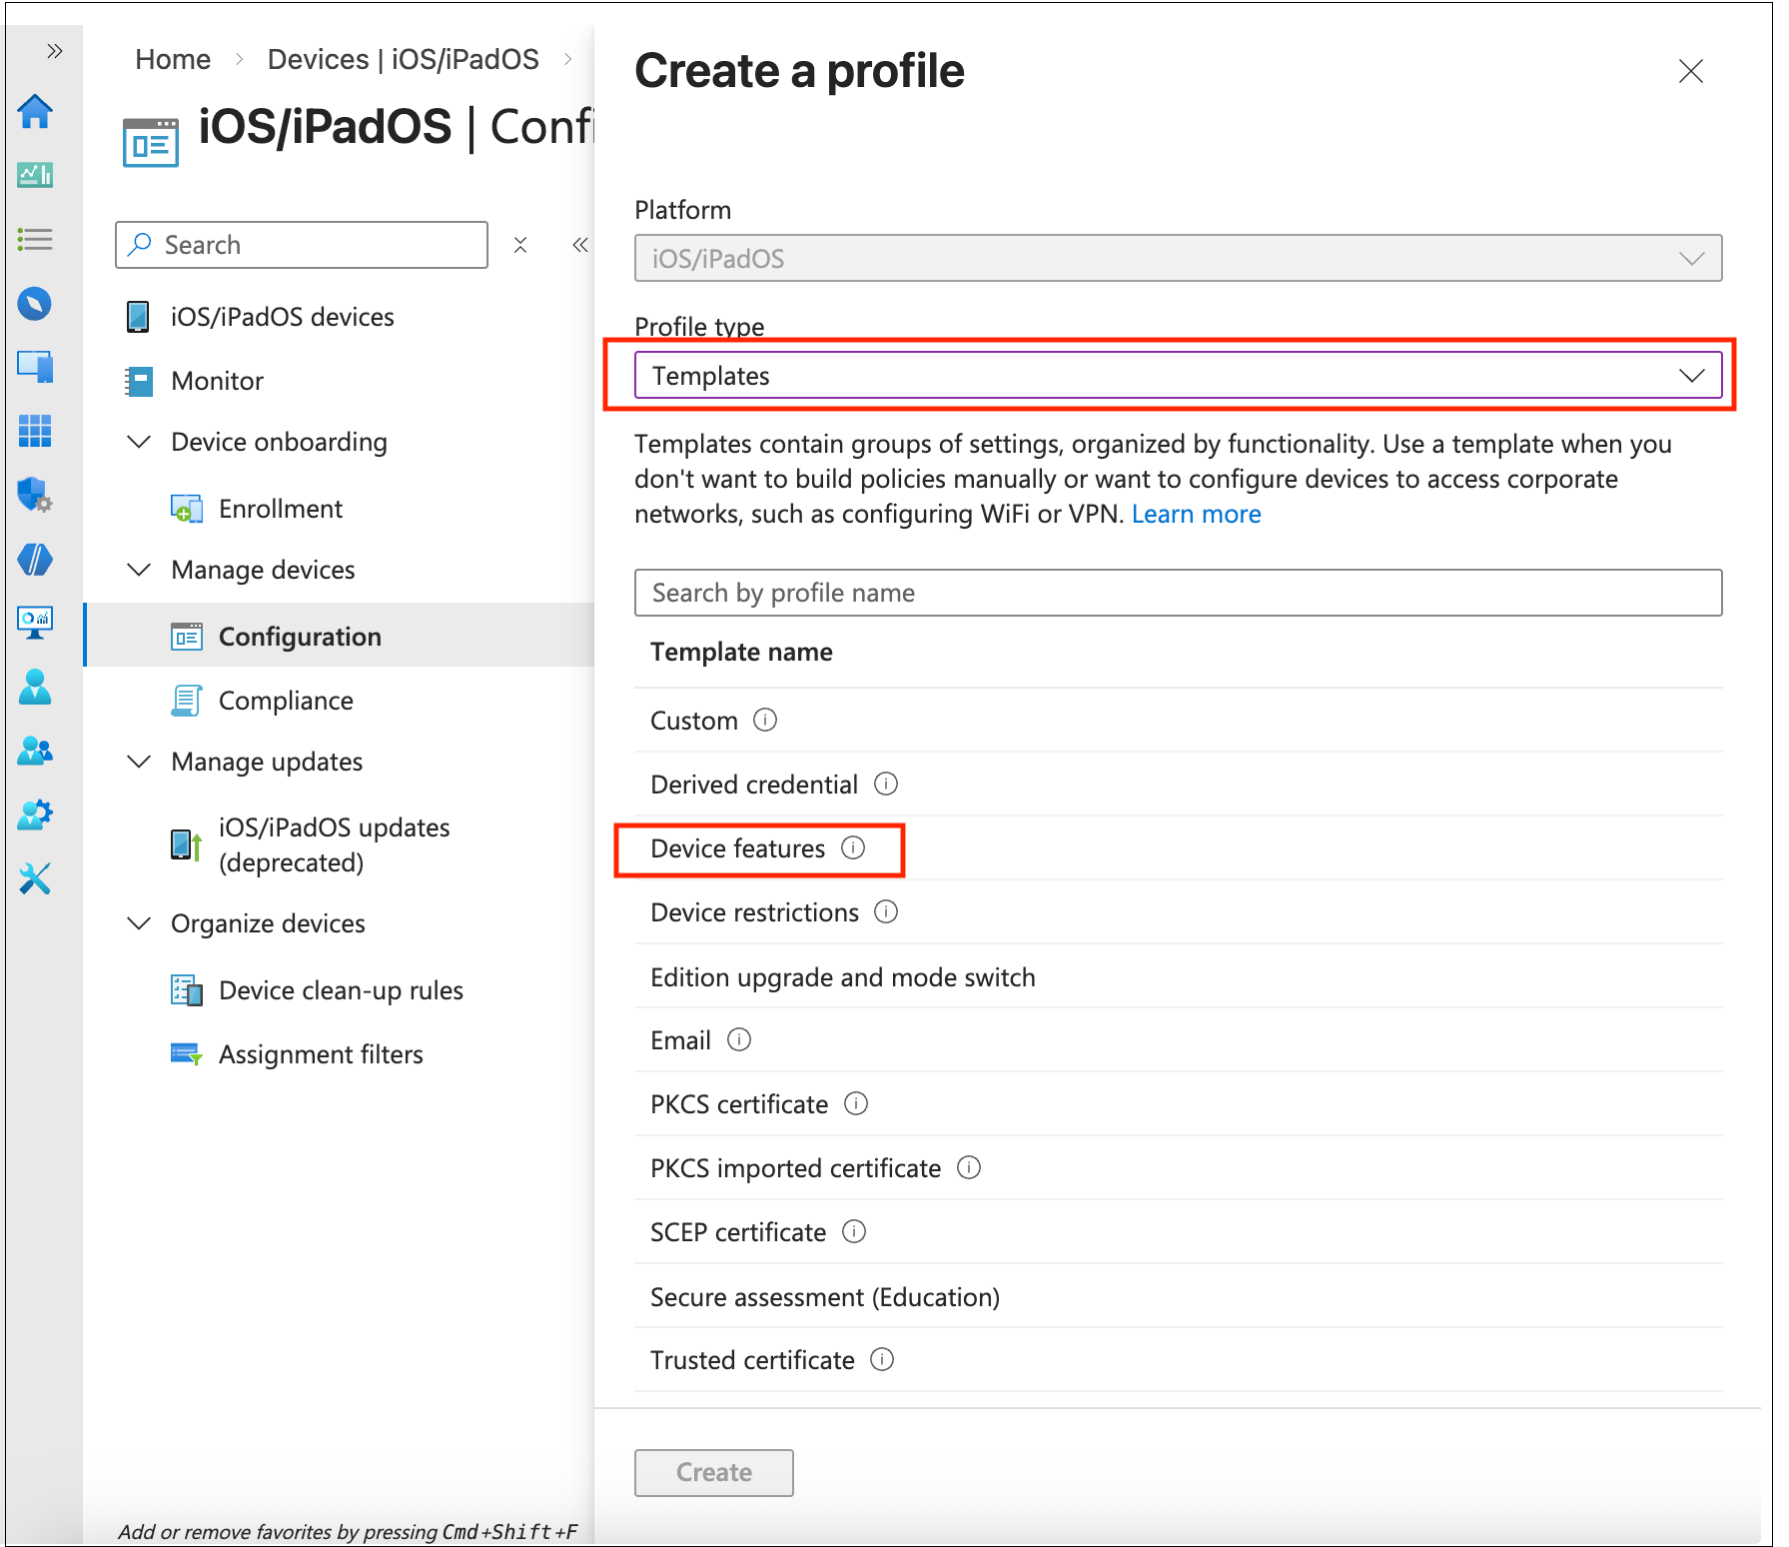
In Profile type select Templates, and then select Device Features.
-
Press Create.
-
Enter a name for the policy and then proceed to Configuration Settings.
-
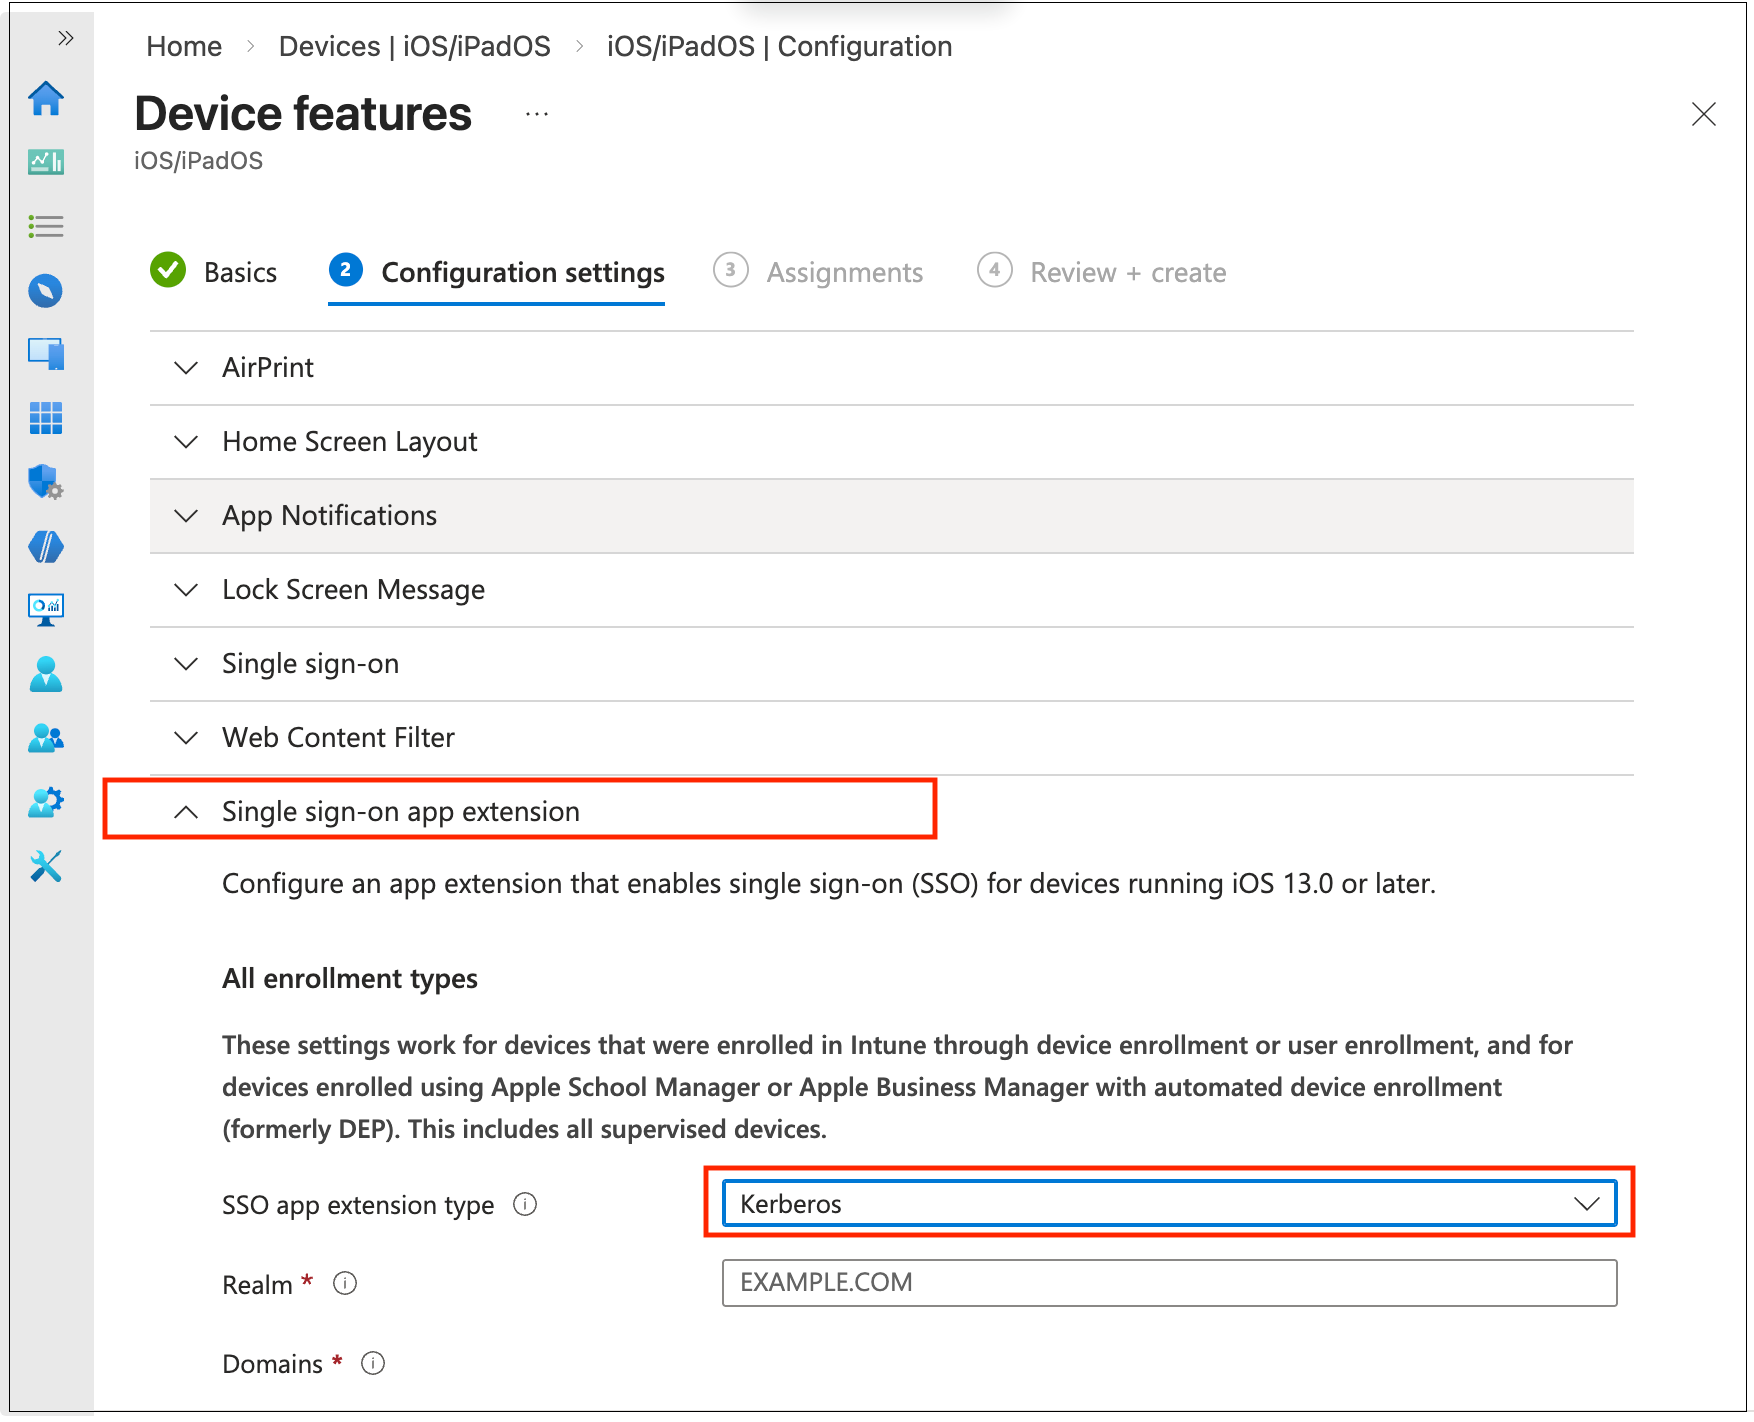
In the Single sign-on app extension > SSO app extension type select Kerberos.
-
Fill in the information according to your setup requirements.
-
Press Review + save.
-
Bind the policy to your device:
-
Go to Edit Policy, click the policy.
-
Edit Assignments.
-
Select your Device Group (create a Device group with your device first if not yet created).
-
-
Synchronize the device.
IIS configuration
On the IIS web server, enable Windows Authentication with the Negotiate provider and disable Anonymous Authentication to enforce Kerberos-based authentication.
Steps to configure IIS authentication:
-
Open IIS Manager (inetmgr from Run or Start).
-
In the Connections pane, select the site or application to configure.
-
Double-click Authentication in the IIS section of the Features View.
-
Disable Anonymous Authentication.
-
Select Anonymous Authentication, click Disable in the Actions pane.
-
-
Enable Windows Authentication.
-
Select Windows Authentication, click Enable in the Actions pane.
-
-
Set the Negotiate provider.
-
With Windows Authentication selected, click Providers… in the Actions pane.
-
Ensure Negotiate is listed first (above NTLM). Add it if missing.
-
Click OK.
-
-
Click Apply in the Actions pane to save the changes.
-
Optionally, run
iisresetfrom an elevated command prompt to apply the configuration immediately.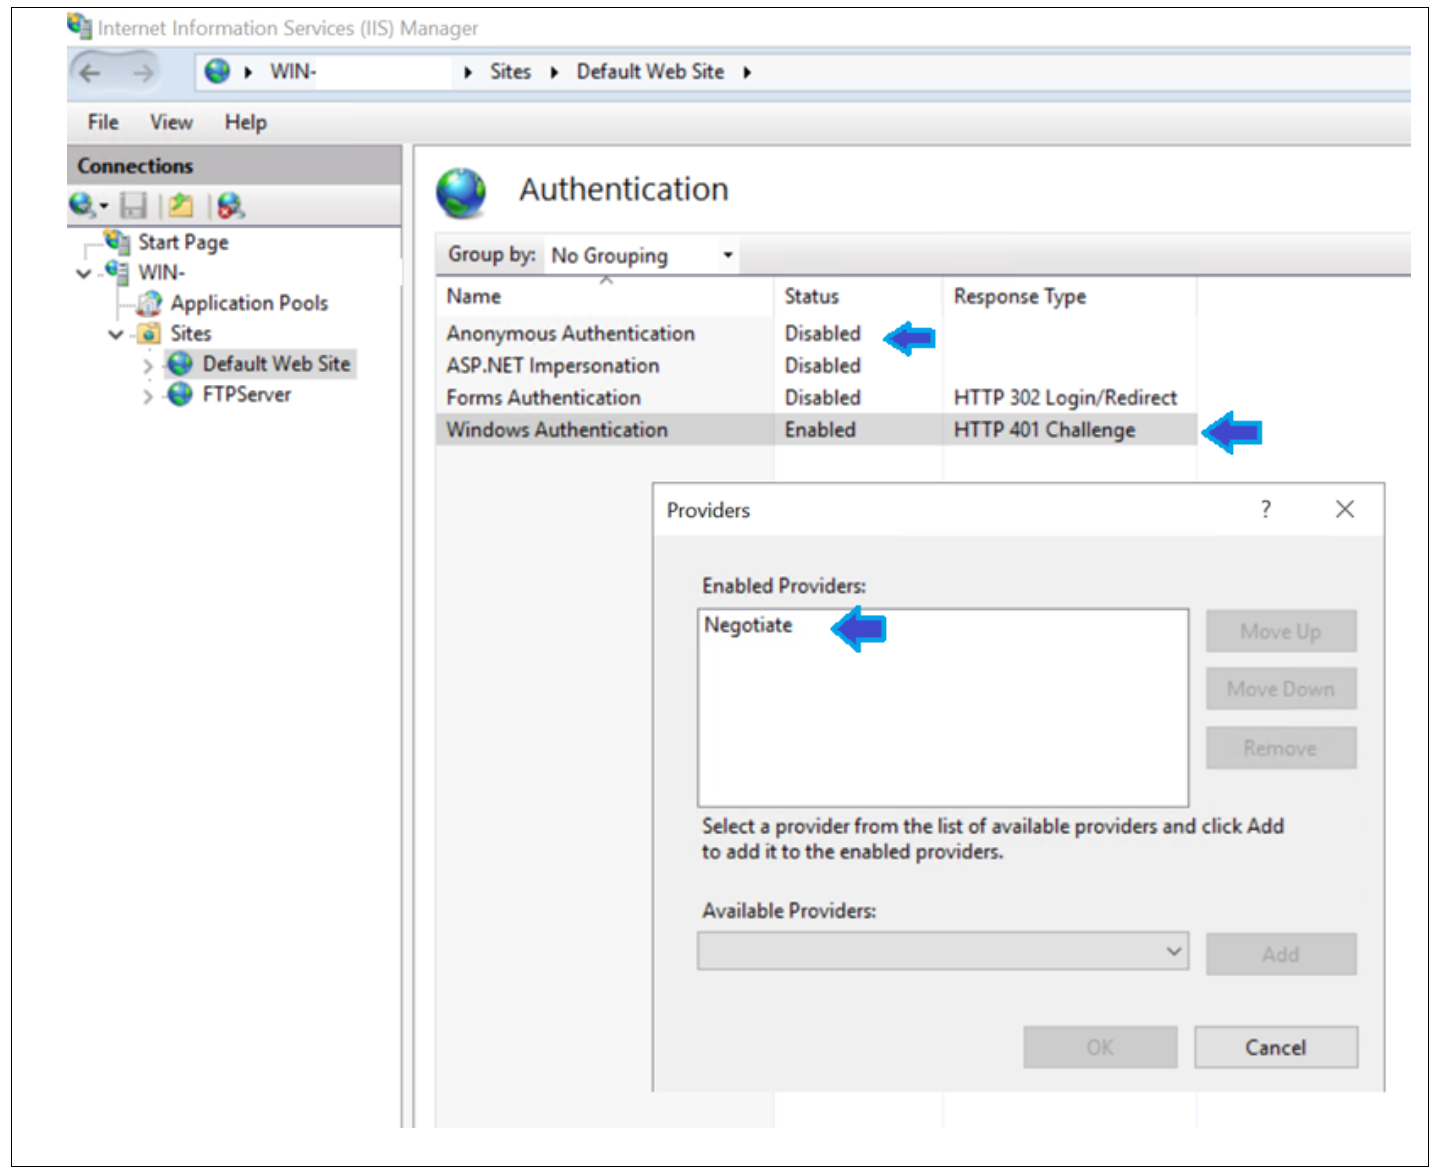
Domain controller configuration
SPN registration for short name and FQDN: Kerberos requires an exact match between the URL that the client uses and a registered SPN on the domain. A client accessing
http://testwebdemo uses a different SPN than one accessing http://testwebdemo.example.com, so both must be registered.
-
Replace
<dc-hostname>below with the host name of your Domain Controller. -
Register both forms.
-
Short host name (used when client accesses via short name, for example
http://testwebdemo)setspn -s HTTP/testwebdemo example.com\<dc-hostname> -
FQDN (used when client accesses via full domain name, for example
http://testwebdemo.example.com)setspn -s HTTP/testwebdemo.example.com example.com\<dc-hostname>
-
-
Verify both are registered on the correct account
-
setspn -L example.com\<dc-hostname>
-
-
Expected output must include both:
-
HTTP/testwebdemo
-
HTTP/testwebdemo.example.com
-