
Zero-touch certificate management
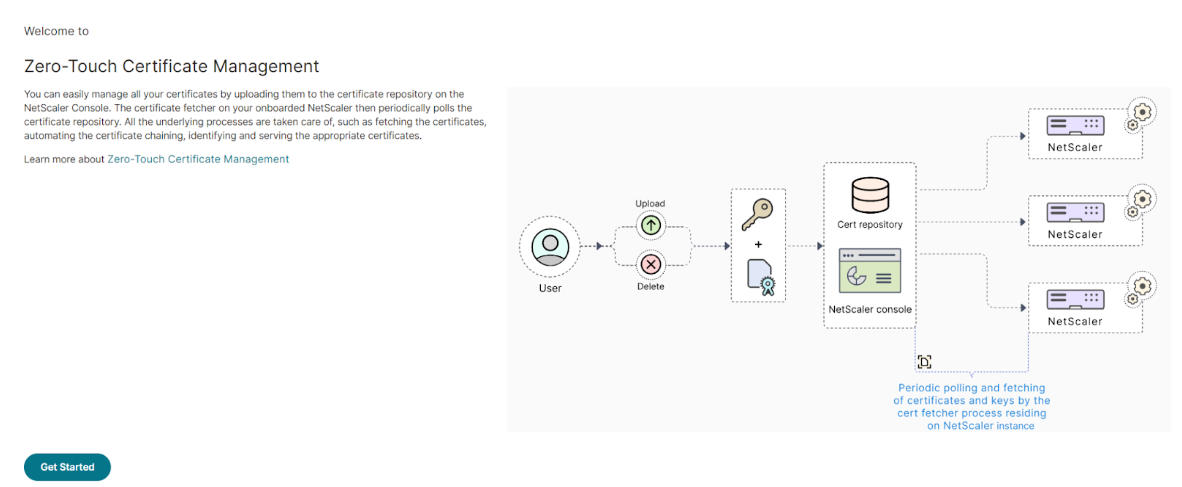
In NetScaler Console, you can configure zero-touch certificate management on the managed NetScaler instances running build 14.1-34.x and later. With zero-touch certificate management, you eliminate manual interventions and build an in-memory zero-touch certificate store to serve the application requests. Navigate to Infrastructure > SSL Dashboard > Zero-Touch Certificate Management to upload all the certificates and keys on NetScaler Console, and enable it on the managed NetScaler instances. NetScaler periodically polls the certificate repository and delivers the necessary certificates as required.
With zero-touch certificate management, the following processes are automatically done by NetScaler®:
-
Adding, binding, and linking the certificates
-
Providing the certificates and keys in a specific order or together
-
Installing and using the suitable certificates based on the requests
-
Deleting the expired certificates during the periodic polling cycle
For more information on how the zero-touch certificate works on NetScaler instances, see NetScaler zero touch certificate management.
As an administrator, you must ensure the following in NetScaler Console:
-
NetScaler instances are running build 14.1-34.x or later and they are managed in NetScaler Console.
-
Upload the certificates (in any format) and keys. Then, enable zero-touch on the managed NetScaler instances.
-
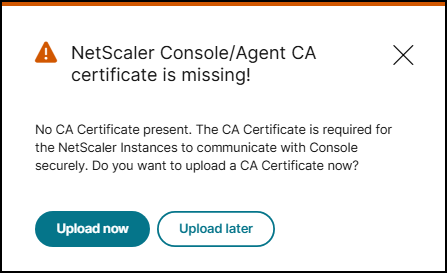
Ensure that a valid CA certificate is present on NetScaler Console. If you have an updated Console CA certificate, upload the certificate before you enable zero-touch on the managed NetScaler instances. The following error message is displayed if no CA certificate present on NetScaler Console:
Related information
Upload certificates
-
Navigate to Infrastructure > SSL Dashboard > Zero-Touch Certificate Management.
-
Click Get Started.
-
NetScaler instances running build 14.1-34.x or later are listed. You can either click Configure zero-touch to enable zero-touch or click Skip to proceed the next step.
-
Click Upload to upload all the certificates (can be in any format, such as .pem, .cer, and .crt).Notes:
-
The certificate or key file must be less than 8192 bytes.
-
If you are uploading multiple certificates or key files, the maximum supported size is 50000 bytes.
-
If the certificates or key files are password-protected, ensure that you provide the password. If the password is not provided, the certificate or the key file is not uploaded.
-
Enable zero-touch certificate management
After you upload the certificates, you must enable zero-touch on the managed NetScaler instances.
-
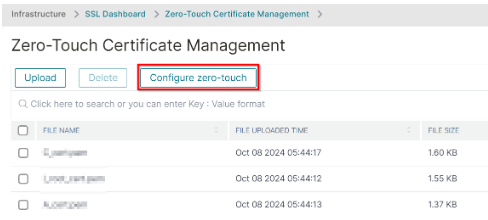
From the Zero-Touch Certificate Management page, click Configure zero-touch.
-
Click Add instances, select the instances, and then click Enable.
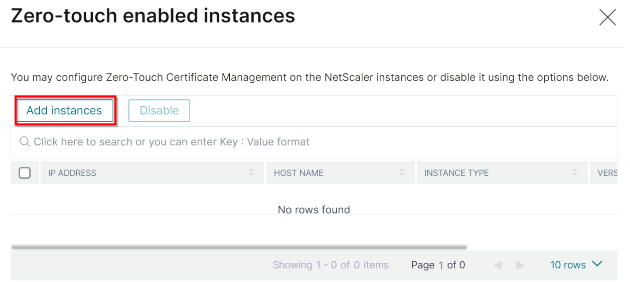
NetScaler Console uses the default polling interval to poll all certificates from the NetScaler instances. You can use the Poll Now option to poll immediately.
In the SSL dashboard, you can also view zero-touch certificate usage that shows details about the active and inactive certificates.
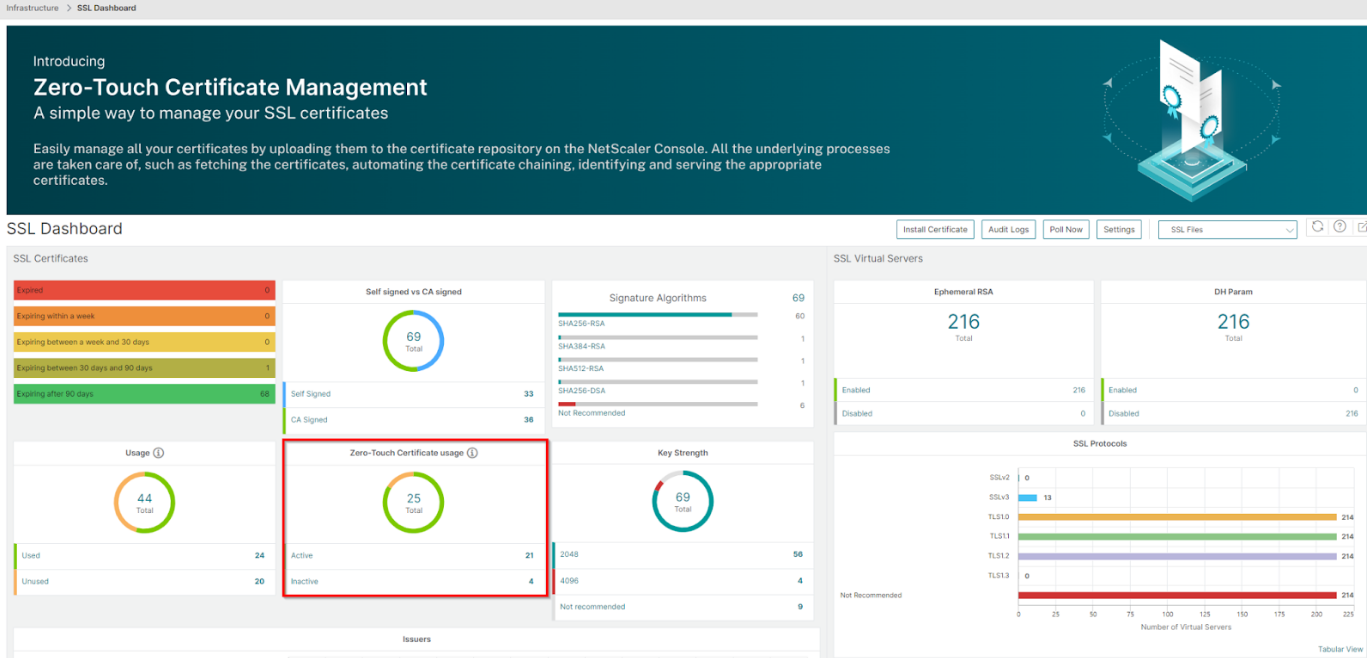
SSL filter mode support
A NetScaler instance fetches the metadata of specific SSL certificates and private keys. This least-privilege approach ensures that instances access only the assets they require, preventing a compromise on one instance from exposing your entire certificate infrastructure. This feature is especially useful for environments with multiple administrators managing a group of NetScaler instances for distinct purposes.
Some of the benefits are:
-
Security segmentation - Restricts metadata access at a per-NetScaler level to minimize the attack surface and adhere to organizational security policies.
-
Streamlined admin experience - Reduces complexity in multi-tenant or departmental deployments by showing administrators only the assets relevant to their group of NetScaler instances.
-
Optimized resource utilization - Prevents system memory bloating by fetching the metadata of only the required SSL certificates and private keys.
The filter mode configuration defines how NetScaler instances and SSL files interact through specific synchronization types. You can manage these settings through NetScaler Console to ensure that only the necessary metadata is fetched by each instance.
| Component | Sync type | Description |
|---|---|---|
| NetScaler Instance | Custom Sync | NetScaler instances in this mode fetch only the metadata for certificates and keys specifically mapped to the instance. |
| NetScaler Instance | Global Sync | NetScaler instances in this mode fetch the metadata for all uploaded certificates and private keys. |
| SSL Files | Custom Files | These files are specifically mapped to NetScaler instances in Custom Sync mode. |
| SSL Files | Global Files | Metadata for these files is fetched by all the NetScaler instances in Global Sync mode. |
Configure filter mode settings
To configure filter mode, define synchronization types for your instances and files. This ensures a secure and optimized distribution of sensitive metadata.
You can upload certificates and private keys directly by using the upload button in the Certificate Files and NetScaler Instances sections of the SSL dashboard.
To configure by using the GUI:
-
Upload new files (day zero) - Navigate to Certificate Files and NetScaler Instances > Upload to add new assets.Select one of the following sync types:
-
GLOBAL - Select to use global sync mode and complete the upload.
-
CUSTOM - Select to use custom sync mode, choose the specific instances for mapping, and then upload the files.
-
-
Move existing files (day N) - To shift certificates and keys from global sync to custom sync mode, select the target NetScaler instances and click Add Existing Files.
-
Select domains - Once instances are selected, choose the relevant domains to trigger the shift. NetScaler Console automatically detects and shifts the corresponding certificates and private key files to custom sync mode.
-
View assets - Navigate to the landing page to view all certificates and private key files mapped to each NetScaler instance in custom sync mode.
-
Switch sync mode - To return instances to global sync mode, click Switch to Global Sync on the landing page.