
NetScaler MPX™ disk encryption through NetScaler Console
Notes:
-
Disk encryption is supported only on NetScaler MPX 9100 instances.
-
Disk encryption for NetScaler MPX 9100 instances can be enabled only in standalone NetScaler Console.
-
Starting from release 14.1-56.x, disk encryption is supported on NetScaler MPX 9100, 16000, and MPX 15000-50G instances manufactured after May 20, 2025.
Disk encryption is essential for securing sensitive data stored on a storage disk. It ensures that even if the physical storage device is compromised, the data remains inaccessible. For NetScaler MPX, disk encryption provides an additional layer of security, especially for critical directories such as
/var/core, /var/crash, /var/log, /var/nslog, /flash/nsconfig, /var/nstrace, and /var/temp.
Some of the benefits of disk encryption are:
-
Data Protection at Rest: Prevents unauthorized access to sensitive data when the system is powered off.
-
Compliance: Helps meet regulatory and compliance requirements for data security.
-
Mitigation of Physical Theft Risks: Ensures that the sensitive and proprietary data on stolen or misplaced storage devices cannot be accessed.
-
Secure Boot Process: Requires authenticated credentials during boot-up, ensuring only authorized users can access the system.
-
Enhanced Security for Critical Data: Protects logs, configurations, and crash data from unauthorized access.
The disk encryption on NetScaler MPX 9100 is supported only in build 14.1-47.x shipped after May 20, 2025 and can be enabled through NetScaler Console running build 14.1-47.x. The disk encryption of each NetScaler MPX instance requires a key that is managed by the Hardware Security Module (HSM) server, which is the Thales CipherTrust Manager. NetScaler MPX instances use NetScaler Console to fetch the key from the HSM server.
The disk encryption on NetScaler MPX 9100, 16000,and MPX 15000-50G is supported only in build 14.1-56.x shipped before May 20, 2025 and can be enabled through NetScaler Console running build 14.1-56.x. To enable the feature, see Instance disk encryption through NetScaler Console.
Note:
NetScaler Console supports Thales CipherTrust Manager as the HSM server.
For successful encryption, you must add the NetScaler MPX instance serial number in the HSM server. After adding the NetScaler MPX instance serial number, NetScaler Console fetches the key using the instance serial number from the HSM server.
After the disk encryption is complete:
-
If the NetScaler MPX instance disk is removed, the data is not accessible.
-
If you reboot the NetScaler MPX instance, the reboot is successful only after NetScaler Console authenticates the NetScaler MPX instance using its serial number from the HSM server.
Prerequisites
Ensure that:
-
For 9100, the NetScaler MPX instances are running build 14.1-47.x and are managed on NetScaler Console on-premises running build 14.1-47.x.Note:Disk Encryption is not supported on NetScaler Console service.
-
You have added the NetScaler MPX instance serial number in the HSM (Thales CipherTrust Manager) server for NetScaler Console to share the key after authenticating the instance using its serial number.
-
The NetScaler MPX instance is backed up through NetScaler Console. For more information, see Backup and restore NetScaler instances.
-
For MPX 16000 and MPX 15000-50G, NetScaler Console on-premises is on release 14.1 build 56.x.
Add the instance serial number in the HSM (Thales CipherTrust Manager) server
Before you encrypt the NetScaler MPX instance, you must add the NetScaler MPX instance serial number in the HSM server.
-
Log on to the Thales CipherTrust Manager server.
-
In the left pane, select Keys and click Add Key.
-
Under Key Labels, add a label with the name
serialnumber, specify the instance serial number in the Label Value text box, click the + button to add the key details, and then click Add Key.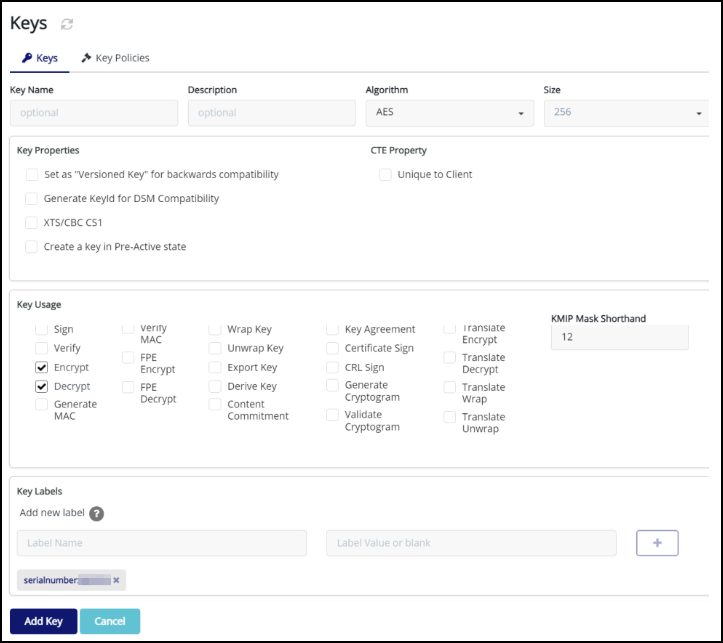
-
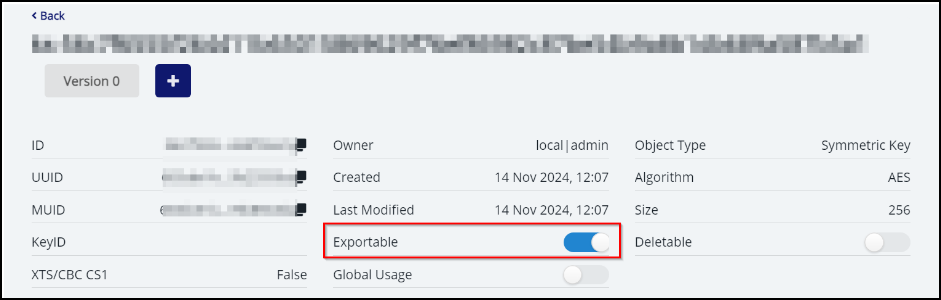
In the key details page, you must enable the Exportable toggle for this key.
 Notes:
-
The maximum supported key size is 511 bytes. For example: AES-128 and AES-256 are supported. RSA keys between 512 and 4096 are not supported.
-
We recommend that you use only the supported key size. NetScaler® instance fails if you configure an unsupported key size.
-
Ensure that you specify the correct serial number. If there is a mismatch in the serial number, the encryption process does not start.
-
We recommend that you copy the instance serial number from NetScaler Console. In the NetScaler Console GUI, navigate to Infrastructure > Instance > MPX, select the NetScaler MPX instance, and from the Select Action list, click Get Serial Number.
-
Instance disk encryption through NetScaler Console
Before you begin the disk encryption, ensure that you take the MPX instance backup through NetScaler Console. For more information, see Configure instance backup.
After you take the backup:
-
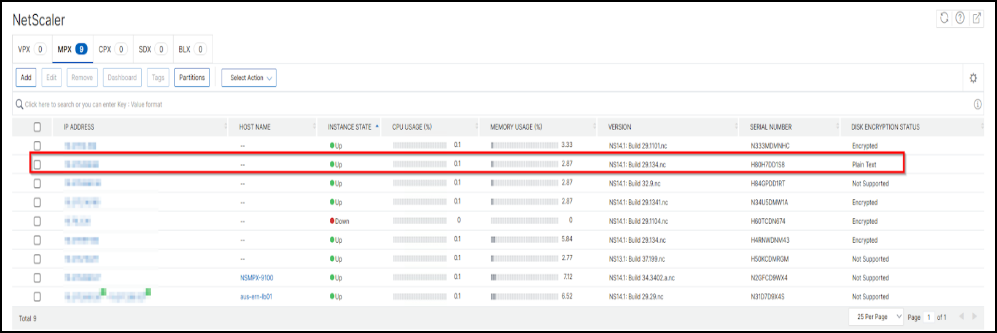
Navigate to Infrastructure > Instances > NetScaler.
-
In the NetScaler MPX tab, you can see the managed instances details. The instance that you want to encrypt displays Plain Text under Disk Encryption Status.
-
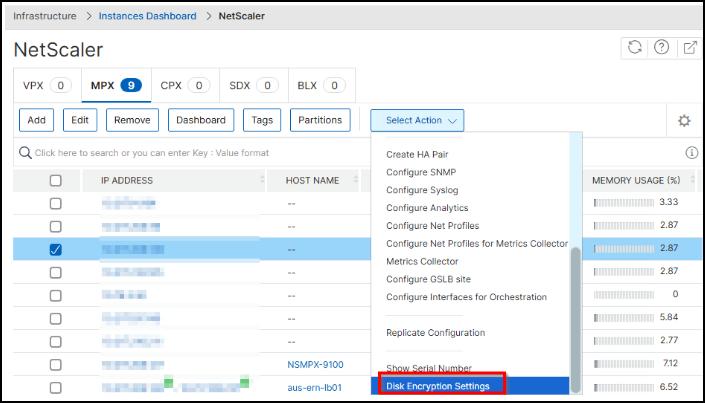
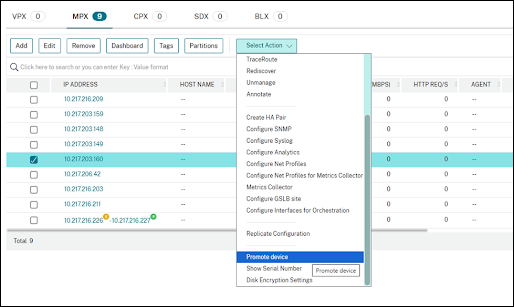
From the Select Action list, click Disk Encryption Settings.
-
From the Select Action list and click Promote device .Note:Selecting the Promote device option is mandatory to activate the Disk Encryption feature specifically for MPX appliances manufactured before May 20, 2025. Allow approximately 30 minutes for the MPX appliance to complete its conversion into a disk encryption-enabled device.
-
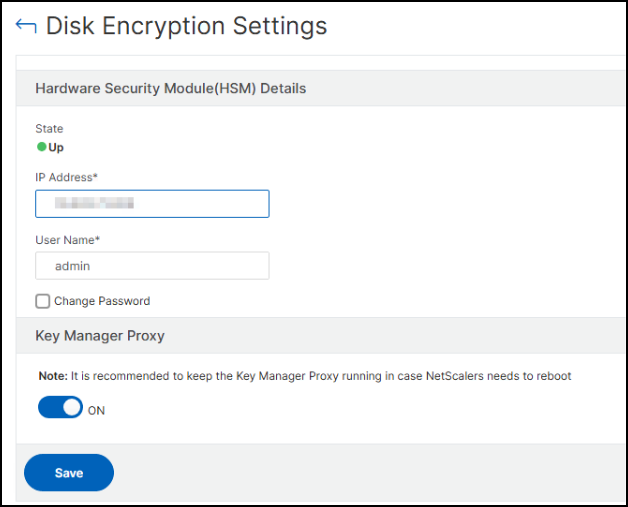
In the Disk Encryption Settings page:
-
Specify the IP address, user name, and password of the HSM server from where NetScaler Console can fetch the encryption key by using the serial number.
-
Enable the Key Manager Proxy. You must enable this option to continue with the disk encryption process.Note:Ensure that the Key Manager Proxy is always enabled even after the encryption is complete. If you disable this option, the encrypted instance will not reboot successfully for scenarios, such as after you upgrade the instance or force a reboot of the instance.
-
Click Save.
-
-
Select the instance and from the Select Action list, click Encrypt File System.
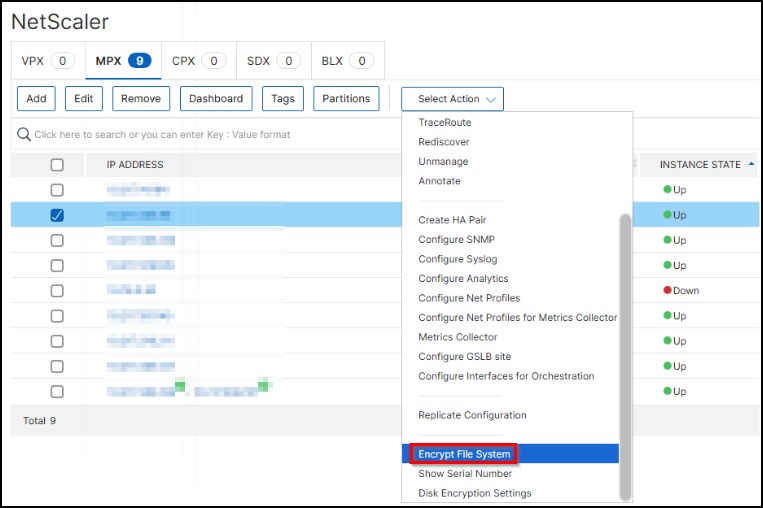 A confirmation window appears. Click Yes to proceed.
 -
A confirmation message appears in NetScaler Console stating that the encryption is started and the instance will be in Down status for approximately 30 minutes.
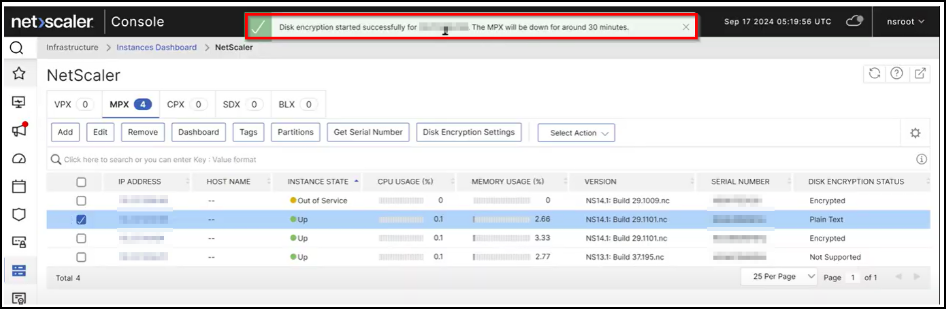 The instance state appears as Encryption in progress.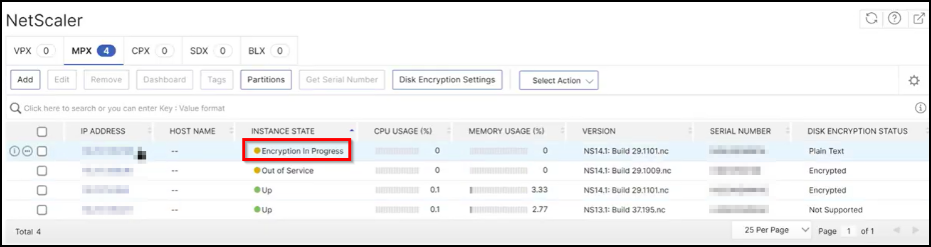
Validation after encryption
The instance encryption is completed in approximately 30 minutes. After the encryption is complete:
-
You can log on to the NetScaler MPX instance using an SSH client and then validate if the encryption is successful by using the following command:
show filesystemencryptionBefore encryption After encryption 

-
You can reboot your NetScaler MPX instance and validate if the reboot is completed after the encryption as shown in the following example:
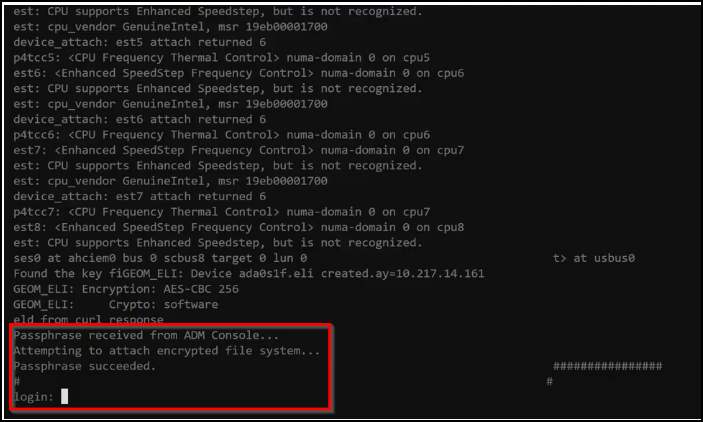
-
You can use the following command to validate if Key Manager Proxy is successfully configured and is accessible from NetScaler:
show keymanagerproxy Note:After the encryption, NetScaler Console uses
mpx_disk_encryption_default_profileto access the NetScaler MPX instance. Thempx_disk_encryption_default_profilehas the default credentials (nsroot/nsroot).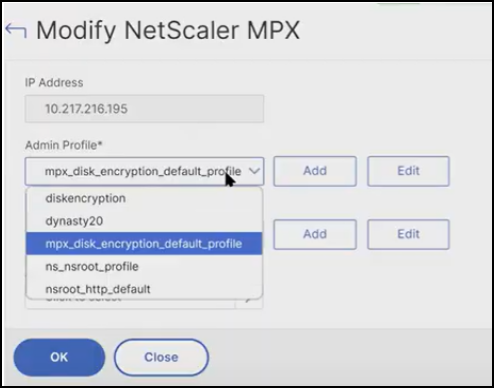
Restore NetScaler MPX instance after encryption
If you have changed the default password (nsroot) before taking the backup, ensure that the profile that is used during the backup is available in NetScaler Console after encryption.