
NetScaler Console on Red Hat OpenShift Virtualization
Note:
Support for installing NetScaler Console on Red Hat® OpenShift® Virtualization (RHOCPV) is available in NetScaler Console release 14.1-72.xx and later.
You can deploy NetScaler® Console on Red Hat® OpenShift® Virtualization (RHOCPV) as a virtual machine. This allows you to manage NetScaler instances in OpenShift-based environments.
Related information
Hardware requirements
| Component | Minimum requirements |
|---|---|
| CPU | Minimum 8 vCPUs |
| Memory (RAM) | Minimum 32 GiB |
| Hard Disk | Minimum 120 GiB (boot disk) |
Note:
The hardware requirements apply to the NetScaler Console virtual machine deployed on RHOCPV. The values are based on the recommended General Purpose (U series – 2xlarge) instance type used during deployment. Ensure that your RHOCPV cluster nodes have sufficient capacity to run the NetScaler Console virtual machine based on these requirements.
Prerequisites
Platform requirements
-
RHOCPV (OpenShift Virtualization) cluster deployed
-
Access to OpenShift web console or CLI (oc)
-
KubeVirt enabled
Note:
For NetScaler deployed on RHOCPV, the minimum supported version is 14.1–66.64. For more information, see the NetScaler VPX instance on Red Hat OpenShift® Virtualization (RHOCPV).
Deployment architecture
-
NetScaler Console runs as a virtual machine on RHOCPV
-
NetScaler Agent can be deployed on RHOCPV
Install NetScaler Console on Red Hat OpenShift Virtualization
Perform the following steps to install NetScaler Console on RHOCPV.
Step 1 - Prepare the environment
-
Ensure that your RHOCPV cluster is up and running.
-
Verify that you have administrator access to create the virtual machines.
-
Ensure that you have the virtualization operator enabled to create and manage virtual machines.
Step 2 - Download the NetScaler Console setup file
To download the NetScaler Console setup file:
-
Log on to
<https://www.citrix.com/downloads>page. -
Select NetScaler Console from the product list.
-
Under Release 14.1, select the 14.1-72.x or later build. The selected build page is displayed.
-
On the Jump to Download list, select NetScaler Console/NetScaler Console Agent image for KVM, 14.1 Build 72.57.
-
Click Download File, accept the EULA, and download the compressed image file to any folder on your local machine.
Step 3 - Upload the image to the RHOCPV bootable volume
-
Log in to your Red Hat OpenShift console.
-
In the dashboard, navigate to Virtualization > Bootable Volumes.
-
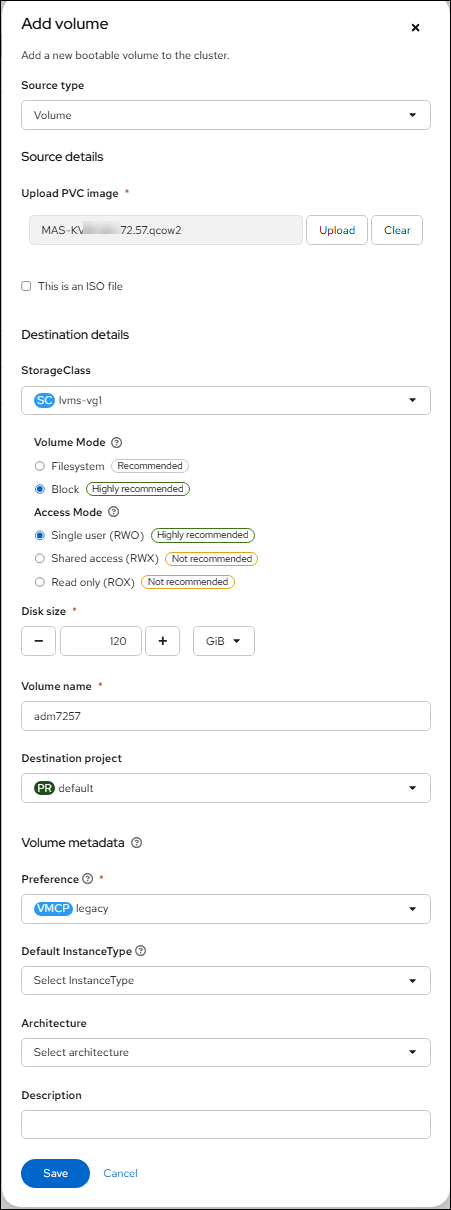
Click Add volume in the top-right corner and select with form to add a bootable volume to the cluster.
-
In the Upload PVC image field, upload the NetScaler Console/Agent image file with
.qcow2extension. -
Specify a Volume name and select the Storage available.
-
Specify the Volume metadata Preference field as legacy.
-
Click Save.
Step 4 - Create the virtual machine
To create a virtual machine from instance type:
-
Go to Virtualization > Virtual Machines and click Create.
-
Select the InstanceTypes tab.
-
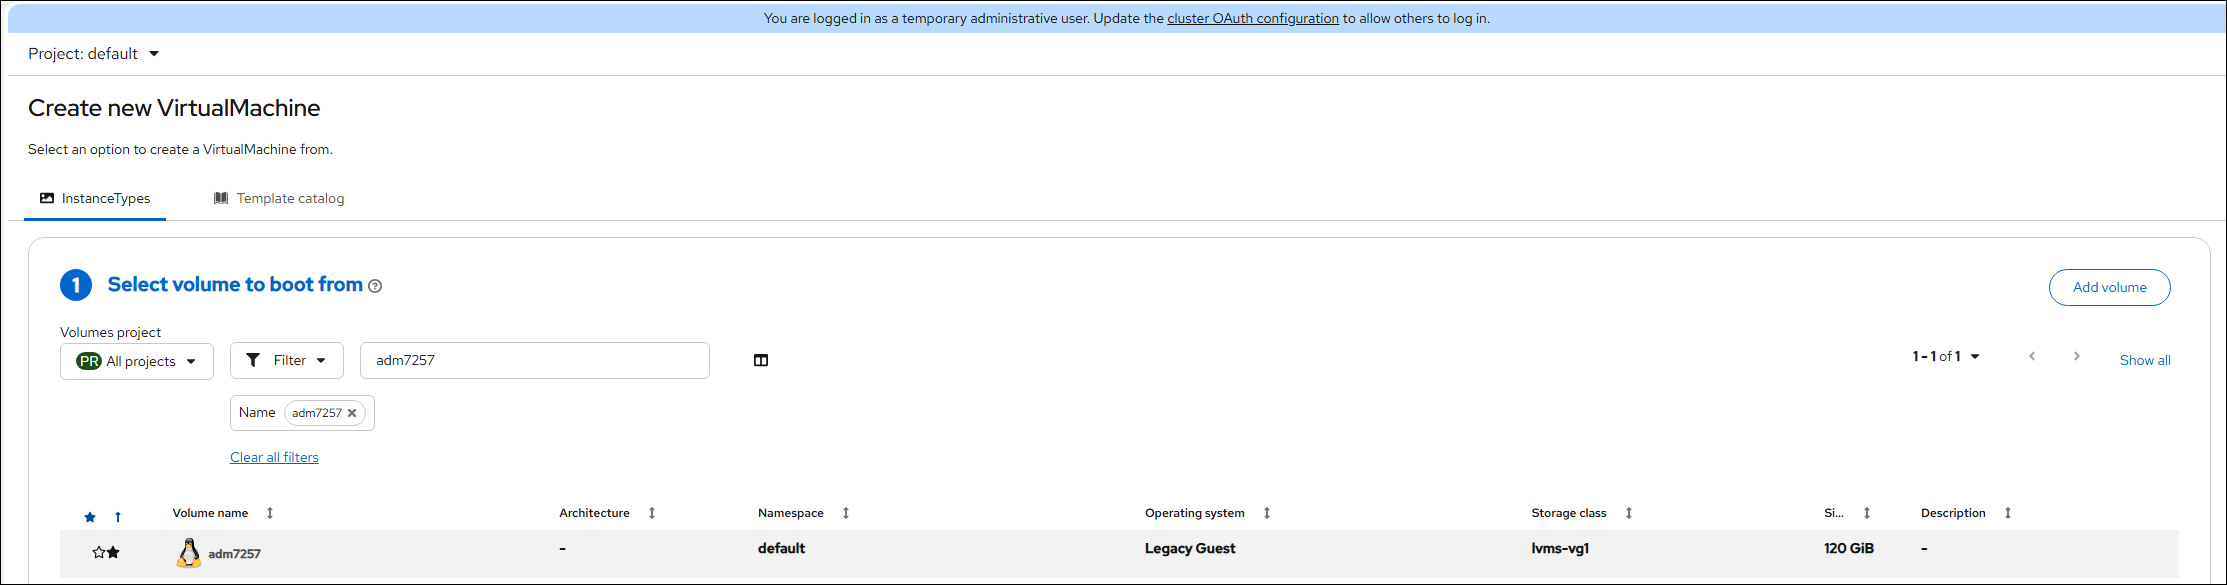
Select the bootable volume that you created in step 3.
-
Select an instance type that matches the virtual machine hardware specifications for your NetScaler Console model. For details, see Hardware requirements.
-
Enter a name for the virtual machine.
-
Click Customize Virtual Machine.
-
Detach the default disk (here
cloudinitdesk) if present and retain the 120 GB bootable disk.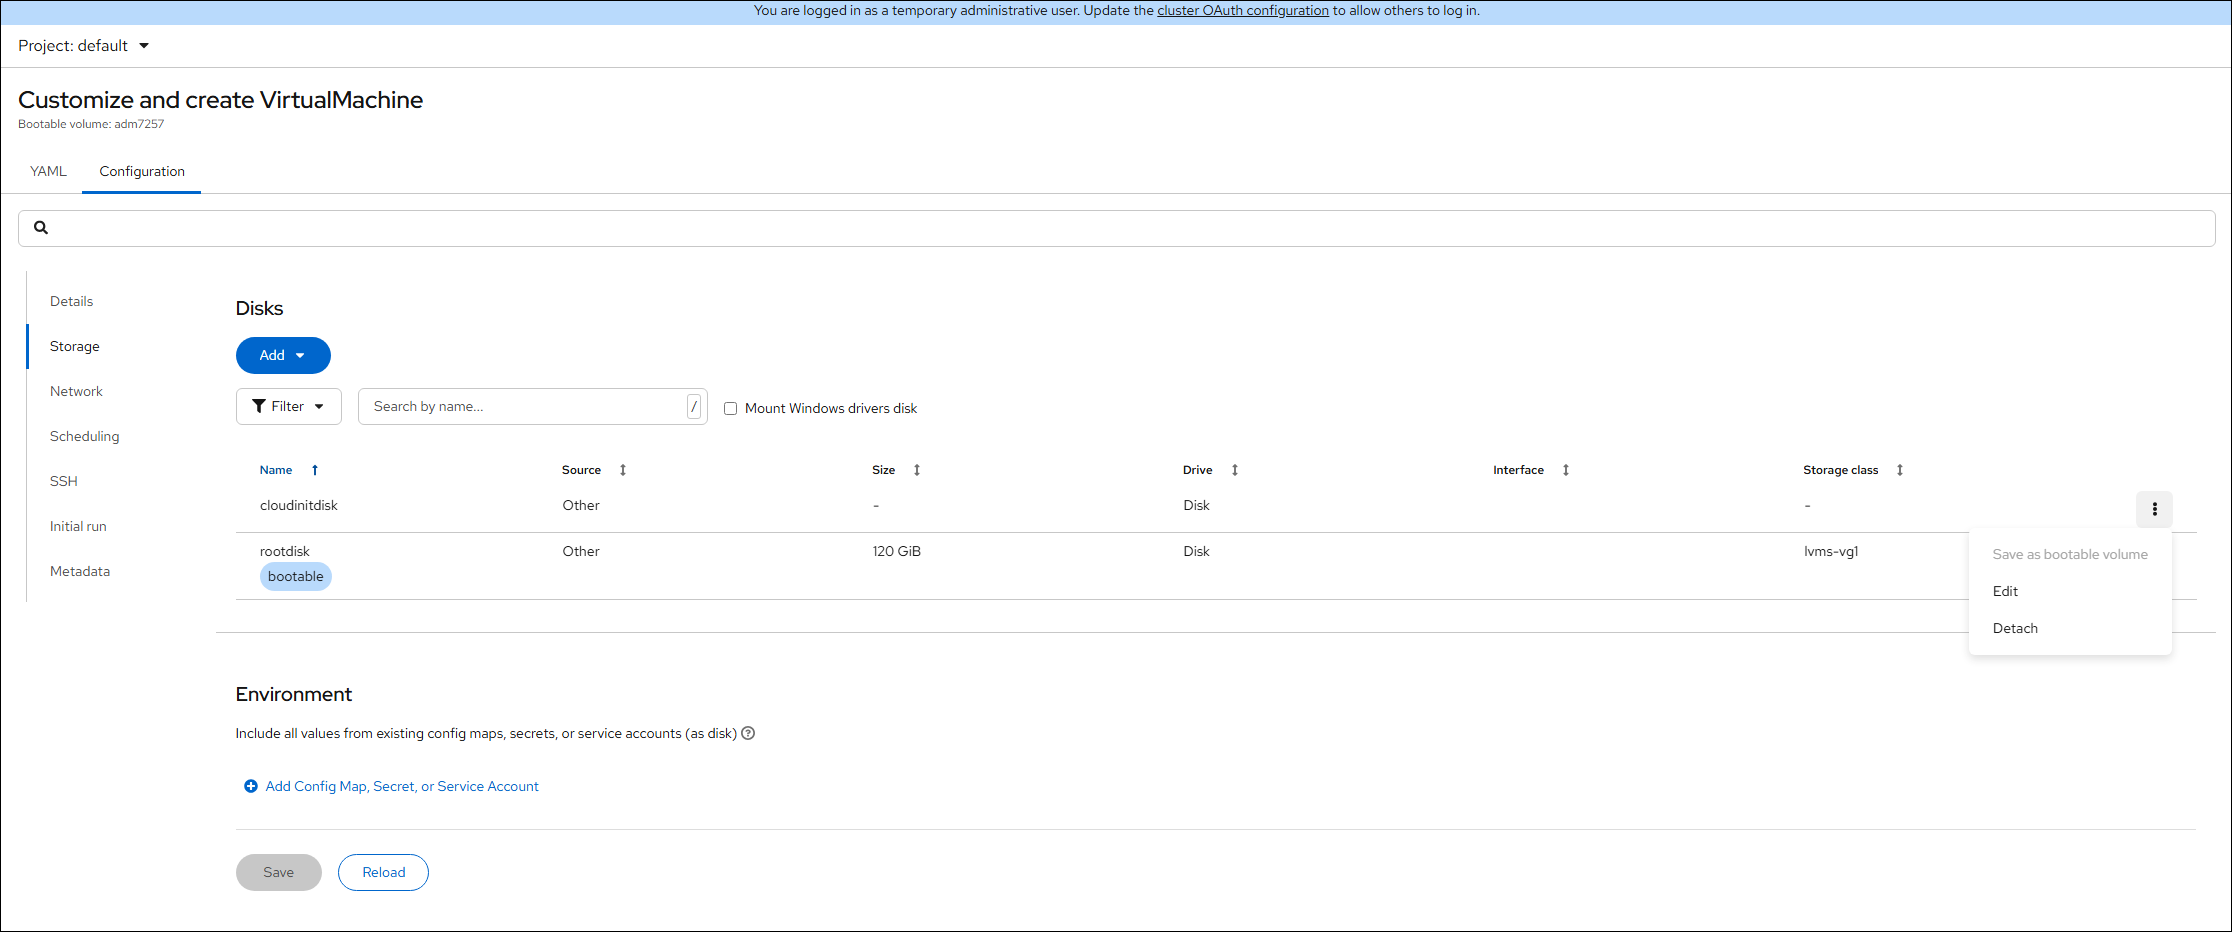
-
In the Network section, select
virtioas the interface model, and then choose the required network from the list.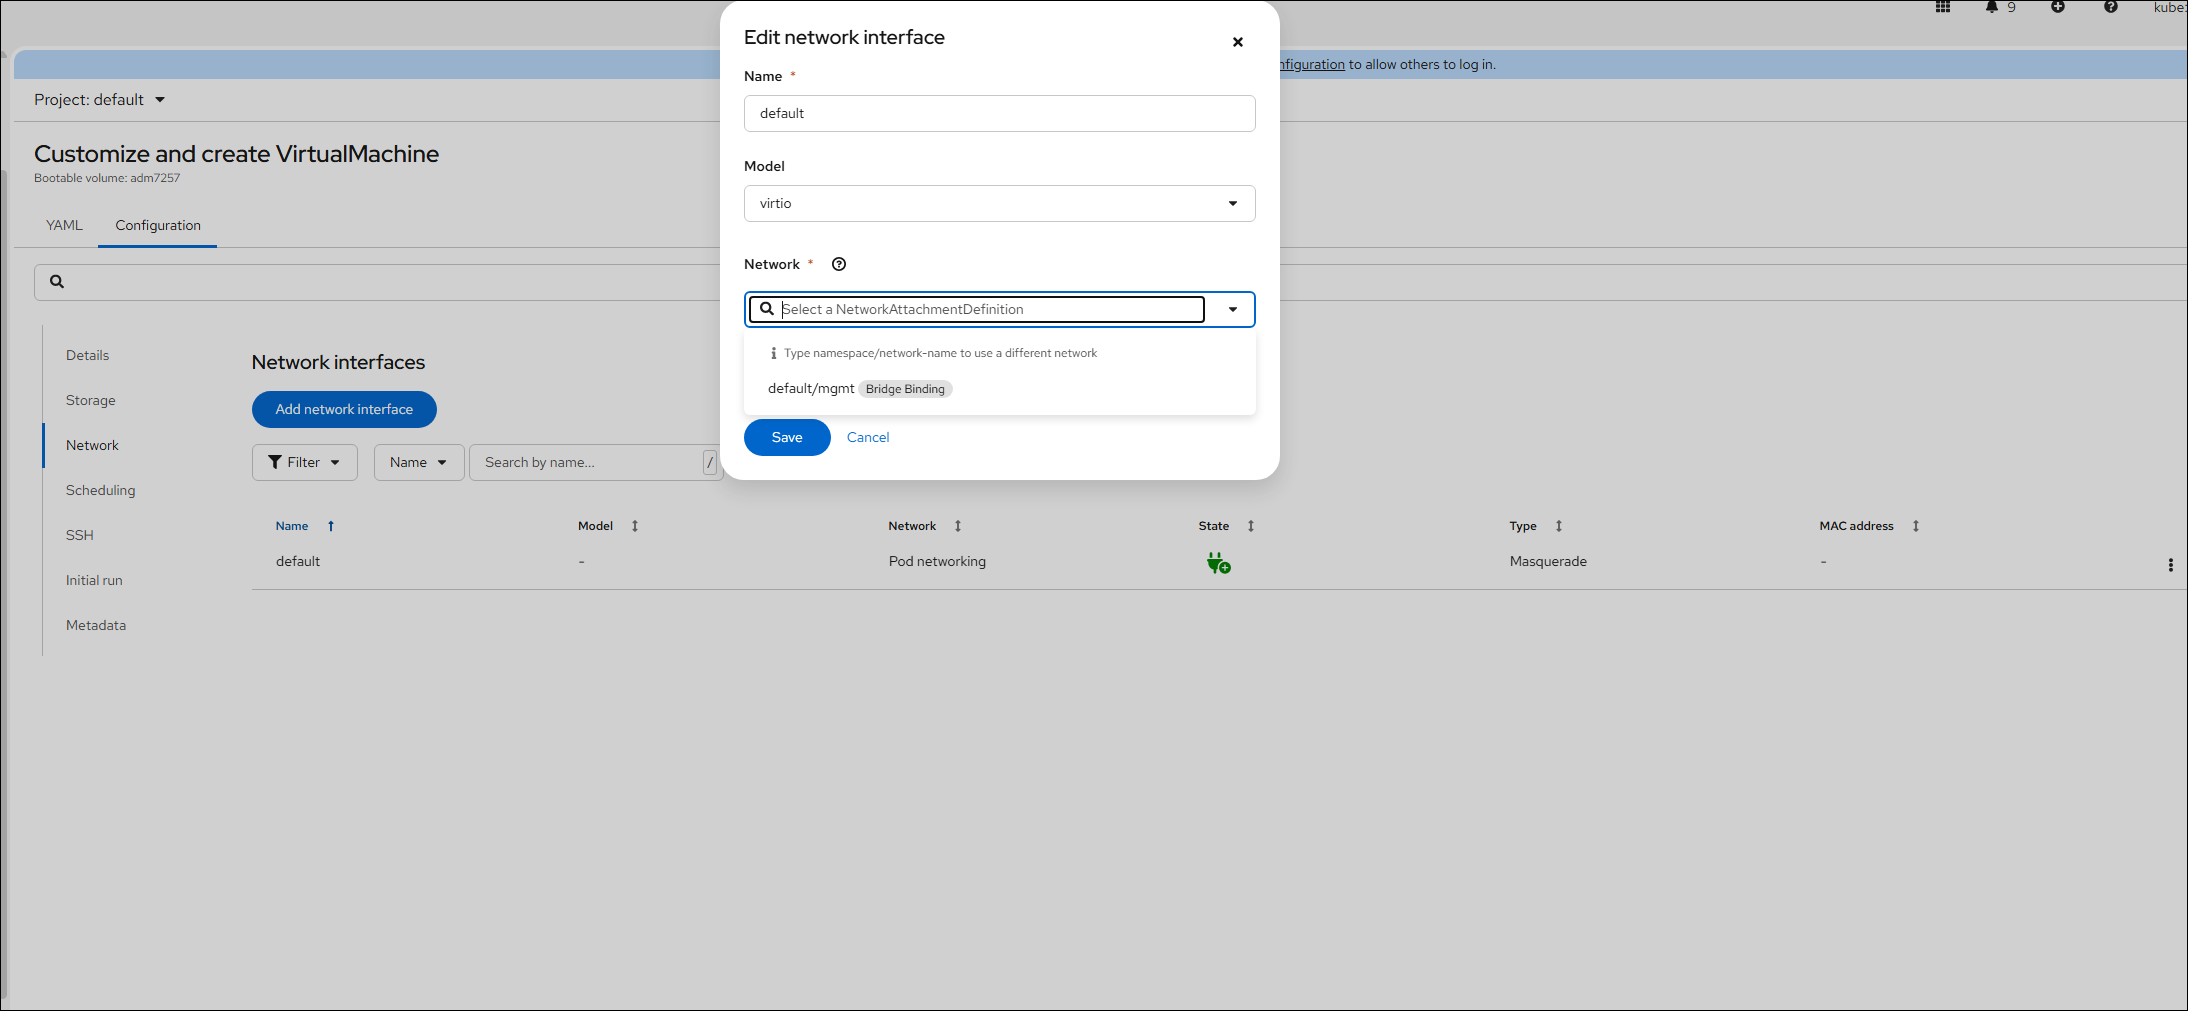
-
Click Create VirtualMachine.
Step 5. Start the virtual machine
Start the virtual machine and verify that it reaches the running state.
Step 6. Access NetScaler Console
Access NetScaler Console using the following URL:
https://<console-ip-address>