
Back up and restore NetScaler instances
You can back up the current state of a NetScaler instance and later use the backed-up files to restore it to the same state. Always back up an instance before you upgrade it or for precautionary reasons. A backup of a stable system enables you to restore it back to a stable point if it becomes unstable.
There are multiple ways to perform backups and restores on a NetScaler instance. You can manually backup and restore NetScaler configurations using the GUI and CLI. You can also use NetScaler ADM to perform automatic backups and manual restores.
NetScaler ADM backs up the current state of your managed NetScaler instances by using NITRO calls and the Secure Shell (SSH) and Secure Copy (SCP) protocols.
NetScaler ADM creates a complete backup and restores the following NetScaler instance types:
-
NetScaler SDX
-
NetScaler VPX
-
NetScaler MPX
-
NetScaler BLX
For more information, see Backup and restore an ADC instance.
Note
-
Ensure that the NetScaler® ADM profile has the admin access to backup and restore ADC instances.
-
From NetScaler ADM, you cannot perform the backup and restore operation on a NetScaler cluster.
-
You cannot use the backup file taken from one instance to restore a different instance.
The backed-up files are stored as a compressed TAR file in the following directory:
/var/mps/tenants/root/device_backup/
To avoid issues due to non-availability of disk space, you can save a maximum of 50 backup files per ADC instance in this directory.
To back up and restore NetScaler instances, you must first configure the backup settings on NetScaler ADM. After configuring the settings, you can select a single NetScaler instance or multiple instances and create a backup of the configuration files in these instances. If necessary, you can also restore the NetScaler instances by using these backed-up files.
Related information
Configure instance backup settings
The Instance Backup Settings page allows you to configure settings on NetScaler ADM to back up a selected NetScaler instance or multiple instances:
-
In NetScaler ADM, navigate to Settings \> Administration.
-
In Backup, select Configure System and Instance backup.
-
Select Instance and specify the following:
-
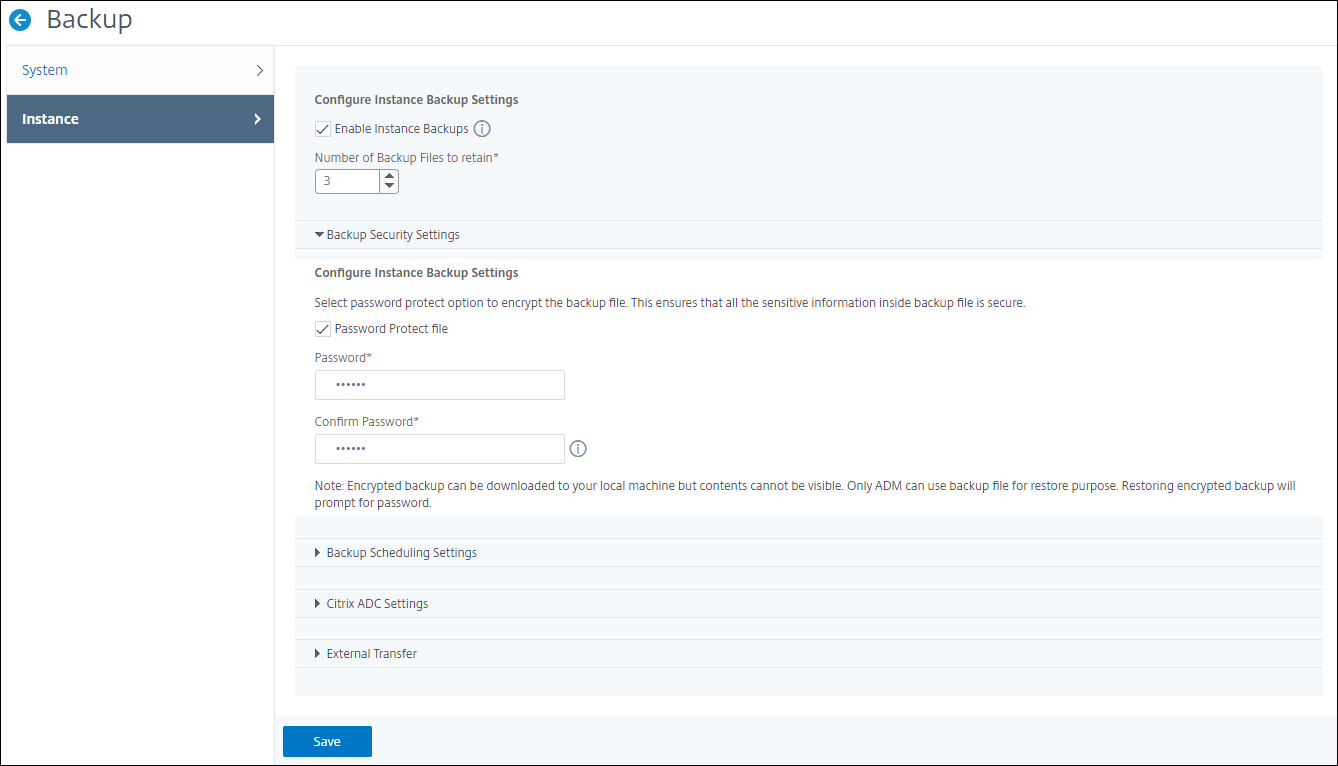
Enable Instance Backups: By default, NetScaler ADM is enabled for taking backups of NetScaler instances. Clear this option if you do not want to create backup files for the instances.
-
Password Protect File: (optional) Select the password protect option to encrypt the backup file. Encrypting the backup file ensures that all the sensitive information inside the backup file is secure.NoteYou can download the encrypted backup file to your local machine, but you cannot open the file either with the NetScaler ADM GUI or with any text editor. You are prompted to provide the password when restoring the encrypted backup file. You can, however, open an unencrypted backup file on your system.
-
Number of Backup Files to retain: Specify the number of backup files to retain in NetScaler ADM. You can retain up to 50 backup files per ADC instance. The default is three backup files.NoteEach backup file accounts for some storage requirement. Citrix recommends that you store an optimal number of NetScaler backup files on NetScaler ADM as per your requirement.
-
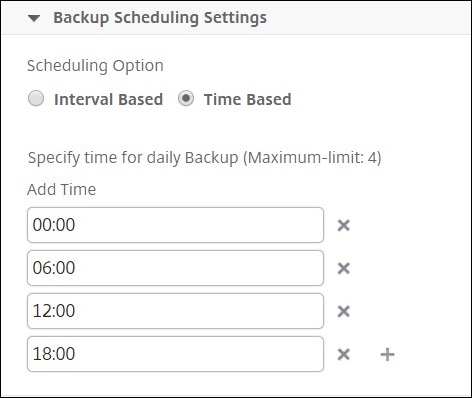
Backup scheduling settings: (optional) There are two options available for creating backup files, though you can use only one option at a time:
-
The default backup scheduling option is "interval-based." A backup file is created in NetScaler ADM after the specified interval elapses. The default backup interval is 12 hours.
-
You can also change the type of scheduled backups to "time-based." In this option, specify the time in
hours:minutesformat to back up instances at the specified time. NetScaler ADM allows a maximum of four daily backups to happen on the instances.
-
-
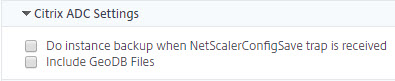
NetScaler settings: (optional) By default, NetScaler ADM does not create a backup file when it receives the “NetScalerConfigSave” trap. But, you can enable the option to create a backup file whenever a NetScaler instance sends a “NetScalerConfigSave” trap to NetScaler ADM. A NetScaler instance sends “NetScalerConfigSave” every time the configuration on the instance is saved.
-
Geodatabase files: (optional) By default, NetScaler ADM does not back up the GeoDatabase files. You can enable the option to create a backup of these files also.
-
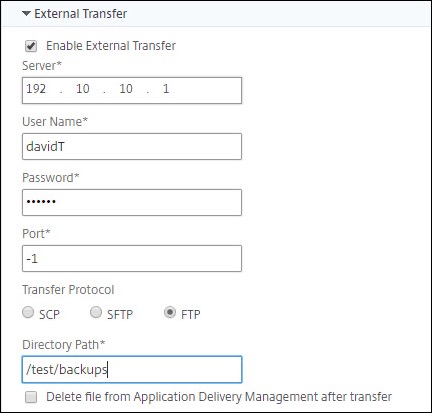
External Transfer:(optional) NetScaler ADM allows you to transfer the NetScaler instance backup files to an external location:
-
Specify the IP address of the location.
-
Specify the user name and the password of the external server to which you want to transfer the backup files.
-
Specify the transfer protocol and the port number.
-
You can specify the directory path where the file must be stored.
-
Optional, you can also delete the backup file from NetScaler ADM after transferring it to the external server.
 NoteNetScaler ADM sends an SNMP trap or a Syslog notification to itself when there is a backup failure for any of the selected NetScaler instances.
 -
-
Create a backup for a selected NetScaler instance by using NetScaler ADM
Perform this task if you want to back up a selected NetScaler instance or multiple instances:
-
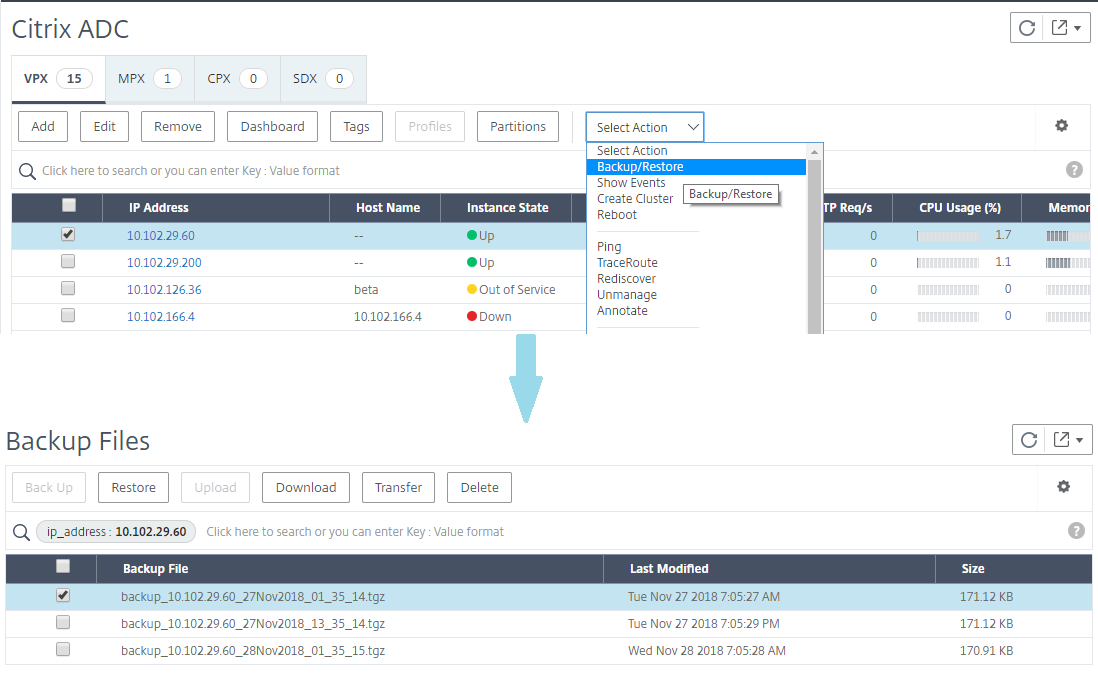
In NetScaler ADM, navigate to Infrastructure > Instances. Under Instances, select the type of instances (for example, NetScaler VPX) to display on the screen.
-
Select the instance that you want to back up.
-
For MPX, VPX, and BLX instance, select Backup/Restore from the Select Action list.
-
For an SDX instance, click Backup/Restore.
-
-
On the Backup Files page, click Back Up.
-
You can specify whether to encrypt your backup file for more security. You can either enter your password or use the global password that you previously specified on the Instance Backup Settings page.
-
Click Continue.
Restore a NetScaler instance by using NetScaler ADM
Note:
If you have NetScaler instances in a HA pair, you need to note the following:
-
Restore the same instance from which the backup file was created. For example, let us consider a scenario that a backup was taken from the primary instance of the HA pair. During the restore process, ensure that you are restoring the same instance, even if it is no longer the primary instance.
-
When you initiate the restore process on the primary ADC instance, you cannot access the primary instance and the secondary instance gets changed to STAYSECONDARY. Once the restore process is completed on the primary instance, the secondary ADC instance changes from STAYSECONDARY to ENABLED mode and becomes part of the HA pair again. You can expect a possible downtime on the primary instance until the restore process gets completed.
Perform this task to restore a NetScaler instance by using the backup file that you created earlier:
-
Navigate to Infrastructure > Instances, select the instance that you want to restore, and then click View Backup.
-
On the Backup Files page, select the backup file containing the settings that you want to restore, and then click Restore.
Restore a NetScaler SDX appliance using NetScaler ADM
In NetScaler ADM, the backup of the NetScaler SDX appliance includes the following:
-
NetScaler instances hosted on the appliance
-
SVM SSL certificates and keys
-
Instance prune settings (in XML format)
-
Instance backup settings (in XML format)
-
SSL certificate poll settings (in XML format)
-
SVM db file
-
NetScaler config files of devices present on SDX
-
NetScaler build images
-
NetScaler XVA images, these images are stored in the following location:
/var/mps/sdx_images/ -
SDX Single Bundle Image (SVM+XS)
-
Third Party instance images (if provisioned)
Restore your NetScaler SDX appliance to the configuration available in the backup file. During appliance restore, the entire current configuration is deleted.
If you are restoring the NetScaler SDX appliance by using a backup of a different NetScaler SDX appliance, ensure that you add the licenses and configure the new appliance's Management Service network settings to match the settings in the backup file before you start the restore process. That is, the new appliance must be licensed and meet the minimum license requirements of the backup file. For example, if the backup had five VPX instances with a total of 5 GB, then the new appliance must also be able to support these requirements. Or if the backup appliance had a platinum license, the new appliance must have the same or higher license. Network settings, such as IP address, netmask, gateway, XenServer IP address, and DNS server must be properly configured on the new appliance.
Before you restore the SDX appliance, ensure that the backed-up SDX appliance platform variant is the same as the appliance. You cannot restore from a different platform variant.
Note
Before you restore an SDX RMA appliance, ensure that the backed-up version is either the same or higher than the RMA version.
To restore the SDX appliance from the backed-up file:
-
In the NetScaler ADM GUI, navigate to Infrastructure > Instances > NetScaler.
-
Click Backup/Restore.
-
Select the backup file of the same instance that you want to restore.
-
Click Repackage Backup.When the SDX appliance is backed up, the XVA files and images are stored separately to save the network bandwidth and the disk space. Therefore, you must repackage the backed-up file before you restore the SDX appliance.When you repackage the backup file, it includes all the backed-up files together to restore the SDX appliance. The repackaged backup file ensures the successful restoration of the SDX appliance.
-
Select the backup file that is repackaged and click Restore.