
Customize the user portal for VPN users
NetScaler Gateway allows administrators to customize the appearance of the user portal accessed by VPN users. You can select from a set of pre-supplied themes or use one as a template to create a fully customized or branded portal.
Using the configuration utility, you can customize a theme by adding new logos, background images, custom input box labels, and various other attributes of the CSS-based portal design. The built-in portal themes include content for five languages: English, French, Spanish, German, and Japanese. The language presented to the user is automatically determined based on the locale settings of their web browsers.
You can create a custom EULA that is presented to VPN users before they are allowed to sign in. The EULA feature supports locale-specific versions of a EULA, which are presented to users based on their web browsers reported locales.
Both portal themes and EULA configurations can be bound independently at the VPN virtual server and VPN global levels.
Important:
NetScaler® does not support customization that requires code modifications and does not offer support to resolve issues beyond reverting to a default theme.
Apply a portal theme
Starting from release 13.0 build 67.43, the VPN portal is configured to use the RfWebUI theme, by default. Previously, the
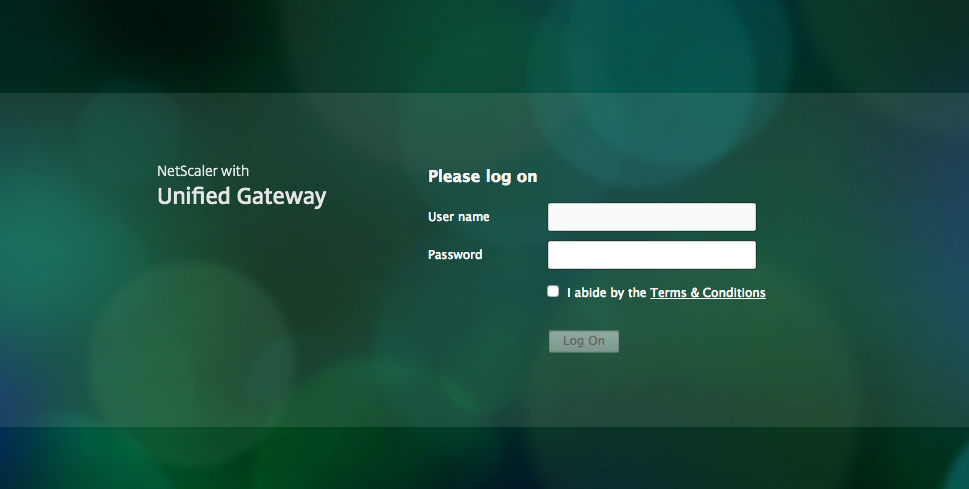
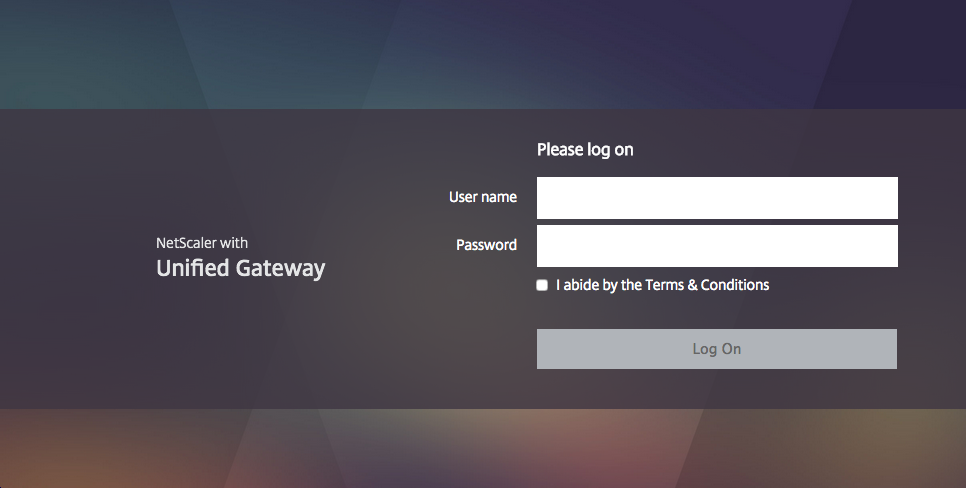
Caxton theme was the default theme. You can also apply the Green bubble and X1 themes.
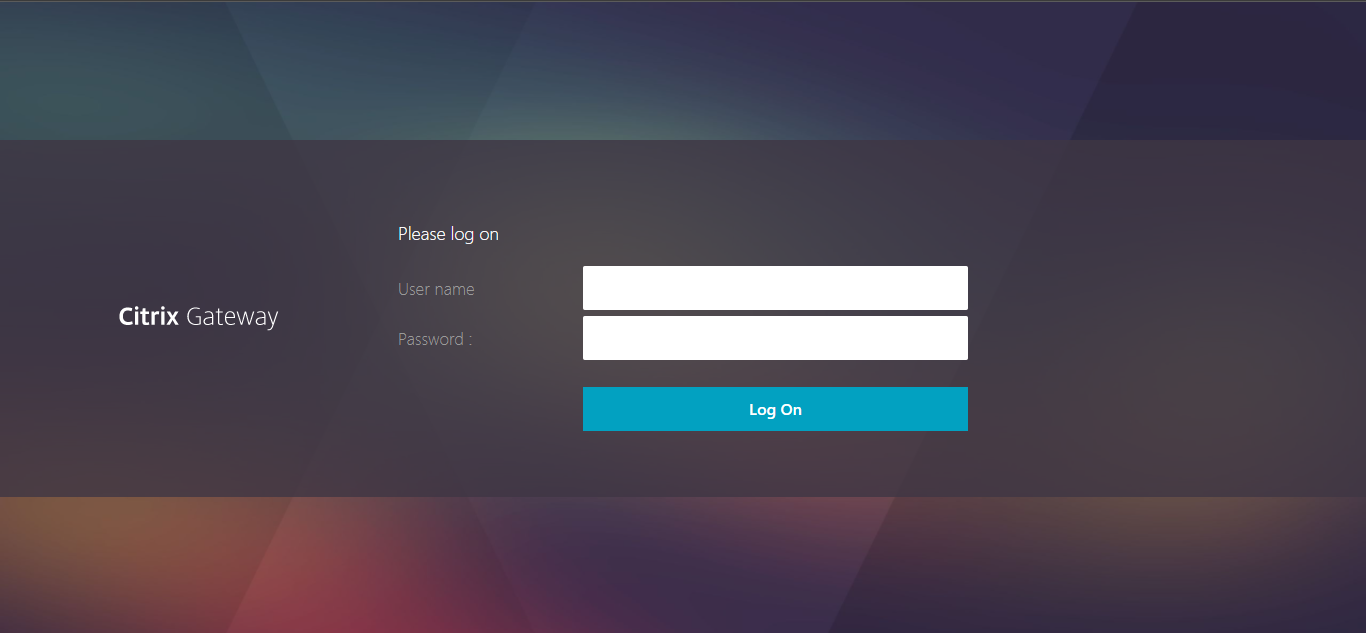
Caxton theme
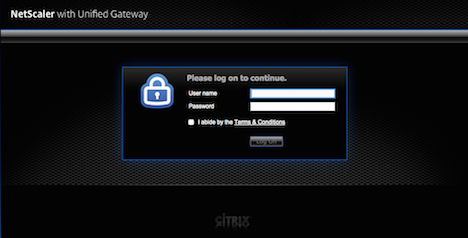
Green bubble theme
X1 theme
You can apply any of the supplied themes directly to a VPN virtual server or as a global VPN binding.
Bind a portal theme to a VPN virtual server
You can bind a portal theme on an existing virtual server or when creating a new virtual server.
Bind a portal theme to a VPN virtual server by using the CLI
At the command prompt, type;
bind vpn vserver <name> - portaltheme <name>
Bind a portal theme to a VPN virtual server by using the GUI
-
On the Configuration tab, Navigate to NetScaler Gateway and click Virtual Servers.
-
Select a virtual server, and then click Edit.
-
If a portal theme has not yet been bound to the virtual server, click Portal Theme under Advanced Settings in the details pane. Otherwise, the Portal Theme option is already expanded in the details pane.
-
In the details pane, under Portal Themes, click No Portal Theme to expand the Portal Theme binding window.
-
ClickClick to select. -
In the Portal Themes window, click a theme name, and then click Select.
-
Click Bind.
-
Click Done.
If you are creating a VPN virtual server, you can follow the steps in the previous procedure starting with step 3 while in the VPN virtual server edit pane to bind a Portal Theme.
Bind a portal theme to VPN global
Bind a portal theme to VPN global by using the CLI
 At the command prompt, type;
bind vpn global portaltheme <name>
Bind a portal theme to VPN global by using the GUI
-
On the Configuration tab, Navigate to NetScaler Gateway.
-
In the main details pane, click NetScaler Gateway Policy Manager.
-
Click the '+' icon.
-
In the Bind Point list, select Resources.
-
In the Connection Type list, select Portal Theme.
-
Click Continue.
-
In the Bind Point screen, click Add Binding.
-
Click Click to select.
-
In the Portal Themes window, click a theme name, and then click Select.
-
Click Bind.
-
Click Close.
-
Click Done.
Note:
After making the changes, use the ‘save ns config’ command on the command line or click the save icon in the configuration utility to ensure that your changes are saved to the NetScaler configuration file.
Create a portal theme
To create a custom portal design, you use one of the supplied portal themes as a template. The system makes a copy of the selected template theme with a name that you specify.
Use a stock portal theme as a template for a custom portal theme
To create a Portal Theme, you can use the configuration utility or the command line to create the theme entity. However, the detailed customization controls are available only within the configuration utility.
Create a portal theme by using the CLI
 At the command prompt, type;
add portaltheme <name> basetheme <name>
Create a portal theme by using the GUI
-
On the Configuration tab, Navigate to NetScaler Gateway and click Portal Themes.
-
In the main details pane, click Add.
-
Enter a name for the theme and select a template from the template list, and then click OK.
-
At this point, you are presented with the first-time view of the portal theme editing window. Click OK to exit.
You can proceed to customize the new portal theme with the first-time view.
Once a new theme is created, you can bind it to a VPN virtual server or to VPN global. You can bind a new theme immediately after creation or after completing your customizations.
Portal theme customization
To customize a Portal Theme, use the Portal Theme interface in the configuration utility. To get the best results, you must understand the various elements of this interface before you use it.
About the portal theme interface
To open the Portal Theme interface in the NetScaler Gateway configuration utility, on the Configuration tab, Navigate to NetScaler Gateway and click Portal Themes. You can either create a theme as described in Creating a Portal Theme or select an existing theme in the main details pane and click Edit.
The portal theme customization page has four primary component panes for modifying a portal design:
-
Portal Theme pane
-
Look and Feel pane
-
Advanced Settings pane
-
Language pane
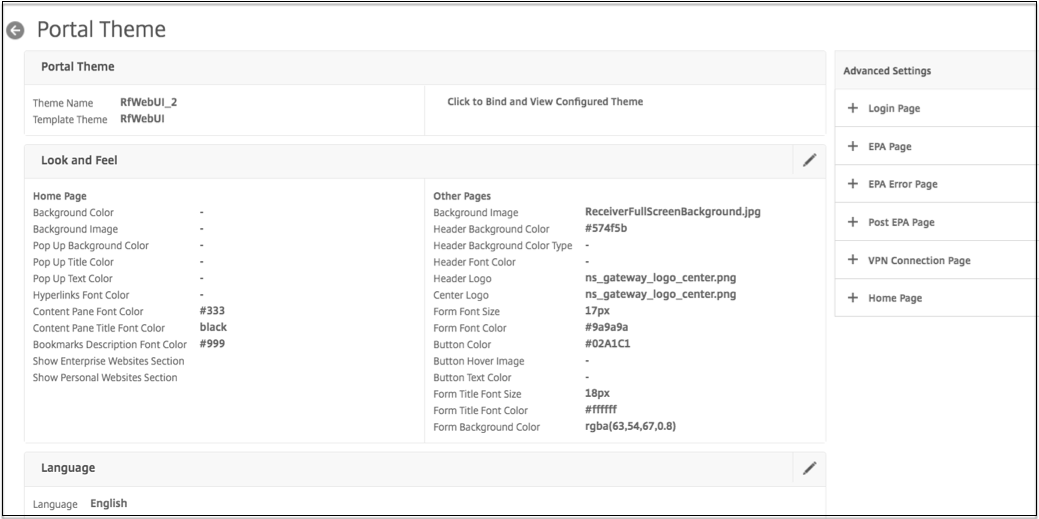
The Portal Theme pane at the top of the page reports what theme is loaded for editing and what template theme it is based on. The viewing option here allows you to view your customizations without accessing the VPN with a user connection. Using the viewing option requires binding the theme to a VPN virtual server and the binding remains in effect after the viewing window is closed.
With the Look and Feel pane in the center of the page, you configure a theme’s general properties, such as headers, background colors and images, font properties, and logos. When this pane is in edit mode, attribute legends are available for guidance on where the Look & Feel attributes are used on portal pages.
The Advanced Settings pane contains the onscreen content controls for the individual portal pages. To load a page’s content for editing, click one of the pages listed. The page controls then open below the other center panes. A page remains collapsed in the Advanced Settings pane across Portal Theme edits as long as the page has not been modified.
In the Language pane, you can select which of the languages is loaded when a page is selected for edit from the Advanced Settings pane. The English language pages are loaded by default.
Types of customizable page attributes
When customizing a Portal Theme, you can modify a range of attributes in the Portal Theme interface. Along with the text and the supported languages that can be edited, the graphical elements of the portal’s layout can be tailored to suit your needs. Each of the page element types has parameters or recommendations to consider before modifying them.
Colors
The portal design specifies the colors for attributes such as page backgrounds, highlights, text for titles and body content, button controls, and hover responses.
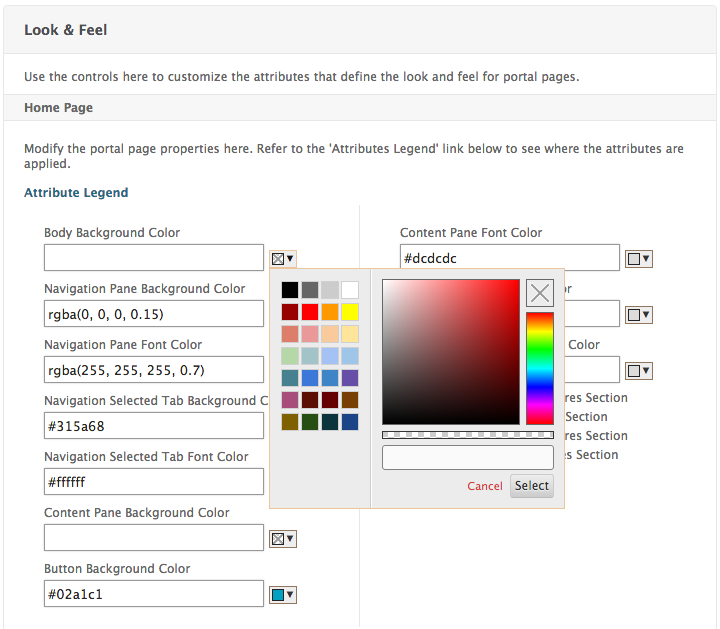
To customize a color attribute, you can enter a color value directly for a selected item, or you can use the supplied color picker to generate a color value. The interface supports entering valid HTML color values in RGBA format, HTML hexadecimal triplet format, and X11 color names. The color picker can be accessed for any applicable color attribute by clicking the color box next to the attribute’s input field.
Fonts
Along with font colors, you can modify font sizes for some page attributes. For each of these attributes, a menu offers the sizes available for each attribute, as determined by the portal’s design.
Images
For images, a pop-up description available for each control provides size recommendations and other requirements. The descriptions vary according to an attribute’s location on the page and its function. You can use PNG or JPEG image file formats. You can select an image to upload by selecting the checkbox beneath an item’s file name and then browsing to where the image resides on your local computer’s drive.
Labels
In the Advanced Settings section, you can select a specific portal page’s text to modify. If you modify the default English text for a page, the text for other languages is not retranslated. The alternative language page content is provided as a convenience but requires manual updates for any customizations.
To edit another language version for a page, first collapse the window, if it is open, by clicking the X icon for the open portal page. Then select the language in the Language pane and click OK. All the portal pages opened from the Advanced Settings pane is in that language until you select a different one.
Important:
In high availability or clustered deployments, Portal Themes are distributed across the shared configuration only when Portal Theme settings are made on the primary or configuration coordinator NetScaler entities respectively.
Create an EULA
The VPN portal system provides the option to apply an EULA to a portal configuration. Once a EULA is bound to the NetScaler Gateway configuration, either at the VPN global scope or to a relevant VPN virtual server, VPN users must agree to the EULA as Terms and Conditions before they are allowed to authenticate into the VPN.
As with the portal themes, users are served a language-specific EULA based on the locale reported by their web browser. In cases of a locale that doesn't match to any of the supported languages, the default language served is English.
For each EULA, you can enter a custom message in the supported languages. Pre-translated content is not provided for EULA configurations as it is for the portal themes. If a user's reported locale matches for a language where no EULA content is entered, the user is returned a blank page when they click the "Terms & Conditions" link in on the VPN login page.
To create a EULA, you can use either of the controls in the configuration utility on the Configuration tab at NetScaler Gateway > Global Settings > EULA or NetScaler Gateway > Resources > EULA. The controls in the Global Settings pane are used to manage VPN global EULA bindings while the control on the Resources > EULA node is for general operations on EULA configurations.
You can manage VPN virtual server EULA bindings by editing a VPN virtual server at NetScaler Gateway > Virtual Servers. Some commands are also available with the command line for managing EULA entities. However, the full EULA management controls are available only in the configuration utility.
Create a EULA entity by using the CLI
At the command prompt, type;
add vpn eula <name>
Create a EULA entity by using the GUI
-
Navigate to NetScaler Gateway > Resources > EULA.
-
Click Add to create an entity.
-
Enter a name for the entity.
-
For each of the languages, paste the content under the relevant tabs.
-
Click Create.
Starting from release 14.1 build 17.38, the following HTML tags are re-enabled in the EULA text. These tags must be used without the HTML attributes.
- <html></html>
 - <b></b>
 - <p></p>
 - <i></i>
 - <ol></ol>
 - <ul></ul>
 - <li></li>
 - <br></br><br/>
Once a EULA entity has been created, it can be globally bound to the VPN configuration, or can be bound to a VPN virtual server.
Bind a EULA to VPN global by using the CLI
At the command prompt, type;
bind vpn global eula <name>
Bind a EULA to VPN global by using the GUI
-
On the Configuration tab, Navigate to NetScaler Gateway > Global Settings.
-
In the main details pane, click Configure an End User License Agreement.
-
Click Add Binding.
-
Click Click to select.
-
Select a EULA entity then click Select.
-
Click Bind.
-
Click Close.
Bind a EULA to a VPN virtual server by using the CLI
At the command prompt, type;
bind vpn vserver <name> eula <name>
Bind a EULA to a VPN virtual server by using the GUI
-
At the Configuration tab browse to NetScaler Gateway > Virtual Servers.
-
In the main details pane, select a VPN virtual server and click Edit.
-
From the Advanced Settings pane on the right side of the page, click EULA.
-
In the newly added EULA pane, click No EULA.
-
ClickClick to select. -
Select a EULA entity and click Select.
-
Click Bind.
-
Click Done.