
Create and customize login schema
Login Schema is the XML file that provides the structure to the form-based authentication. Users can use a wide range of authentication forms using a set of user interface constructs that are similar to basic HTML forms.
In nFactor authentications, authentication factors are chained together. Each factor can have different login schema pages or files. In some authentication scenarios, users can be presented with multiple logon screens. You can also have one login schema gather the information that can be passed on to multiple factors so that the latter factors do not have to display another login schema.
The login schema XML files are included with the NetScaler appliance in
/nsconfig/loginschema/LoginSchema.
Create a login schema profile
-
Navigate to Security > AAA - Application Traffic > Login Schema.
-
Click the Profiles tab, and then click Add.
-
In Authentication Schema, click the pencil icon.
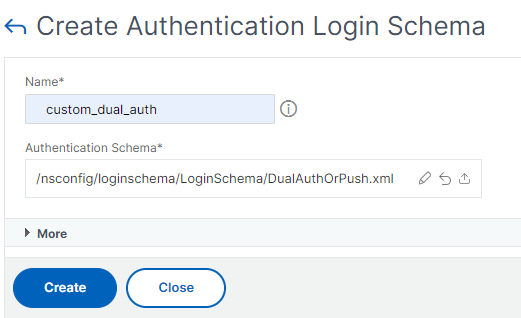
-
Click the LoginSchema folder to view the files in it.
-
Select one of the files and perform the changes as required.
-
Change the labels by clicking the Edit button on the top right.
-
Edit the scheme by selecting the language.
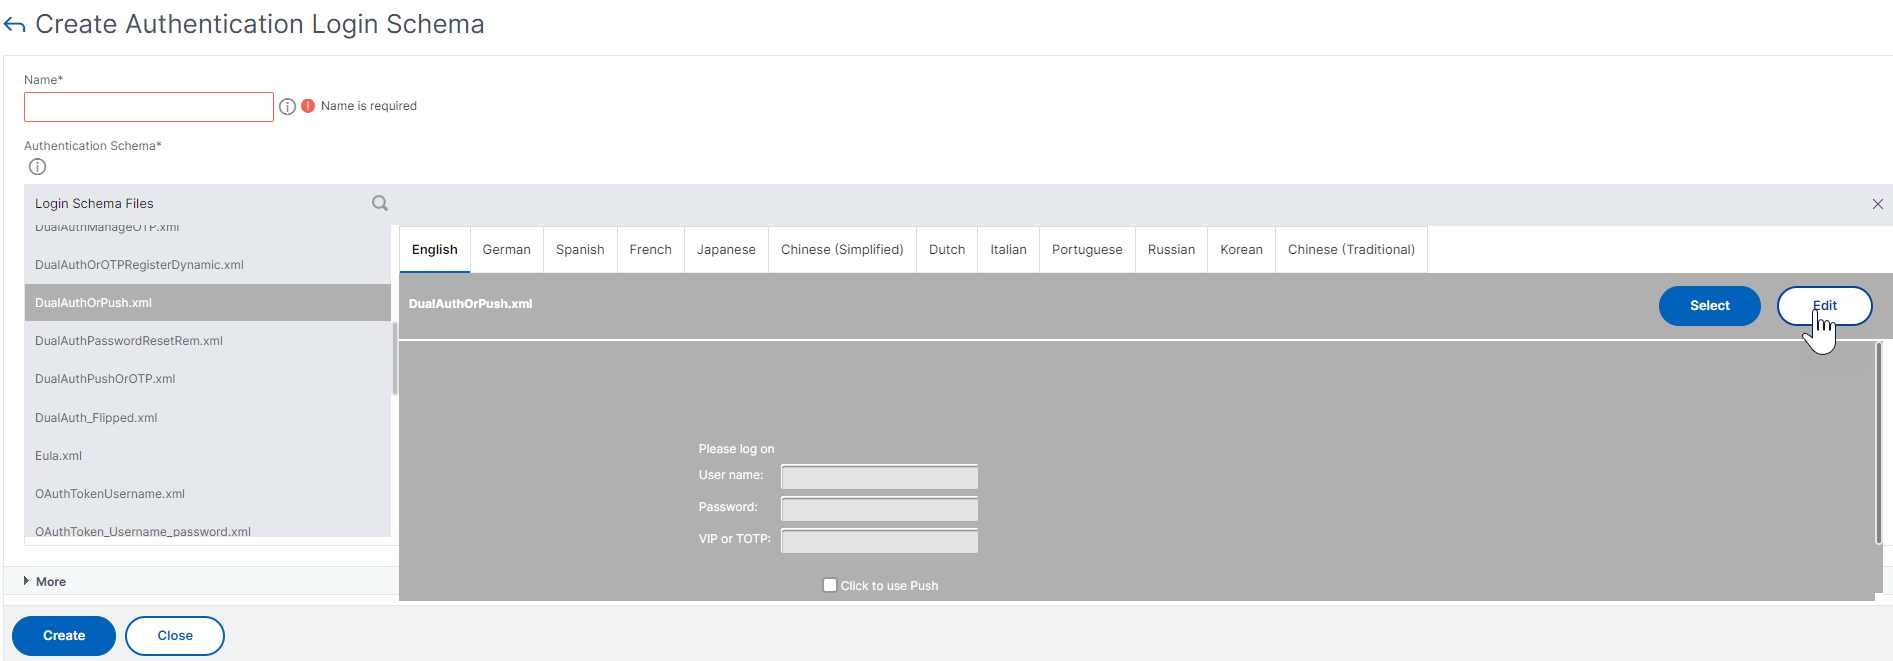
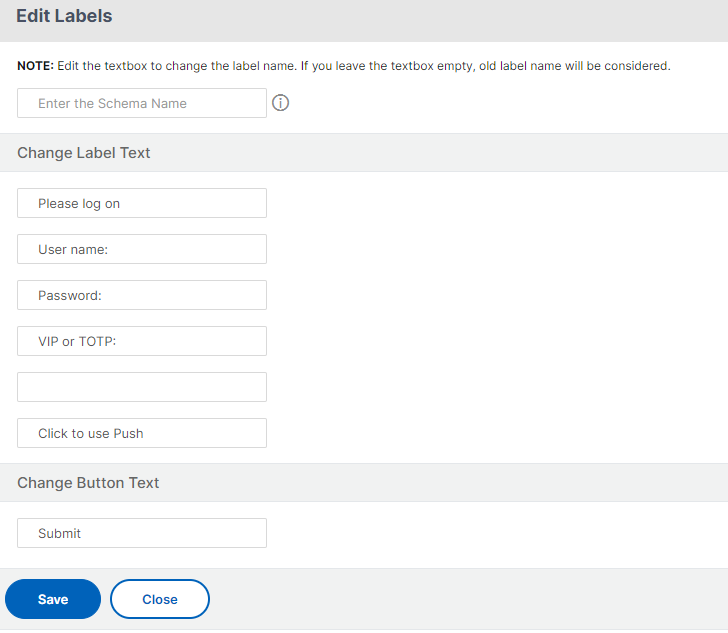 Note: When you save the changes after modification, a new schema XML file is created with the changes.
 -
-
On the top right, click Select to select the modified schema XML.
-
Enter a login schema name, and click More.Note: You can use the already entered credentials elsewhere. For example, you can use the user name and one of the passwords for single sign-on to StoreFront. You can click More and enter unique values for the indexes. These values can be between 1 and 16. You can reference these index values in a traffic policy or profile by using the expression REQ.USER.ATTRIBUTE(#).
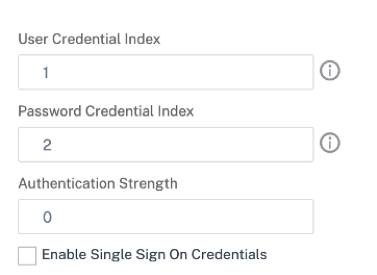
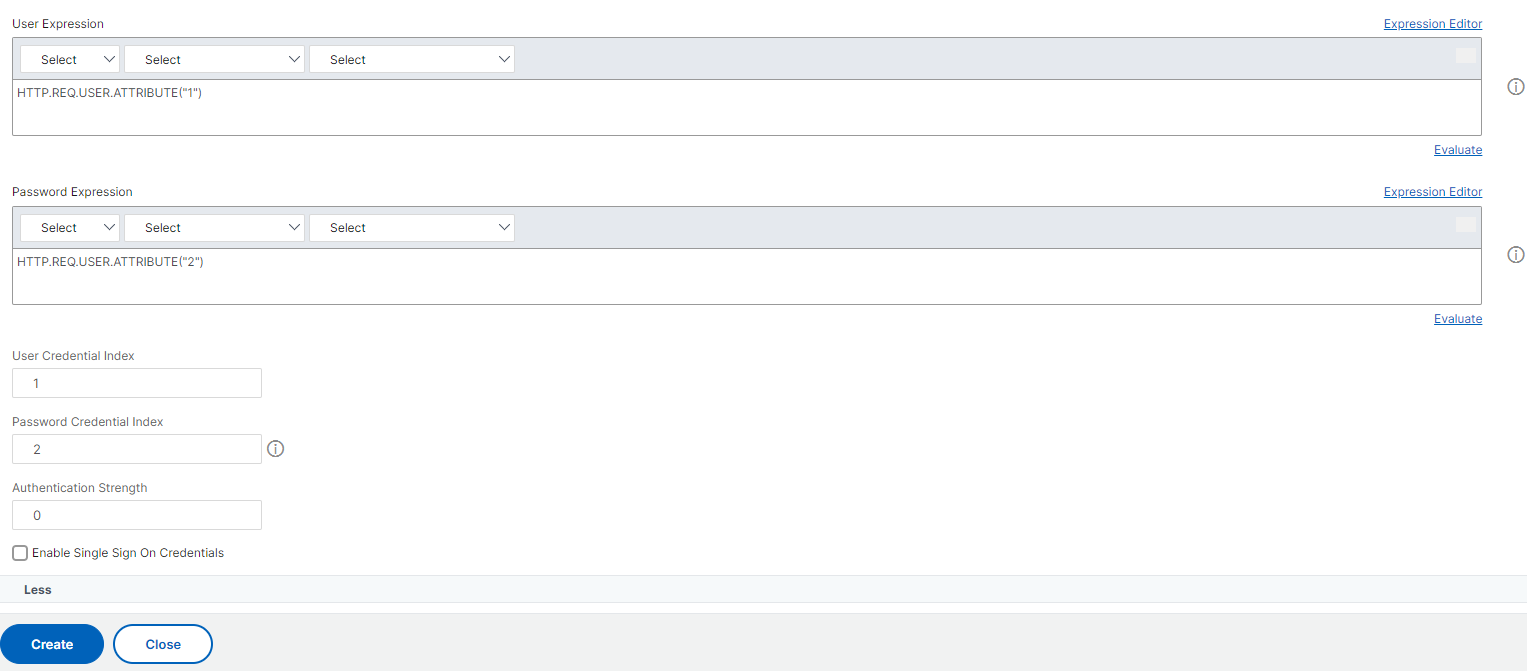
-
Click Create to create the login schema profile.
Bind a login schema profile to an authentication, authorization, and auditing virtual server
To bind a login schema profile to an authentication, authorization, and auditing virtual server, you must first create a login schema policy. Login schema policies are not required when binding the login schema profile to an authentication policy label.
To create and bind a Login Schema Policy:
-
Navigate to Security > AAA > Login Schema.
-
Click the Policies tab, and then click Add.
-
In Profile, select the login schema profile created earlier.
-
In Rule, enter the default syntax expression and click Create.