
Configure a NetScaler VPX instance to use VMXNET3 network interface
After you have installed and configured the NetScaler VPX instance on the VMware ESX, you can use the VMware vSphere web client to configure the virtual appliance to use VMXNET3 network interfaces.
To configure NetScaler VPX instances to use VMXNET3 network interfaces by using the VMware vSphere Web Client:
-
In the vSphere Web Client, select Hosts and Clusters.
-
Upgrade the Compatibility setting of the NetScaler VPX instance to ESX, as follows:a. Power off the NetScaler VPX instance.b. Right-click the NetScaler VPX instance and select Compatibility > Upgrade VM Compatibility.c. In the Configure VM Compatibility dialog box, select ESXi 7.0 and later from the Compatible with drop-down list and click OK.
-
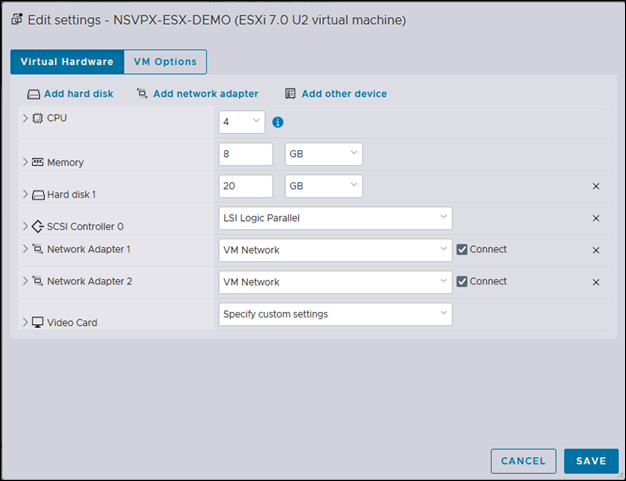
Right-click on the NetScaler VPX instance and click Edit Settings.
-
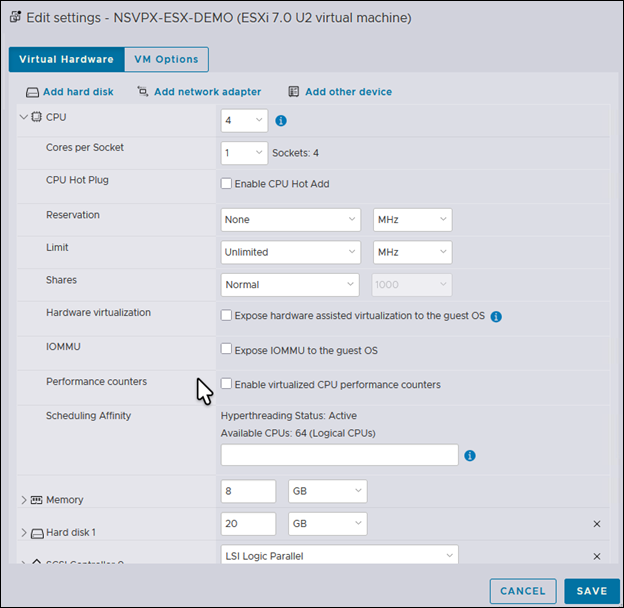
In the \<virtual\_appliance\> - Edit Settings dialog box, click the CPU section.
-
In the CPU section, update the following:
-
Number of CPUs
-
Number of Sockets
-
Reservations
-
Limit
-
Shares
Set the values as follows:a. In the CPU drop-down menu, select the number of CPUs to assign to the virtual appliance.b. In the Cores per Socket drop-down list, select the number of sockets.c. (Optional) In the CPU Hot Plug field, select or unselect the Enable CPU Hot Add checkbox.Note:Citrix® recommends accepting the default (disabled).d. In the Reservation drop-down list, select the number that is shown as the maximum value.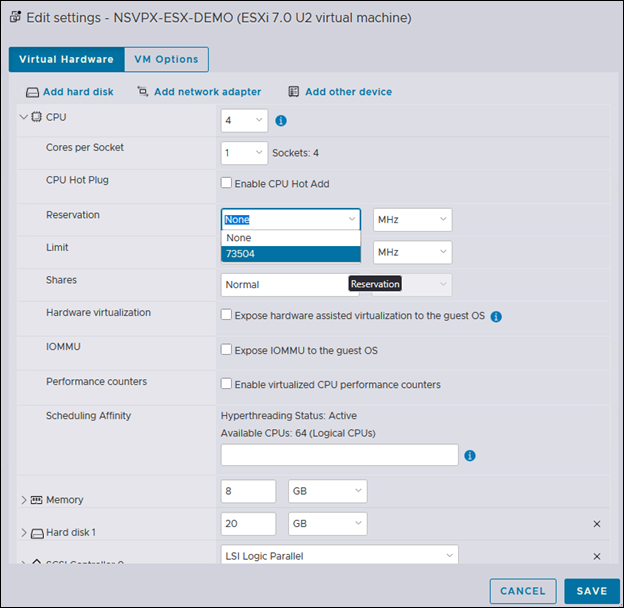 e. In the Limit drop-down list, select the number that is shown as the maximum value.
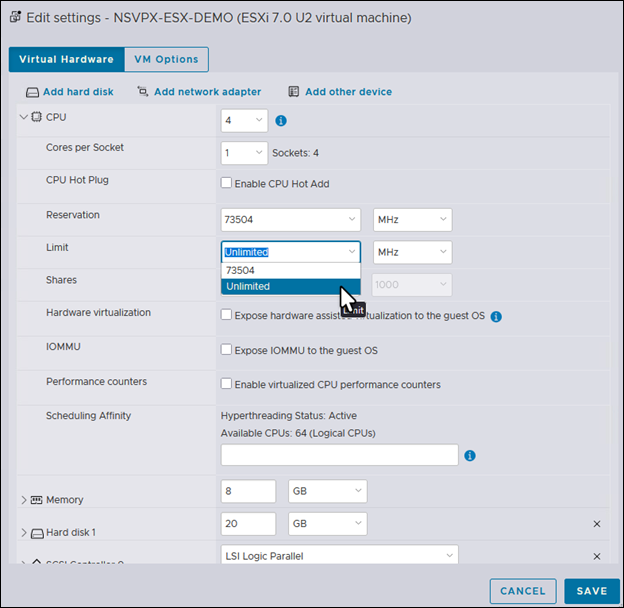 f. In the Shares drop-down lists, select Custom and the number that is shown as the maximum value.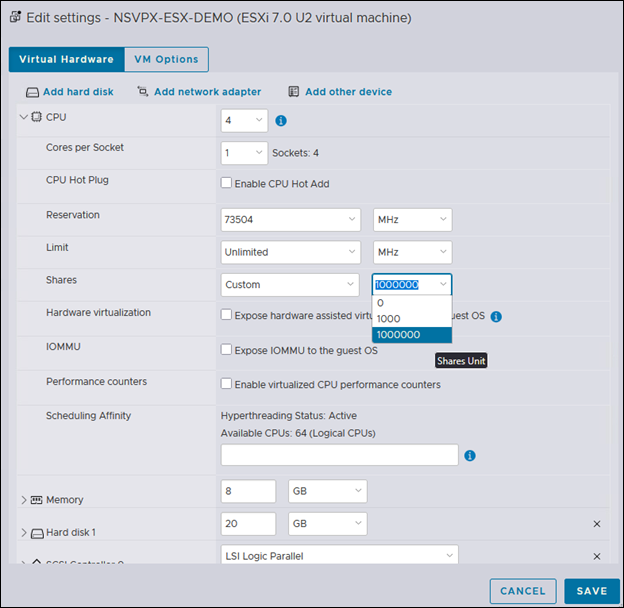
-
-
In the Memory section, update the following:
-
Size of RAM
-
Reservations
-
Limit
-
Shares
Set the values as follows:a. In the RAM drop-down list, select the size of the RAM. It must be the number of vCPUs x 2 GB. For example, if the number of vCPUs is 4, the RAM must be 4 x 2 GB = 8 GB.Note:For an Advanced or Premium edition of the NetScaler VPX appliance, make sure that you allocate 4 GB of RAM to each vCPU. For example, if the number of vCPU is 4 then RAM = 4 x 4 GB = 16 GB.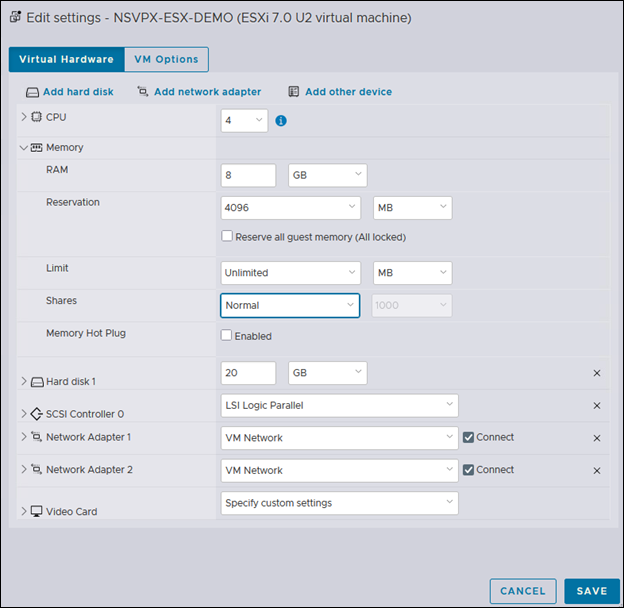 b. In the Reservation drop-down list, enter the value for the memory reservation, and select the Reserve all guest memory (All locked) checkbox. The memory reservation must be the number of vCPUs x 2 GB. For example, if the number of vCPUs is 4, the memory reservation must be 4 x 2 GB = 8 GB.Note:For an Advanced or Premium edition of the NetScaler VPX appliance, make sure that you allocate 4 GB of RAM to each vCPU. For example, if the number of vCPU is 4 then RAM = 4 x 4 GB = 16 GB.
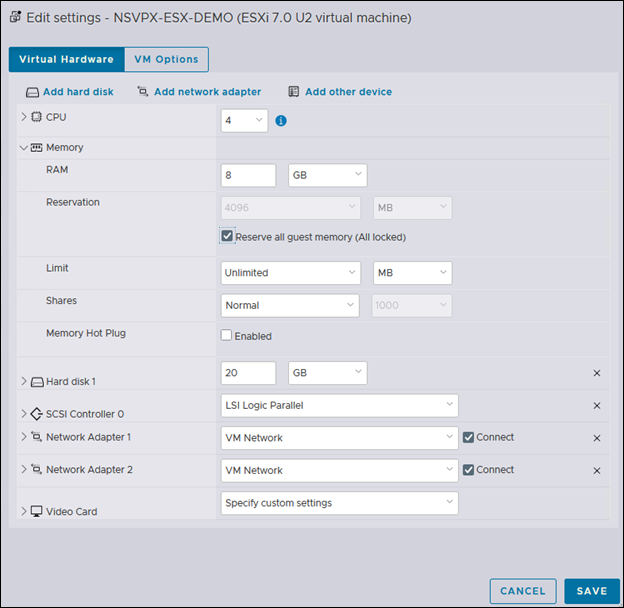 c. In the Limit drop-down list, select the number that is shown as the maximum value.
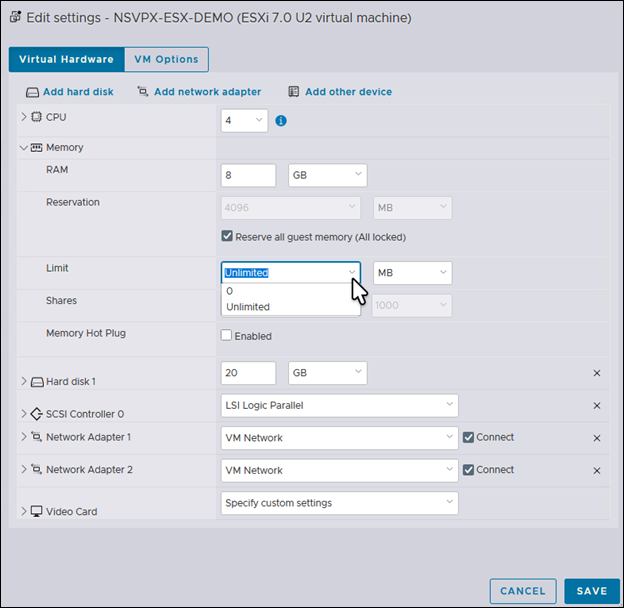 d. In the Shares drop-down list, select Custom and the number that is shown as the maximum value.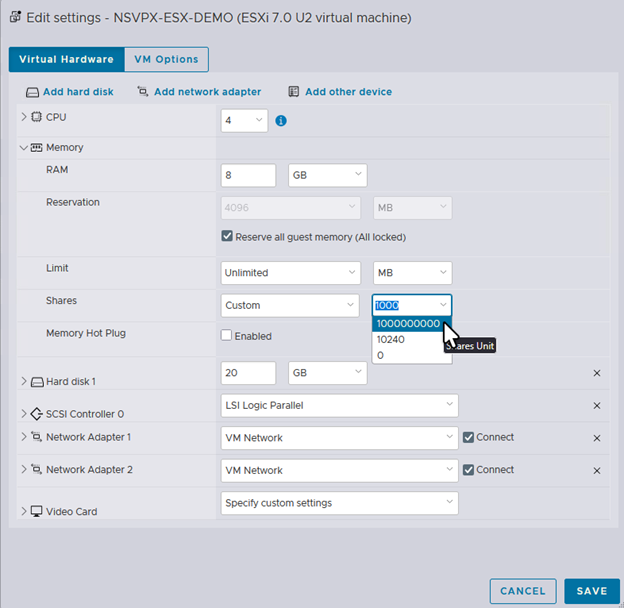
-
-
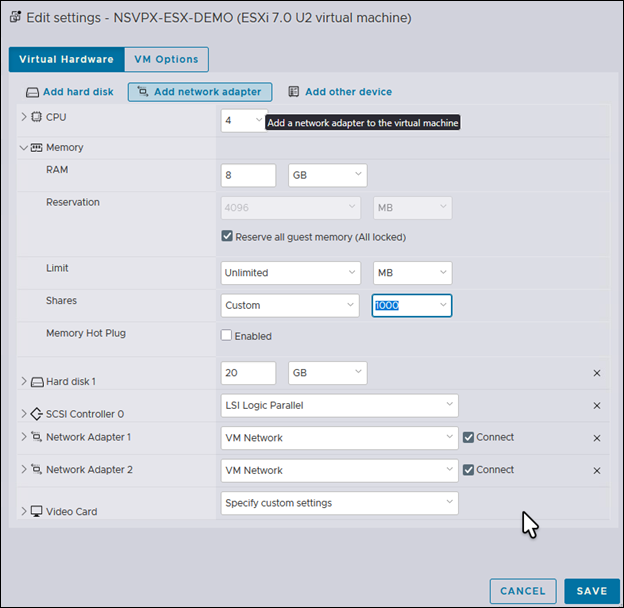
Add a VMXNET3 network interface. From the New device drop-down list, select Network and click Add.
-
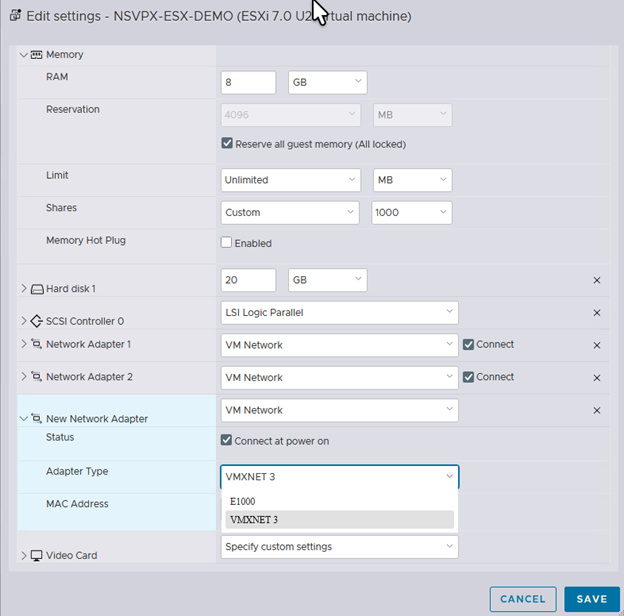
In the New Network Adapter section, select the network interface from the drop-down list, and do the following:a. In the Adapter Type drop-down list, select VMXNET3.Important:The default E1000 network interface and VMXNET3 cannot coexist, make sure that you remove the E1000 network interface and use VMXNET3 (0/1) as the management interface.
-
Click OK.
-
Power on the NetScaler VPX instance.
-
Once the NetScaler VPX instance powers on, you can use the following command to verify the configuration:show interface summary
The output must show all the interfaces that you configured:
> show interface summary
 --------------------------------------------------------------------------------
       Interface  MTU        MAC                  Suffix
 --------------------------------------------------------------------------------
 1     0/1        1500       00:0c:29:89:1d:0e    NetScaler Vir...rface, VMXNET3
 2     1/1        9000       00:0c:29:89:1d:18    NetScaler Vir...rface, VMXNET3
 3     1/2        9000       00:0c:29:89:1d:22    NetScaler Vir...rface, VMXNET3
 4     LO/1       9000       00:0c:29:89:1d:0e    Netscaler Loopback interface
Note:
After you add more than four VMXNET3 interfaces and restart the NetScaler VPX appliance, the VMware ESX hypervisor might change the order in which the NIC is presented to the VPX appliance. So, network adapter 1 might not always remain 0/1, resulting in loss of management connectivity to the VPX appliance.
This is a VMware ESX hypervisor limitation.
Set receive ring size for the VMXNET3 network interface
You can increase the receive ring size for VMXNET3 network interfaces on VMware ESX. A higher ring size reduces the packet drops when a sudden burst in traffic occurs.
Note:
This feature is available in release 14.1 build 14.x and later.
To set the ring size on a VMXNET3 network interface
At the command prompt, type:
set interface *id* [-ringsize *positive_integer*]
The maximum ring size that you can set on a VMXNET3 interface is 2048. Only the fixed ring type is supported. You must save the configuration and reboot the NetScaler VPX™ instance for the settings to take effect.