
Deploy a VPX HA pair in the same AWS availability zone
Note:
From NetScaler release 13.1 build 27.x onwards, the VPX HA pair in the same AWS availability zone supports IPv6 addresses.
You can configure two NetScaler VPX instances on AWS as a HA pair, in the same AWS zone where both VPX instances are on the same subnet. HA is achieved by migrating secondary private IP addresses attached to the NICs (client and server-side NICs) of the primary HA node to the secondary HA node after failover. All the Elastic IP addresses associated with the secondary private IP addresses are also migrated.
The NetScaler VPX HA pair supports both IPv4 and IPv6 addresses in the same AWS availability zone.
The following illustration depicts an HA failover scenario by migrating secondary private IP addresses.
Figure 1. A NetScaler VPX HA Pair on AWS, using private IP migration

Before you start your document, read the following docs:
How to deploy a VPX HA pair in the same zone
Here is the summary of the steps to deploy a VPX HA pair in the same zone:
-
Create two VPX instances on AWS, each with three NICs.
-
Assign AWS secondary private IP address to VIP and SNIP of primary node.
-
Configure VIP and SNIP on primary node using AWS secondary private IP addresses.
-
Configure HA on both nodes.
Step 1. Create two VPX instances (primary and secondary nodes) by using the same VPC, each with three NICs (Ethernet 0, Ethernet 1, Ethernet 2)
Follow the steps given in Deploy a NetScaler VPX instance on AWS by using the AWS web console.
Step 2. On the primary node, assign private IP addresses for Ethernet 1 (client IP or VIP) and Ethernet 2 (back-end server IP or SNIP)
The AWS console automatically assigns primary private IP addresses to the configured NICs. Assign more private IP addresses to VIP and SNIP, known as secondary private IP addresses.
To assign a private IP address to a network interface, follow these steps:
-
Open the Amazon EC2 console at
<https://console.aws.amazon.com/ec2/>. -
In the navigation pane, choose Network Interfaces and then select the network interface attached to the instance.
-
Choose Actions > Manage IP Addresses.
-
Select IPv4 Addresses or IPv6 Addresses based on your requirement.
-
For IPv4 Addresses:
-
Choose Assign new IP.
-
Enter a specific IPv4 address that's within the subnet range for the instance, or leave the field blank to let Amazon select an IP address for you.
-
(Optional) Choose Allow reassignment to allow the secondary private IP address to be reassigned if it is already assigned to another network interface.
-
-
For IPv6 Addresses:
-
Choose Assign new IP.
-
Enter a specific IPv6 address that's within the subnet range for the instance, or leave the field blank to let Amazon select an IP address for you.
-
(Optional) Choose Allow reassignment to allow the primary or secondary private IP address to be reassigned if it is already assigned to another network interface.
-
-
Choose Yes > Update.
Under the Instance description, the assigned private IP addresses appear.
Note:
In an IPv4 HA pair deployment, you can assign only the secondary IPv4 addresses on the interface and use them as VIP and SNIP addresses. But in an IPv6 HA pair deployment, you can assign either the primary IPv6 or secondary IPv6 addresses on the interface and use them as VIP and SNIP addresses.
Step 3. Configure VIP and SNIP on the primary node, using secondary private IP addresses
Access the primary node using SSH. Open an ssh client and type:
ssh -i <location of your private key> nsroot@<public DNS of the instance>
Next, configure VIP and SNIP.
For VIP, type:
add ns ip <IPAddress> <netmask> -type <type>
For SNIP, type:
add ns ip <IPAddress> <netmask> -type SNIP
Type
save config to save.
To see the configured IP addresses, type the following command:
show ns ip
For more information, see the following topics:
Step 4: Configure HA on both instances
On the primary node, open a Shell client and type the following command:
add ha node <id> <private IP address of the management NIC of the secondary node>
On the secondary node, type the following command:
add ha node <id> <private IP address of the management NIC of the primary node>
Type
save config to save the configuration.
To see the configured HA nodes, type
show ha node.
Upon failover, the secondary private IP addresses configured as VIP and SNIP on the previous primary node are migrated to the new primary node.
To force a failover on a node, type
force HAfailover.
Migrate a legacy HA pair to a new HA pair based on secondary private IP migration
Note:
The legacy method for deploying VPX HA pair that works based on ENI migration is deprecated. Therefore, we recommend you to use the HA pair deployment based on the secondary private IP migration.
To enable seamless migration from legacy HA pair to a new HA pair based on secondary private IP migration, ensure the following:
-
Both the primary and secondary nodes must have the same number of interfaces, and these interfaces must be in the same subnets.
-
The VIP and SNIP configured as primary private IP address in the legacy method, must be migrated to a secondary private IP address in the new method.
-
IAM permissions required for the new HA deployment must be added to the primary and secondary NetScaler® instances.
-
Reboot both the primary and secondary NetScaler instances.
For more information, see High availability within the same zones.
Deploy a high availability pair by using the Citrix CloudFormation template
Before starting the CloudFormation template, ensure that you complete the following requirements:
-
A VPC
-
Three subnets within the VPC
-
A security group with UDP 3003, TCP 3009–3010, HTTP, SSH ports open
-
A key pair
-
Create an internet gateway
-
Edit route tables for client and management networks to point to the internet gateway
Note:
The Citrix CloudFormation template automatically creates an IAM Role. Existing IAM Roles do not appear in the template.
To launch the Citrix CloudFormation template:
-
Log on to the AWS marketplace by using your AWS credentials.
-
In the search field, type NetScaler VPX to search for the NetScaler AMI, and click Go.
-
On the search result page, click the desired NetScaler VPX offering.
-
Click the Pricing tab, to go to Pricing Information.
-
Select the region and Fulfillment Option as NetScaler VPX – Customer Licensed.
-
Click Continue to Subscribe.
-
Check the details in the Subscribe page and click Continue to Configuration.
-
Select Delivery Method as CloudFormation Template.
-
Select the required CloudFormation template.
-
Select Software Version and Region, and click Continue to Launch.

-
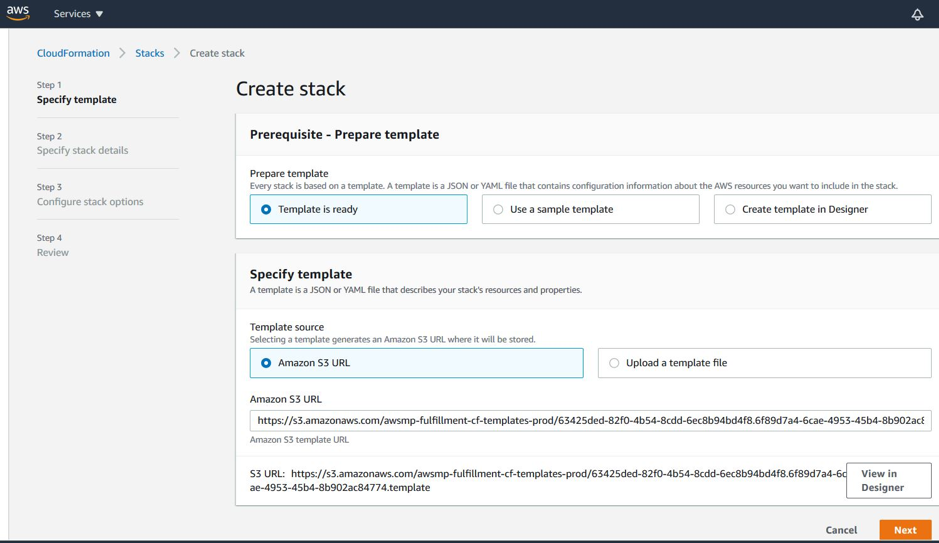
Under Choose Action, select Launch CloudFormation, and click Launch. The Create stack page appears.
-
Click Next.
-
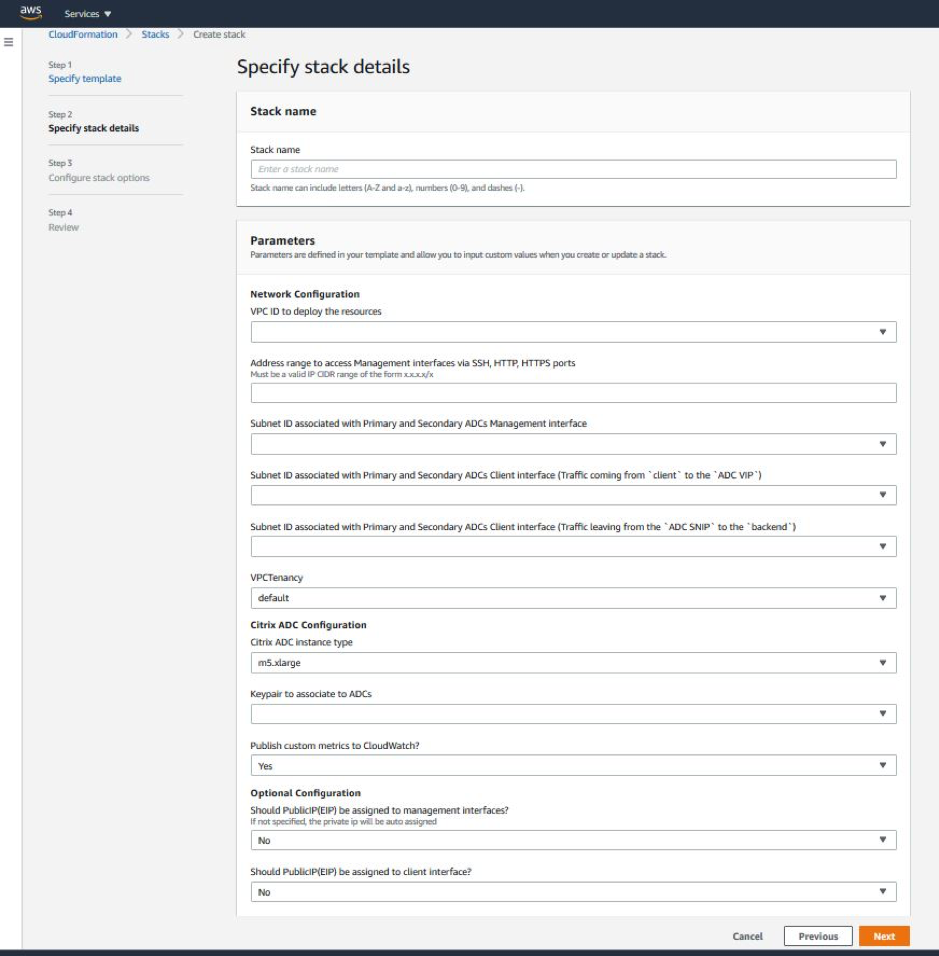
The Specify stack details page appears. Enter the following details.
-
Type a Stack name. The name must be within 25 characters.
-
Under Network Configuration, perform the following:
-
Select Management Subnetwork, Client Subnetwork, and Server Subnetwork. Ensure that you select the correct subnetworks you created within the VPC that you selected under VPC ID.
-
Add Primary Management IP, Secondary Management IP, Client IP, and Server IP. The IP addresses must belong to the same subnets of the respective subnetworks. Alternatively, you can let the template assign the IP addresses automatically.
-
Select default for VPCTenancy.
-
-
Under NetScaler Configuration, perform the following:
-
Select m5.xlarge for Instance type.
-
Select the key pair that you've already created from the menu for Key Pair.
-
By default, the Publish custom metrics to CloudWatch? option is set to Yes. If you want to disable this option, select No.
-
-
Under Optional Configuration, do the following:
-
By default, the Should publicIP(EIP) be assigned to management interfaces? option is set to No.
-
By default, the Should publicIP(EIP) be assigned to client interface? option is set to No.
-
-
-
Click Next.
-
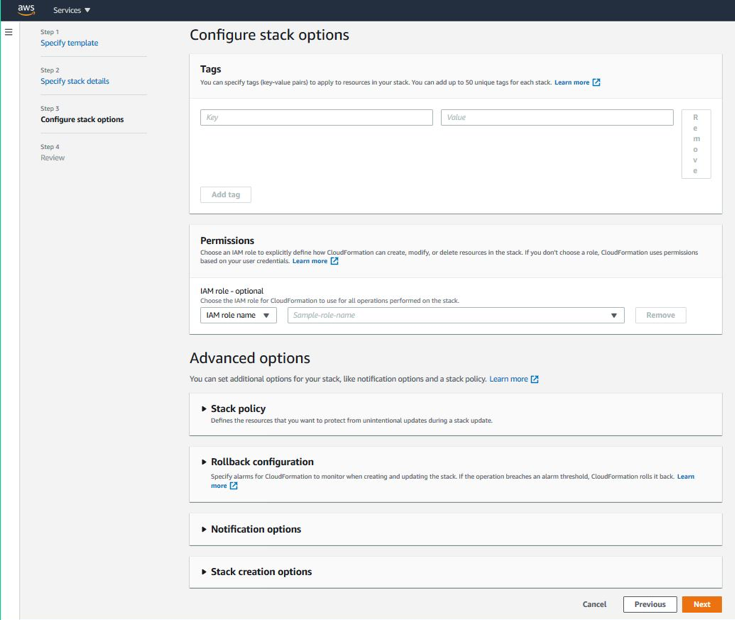
The Configure stack options page appears. This is an optional page.
-
Click Next.
-
The Options page appears. (This is an optional page.). Click Next.
-
The Review page appears. Take a moment to review the settings and make any changes, if necessary.
-
Select the I acknowledge that AWS CloudFormation might create IAM resources. check box, and then click Create stack.
-
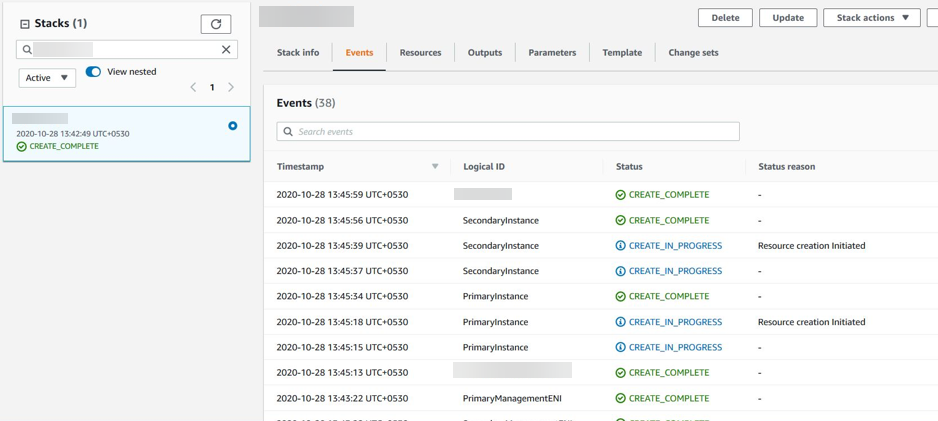
The CREATE-IN-PROGRESS status appears. Wait until the status is CREATE-COMPLETE. If the status does not change to COMPLETE, check the Events tab for the reason of failure, and recreate the instance with proper configurations.
-
After an IAM resource is created, navigate to EC2 Management Console > Instances. You find two VPX instances created with IAM role. The primary and secondary nodes are created each with three private IP addresses and three network interfaces.
-
Log on to the primary node with user name
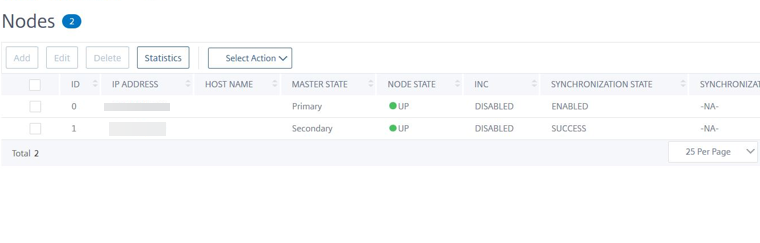
nsrootand the instance ID as the password. From the GUI, navigate to System > High Availability > Nodes. The NetScaler VPX is already configured in HA pair by the CloudFormation template. -
The NetScaler VPX HA pair appears.
Monitor your instances using Amazon CloudWatch
You can use the Amazon CloudWatch service to monitor a set of NetScaler VPX metrics such as CPU and memory utilization, and throughput. CloudWatch monitors resources and applications that run on AWS, in real time. You can access the Amazon CloudWatch dashboard by using the AWS Management console. For more information, see Amazon CloudWatch.
Points to note
-
If you deploy a NetScaler VPX instance on AWS by using the AWS web console, the CloudWatch service is enabled by default.
-
If you deploy a NetScaler VPX instance by using the Citrix CloudFormation template, the default option is "Yes." If you want to disable the CloudWatch service, select "No."
-
Metrics are available for CPU (management and packet CPU usage), memory, and throughput (inbound and outbound).
How to view CloudWatch metrics
To view CloudWatch metrics for your instance, follow these steps:
-
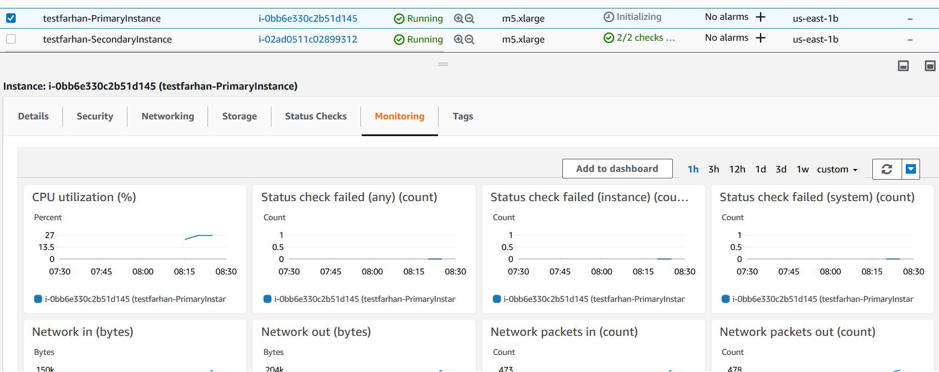
Log on to AWS Management console > EC2 > Instances.
-
Select the instance.
-
Click Monitoring.
-
Click View all CloudWatch metrics.
-
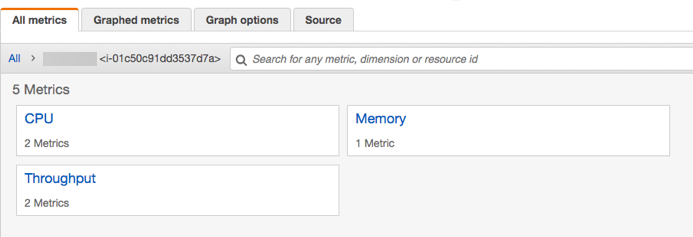
Under All metrics, click your instance ID.
-
Click the metrics that you want to view, set the duration (by minutes, hours, days, weeks, months).
-
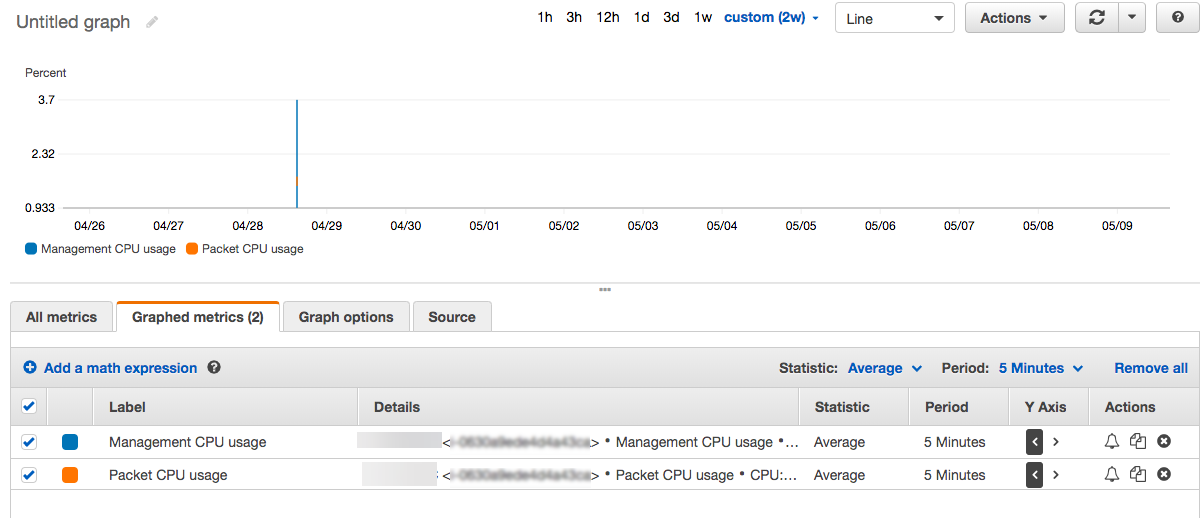
Click Graphed metrics to view the statistics of usage. Use the Graph options to customize your graph.
Figure. Graphed metrics for CPU usage
Configuring SR-IOV on a high availability setup
Support for SR-IOV interfaces in a high availability setup is available from NetScaler release 12.0 57.19 onwards. For more information about how to configure SR-IOV, see Configuring NetScaler VPX instances to Use SR-IOV Network Interface.