
Configure HA-INC nodes by using the NetScaler® high availability template with Azure ILB
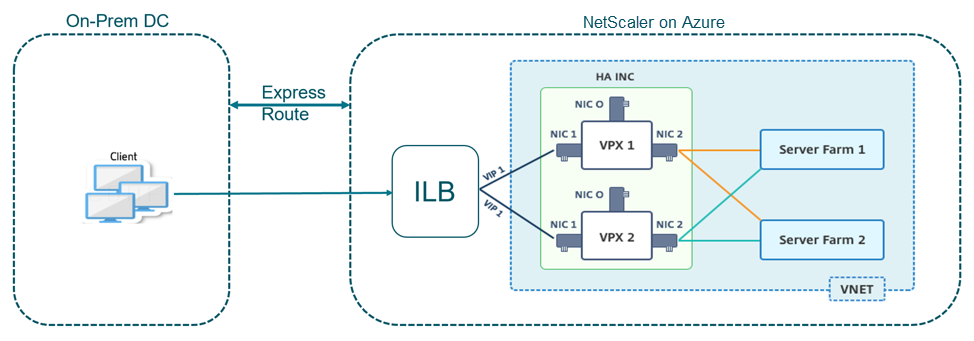
You can quickly and efficiently deploy a pair of VPX instances in HA-INC mode by using the standard template for intranet applications. The Azure internal load balancer (ILB) uses an internal or private IP address for the front end as shown in Figure 1. The template creates two nodes, with three subnets and six NICs. The subnets are for management, client, and server-side traffic with each subnet belonging to a different NIC on each device.
Figure 1: NetScaler HA pair for clients in an internal network
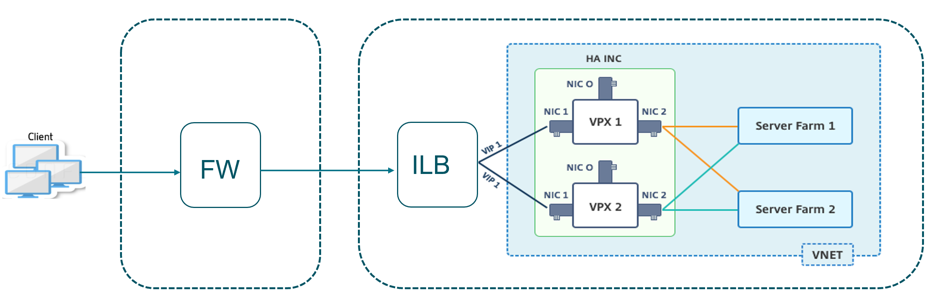
You can also use this deployment when the NetScaler HA pair is behind a firewall as shown in Figure 2. The public IP address belongs to the firewall and is NAT'd to the front-end IP address of the ILB.
Figure 2: NetScaler HA pair with firewall having public IP address
You can get the NetScaler HA pair template for intranet applications at the Azure portal
Complete the following steps to launch the template and deploy a high availability VPX pair by using Azure Availability Sets.
-
From the Azure portal, navigate to the Custom deployment page.
-
The Basics page appears. Create a Resource Group. Under the Parameters tab, enter details for the Region, Admin user name, Admin Password, license type (
VM sku), and other fields.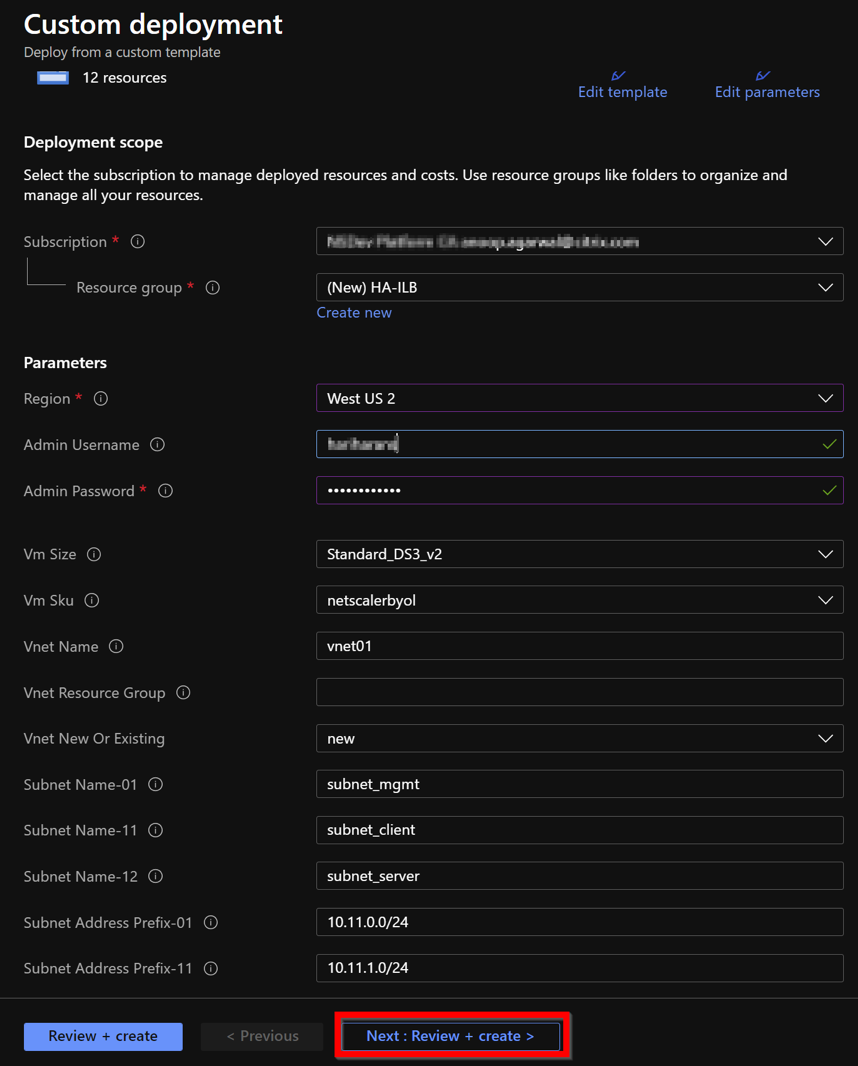
-
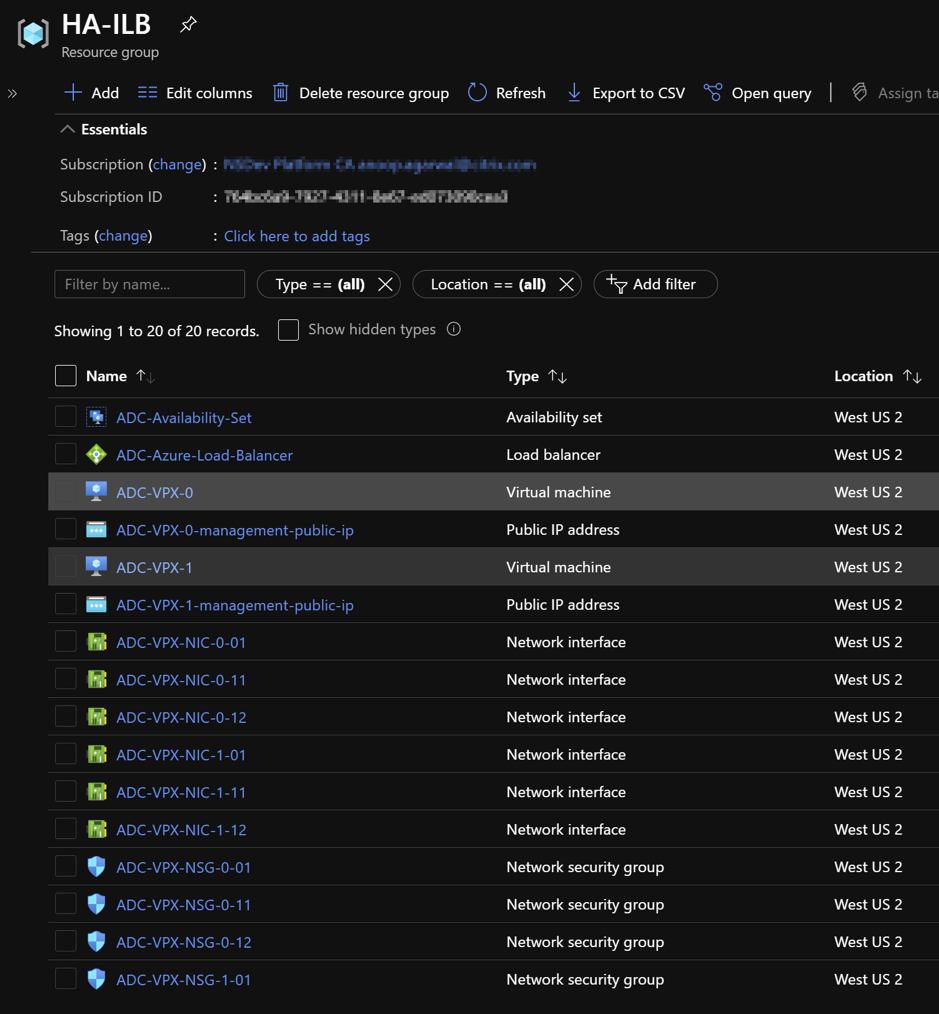
Click Next : Review + create >.It might take a moment for the Azure Resource Group to be created with the required configurations. After completion, select the Resource Group in the Azure portal to see the configuration details, such as LB rules, back-end pools, health probes. The high availability pair appears as ADC-VPX-0 and ADC-VPX-1.If further modifications are required for your HA setup, such as creating more security rules and ports, you can do that from the Azure portal.Once the required configuration is complete, the following resources are created.
-
Log on to ADC-VPX-0 and ADC-VPX-1 nodes to validate the following configuration:
-
NSIP addresses for both nodes must be in the management subnet.
-
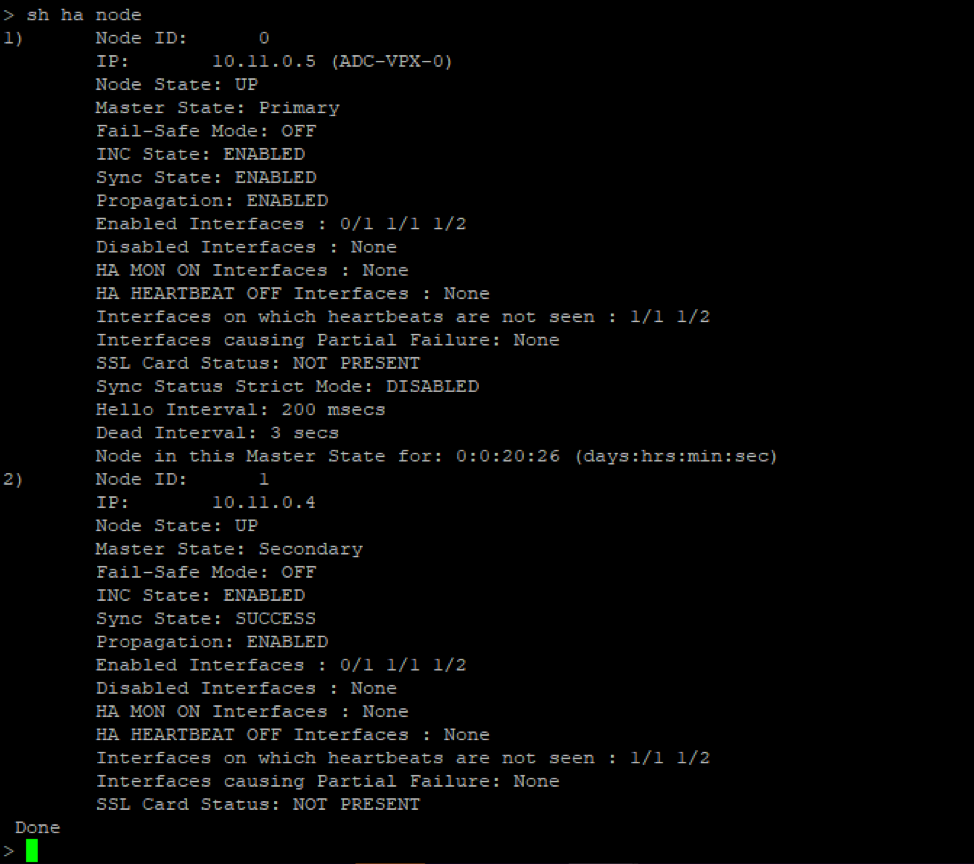
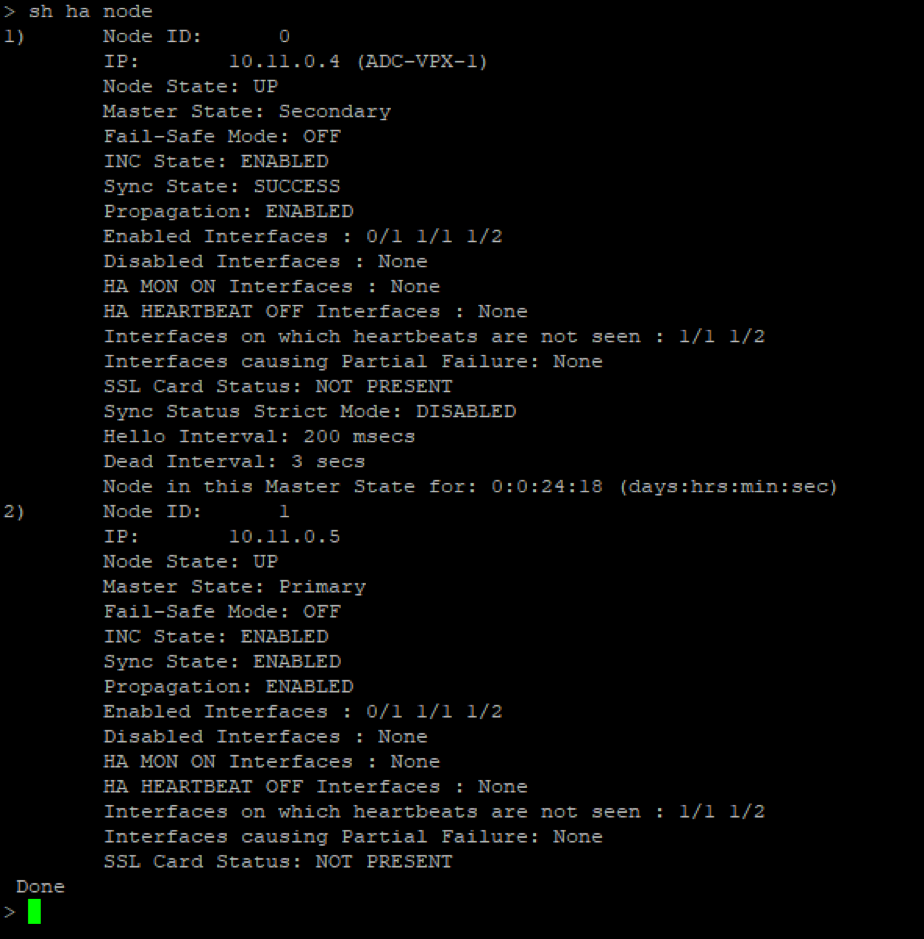
On the primary (ADC-VPX-0) and secondary (ADC-VPX-1) nodes, you must see two SNIP addresses. One SNIP (client subnet) is used for responding to ILB probes and the other SNIP (server subnet) is used for back-end server communication.
Note:In the HA-INC mode, the SNIP address of the ADC-VPX-0 and ADC-VPX-1 VMs are different while in the same subnet, unlike with the classic on-premises ADC HA deployment where both are the same. To support deployments when the VPX pair SNIP is in different subnets, or anytime the VIP is not in the same subnet as a SNIP, you must either enable Mac-Based Forwarding (MBF), or add a static host route for each VIP to each VPX node.On the primary node (ADC-VPX-0)
 On the secondary node (ADC-VPX-1)
-
-
After the primary and secondary nodes are UP and the Synchronization status is SUCCESS, you must configure the load balancing virtual server or the gateway virtual server on the primary node (ADC-VPX-0) with the private floating IP (FIP) address of the ADC Azure load balancer. For more information, see the Sample configuration section.
-
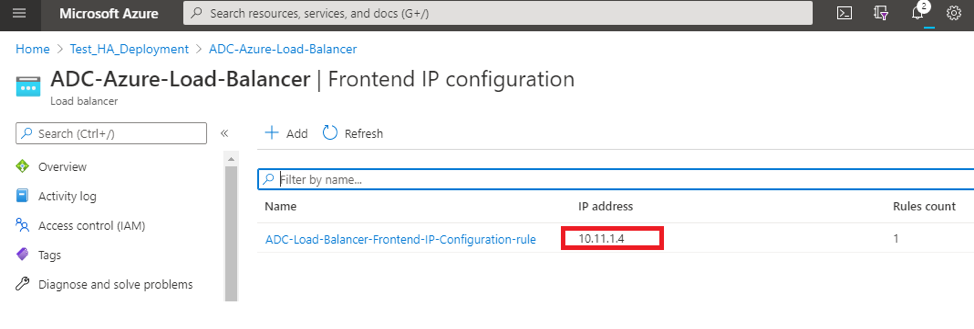
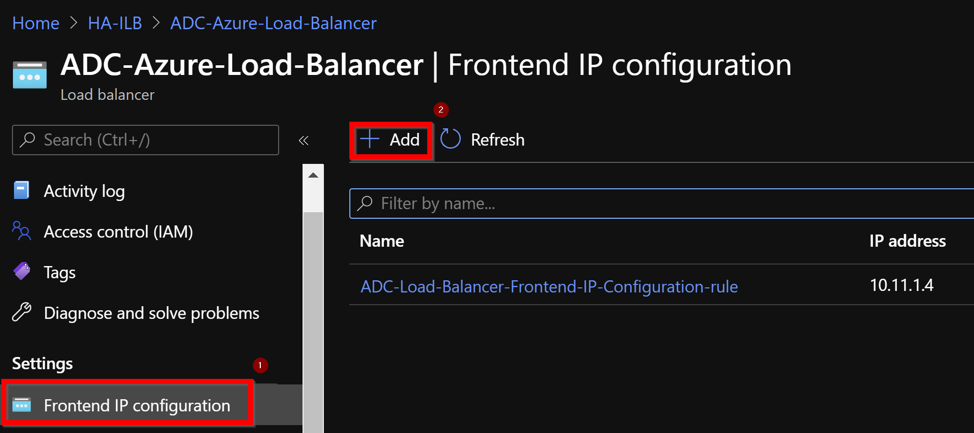
To find the private IP address of ADC Azure load balancer, navigate to Azure portal > ADC Azure Load Balancer > Frontend IP configuration.
-
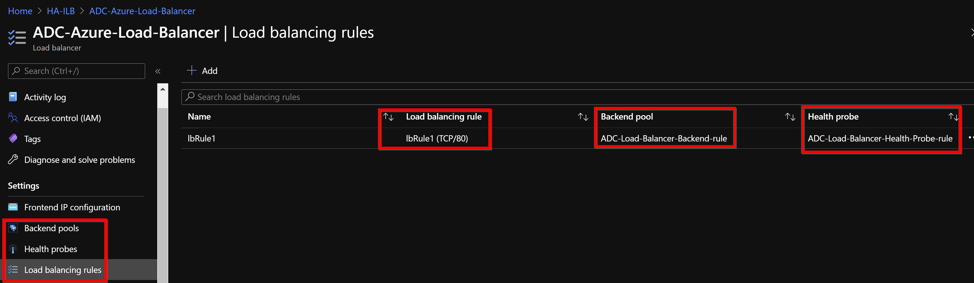
In the Azure Load Balancer configuration page, the ARM template deployment helps create the LB rule, back-end pools, and health probes.
-
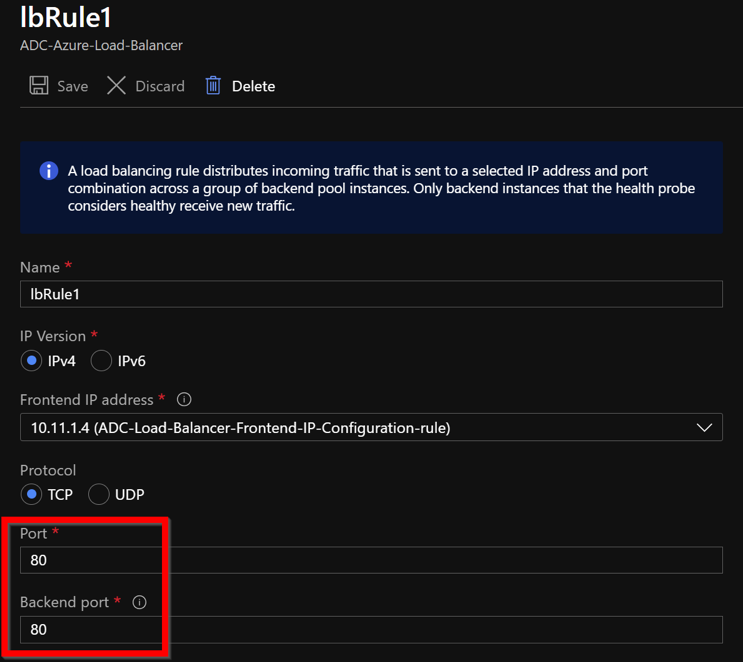
The LB Rule (LbRule1) uses port 80, by default.
-
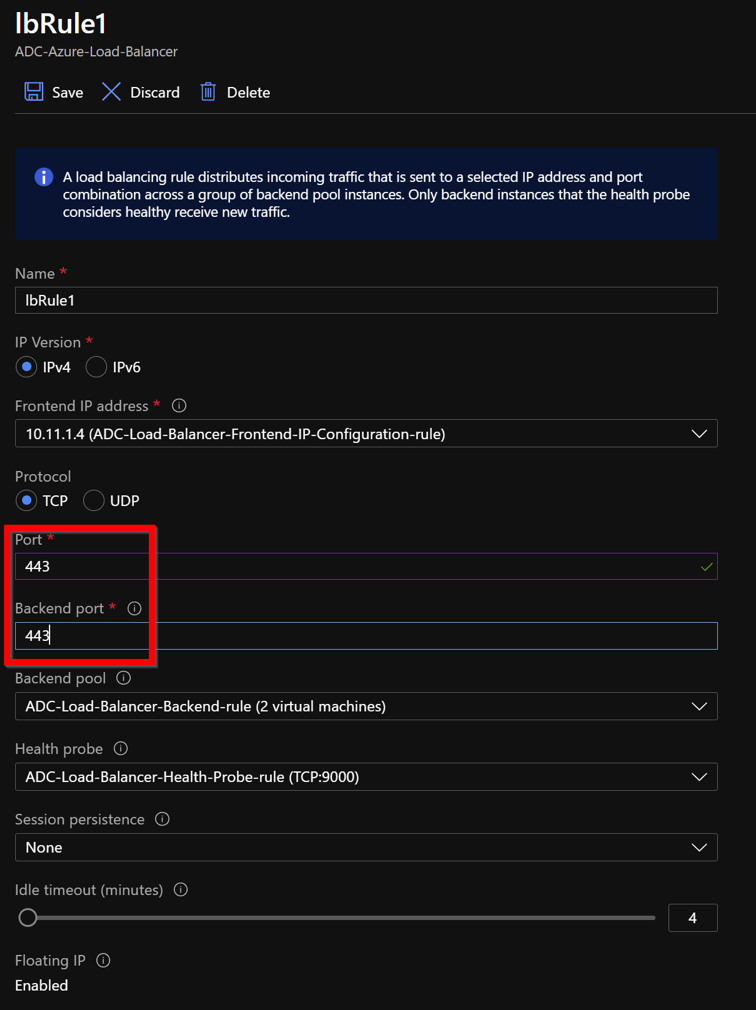
Edit the rule to use port 443, and save the changes.Note:For enhanced security, Citrix® recommends you to use SSL port 443 for LB virtual server or Gateway virtual server.
-
To add more VIP addresses on the ADC, perform the following steps:
-
Navigate to Azure Load Balancer > Frontend IP configuration, and click Add to create a new internal load balancer IP address.
-
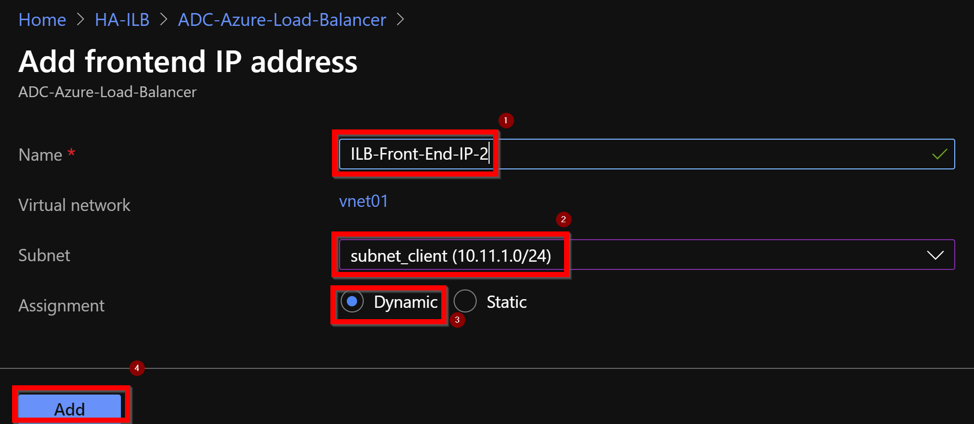
In the Add frontend IP address page, enter a name, choose the client subnet, assign either dynamic or static IP address, and click Add.
-
The front-end IP address is created but an LB Rule is not associated. Create a new load balancing rule, and associate it with the front-end IP address.
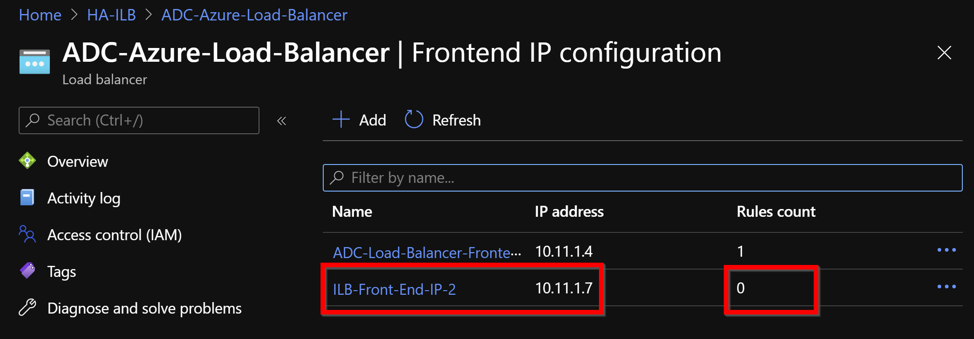
-
In the Azure Load Balancer page, select Load balancing rules, and then click Add.
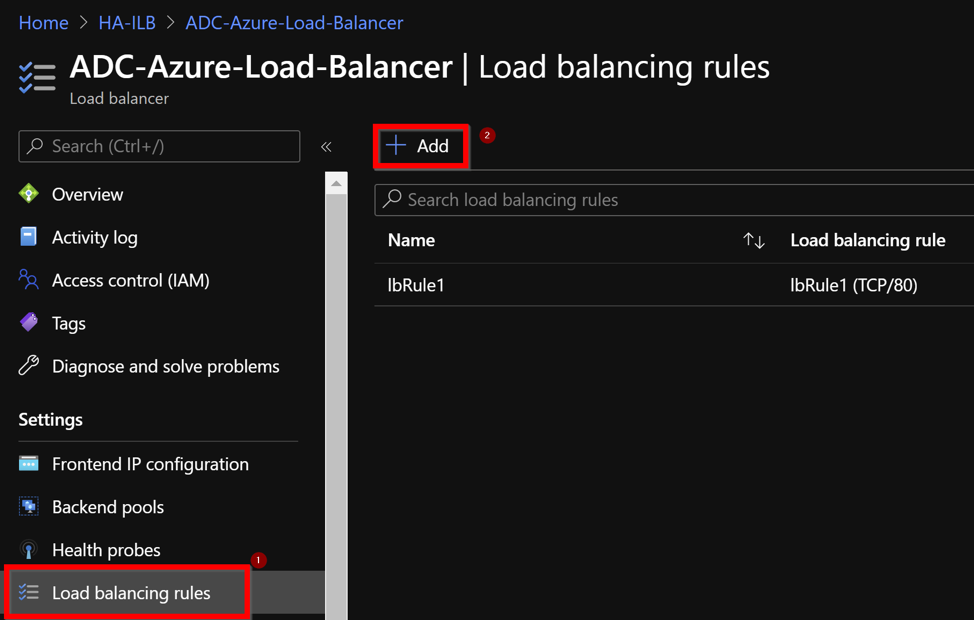
-
Create a new LB Rule by choosing the new front-end IP address and the port. Floating IP field must be set to Enabled.
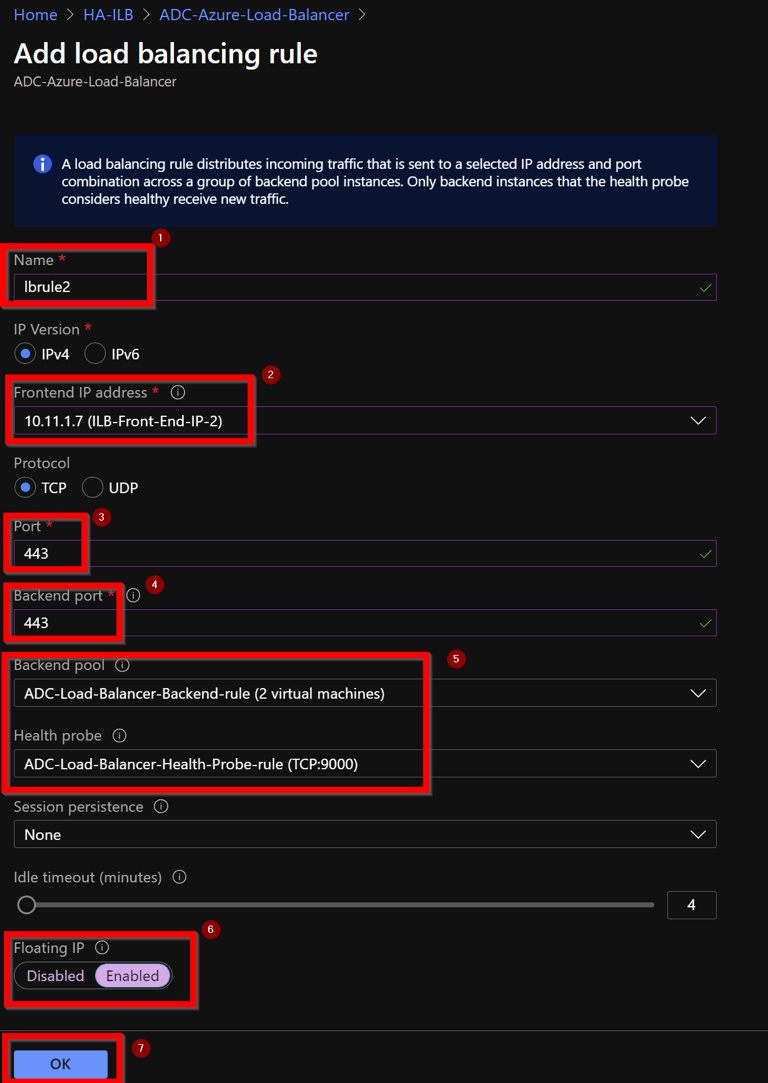
-
Now the Frontend IP configuration shows the LB rule that is applied.
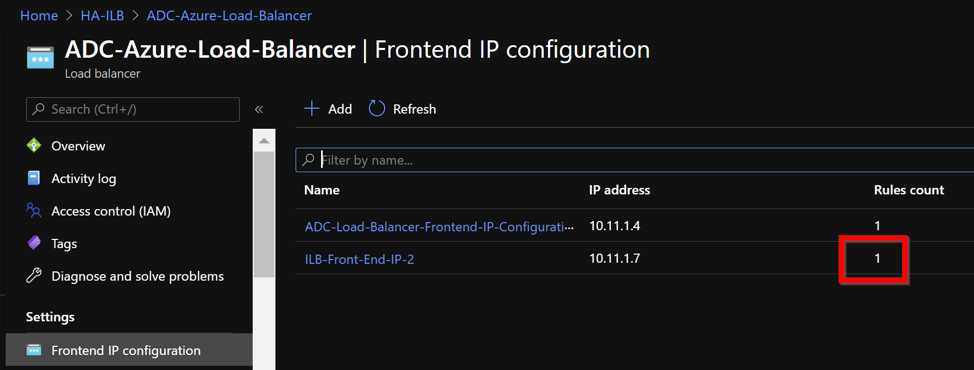
Sample configuration
To configure a gateway VPN virtual server and load balancing virtual server, run the following commands on the primary node (ADC-VPX-0). The configuration auto synchronizes to the secondary node (ADC-VPX-1).
Gateway sample configuration
enable feature aaa LB SSL SSLVPN
 enable ns mode MBF
 add vpn vserver vpn_ssl SSL 10.11.1.4 443
 add ssl certKey ckp -cert wild-cgwsanity.cer -key wild-cgwsanity.key
 bind ssl vserver vpn_ssl -certkeyName ckp
Load balancing sample configuration
enable feature LB SSL
 enable ns mode MBF
 add lb vserver lb_vs1 SSL 10.11.1.7 443
 bind ssl vserver lb_vs1 -certkeyName ckp
You can now access the load balancing or VPN virtual server using the fully qualified domain name (FQDN) associated with the internal IP address of ILB.
See the Resources section for more information about how to configure the load-balancing virtual server.
Resources:
The following links provide additional information related to HA deployment and virtual server configuration:
Related resources: