Configure a high-availability setup with multiple IP addresses and NICs
In a Microsoft Azure deployment, a high-availability configuration of two NetScaler VPX instances is achieved by using the Azure Load Balancer (ALB). This is achieved by configuring a health probe on ALB, which monitors each VPX instance by sending a health probe at every 5 seconds to both primary and secondary instances.
In this setup, only the primary node responds to health probes and the secondary does not. Once the primary sends the response to the health probe, the ALB starts sending the data traffic to the instance. If the primary instance misses two consecutive health probes, ALB does not redirect traffic to that instance. On failover, the new primary starts responding to health probes and the ALB redirects traffic to it. The standard VPX high availability failover time is three seconds. The total failover time that might take for traffic switching can be a maximum of 13 seconds.
You can deploy a pair of NetScaler VPX instances with multiple NICs in an active-passive high availability (HA) setup on Azure. Each NIC can contain multiple IP addresses.
The following options are available for a multi-NIC high availability deployment:
-
High availability using Azure availability set
-
High availability using Azure availability zones
For more information about Azure Availability Set and Availability Zones, see the Azure documentation Manage the availability of Linux virtual machines.
High availability using availability set
A high availability setup using a availability set must meet the following requirements:
-
An HA Independent Network Configuration (INC) configuration
-
The Azure Load Balancer (ALB) in Direct Server Return (DSR) mode
All traffic goes through the primary node. The secondary node remains in standby mode until the primary node fails.
Note:
For a NetScaler VPX high availability deployment on the Azure cloud to work, you need a floating public IP (PIP) that can be moved between the two VPX nodes. The Azure Load Balancer (ALB) provides that floating PIP, which is moved to the second node automatically in the event of a failover.
Diagram: Example of a high availability deployment architecture, using Azure Availability Set
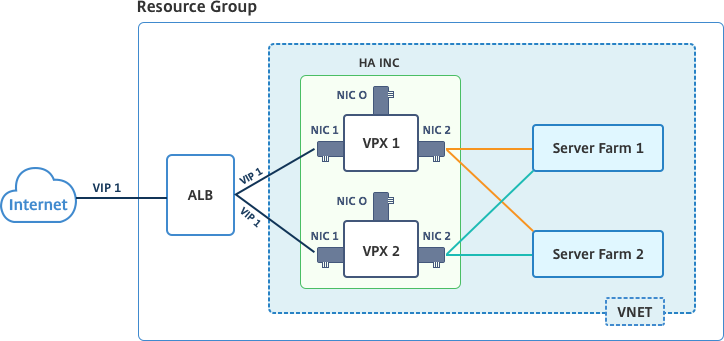
In an active-passive deployment, the ALB front end public IP (PIP) addresses are added as the VIP addresses in each VPX node. In HA-INC configuration, the VIP addresses are floating and SNIP addresses are instance specific.
You can deploy a VPX pair in active-passive high availability mode in two ways by using:
-
NetScaler VPX standard high availability template: use this option to configure an HA pair with the default option of three subnets and six NICs.
-
Windows PowerShell commands: use this option to configure an HA pair according to your subnet and NIC requirements.
This topic describes how to deploy a VPX pair in active-passive HA setup by using the Citrix template. If you want to use PowerShell commands, see Configuring an HA Setup with Multiple IP Addresses and NICs by Using PowerShell Commands.
Configure HA-INC nodes by using the NetScaler® high availability template
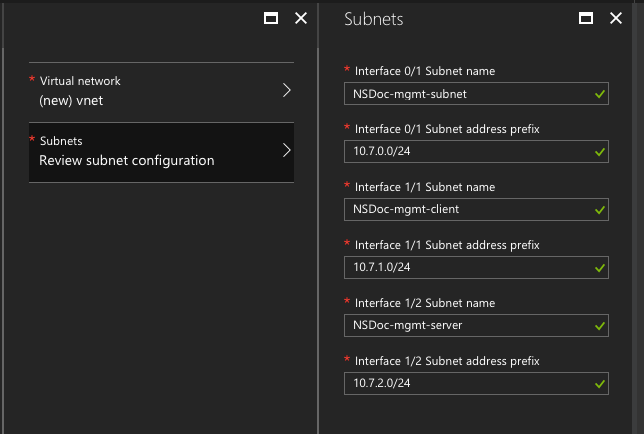
You can quickly and efficiently deploy a pair of VPX instances in HA-INC mode by using the standard template. The template creates two nodes, with three subnets and six NICs. The subnets are for management, client, and server-side traffic, and each subnet has two NICs for both the VPX instances.
You can get the NetScaler HA Pair template at the Azure Marketplace.
Complete the following steps to launch the template and deploy a high availability VPX pair, by using Azure availability sets.
-
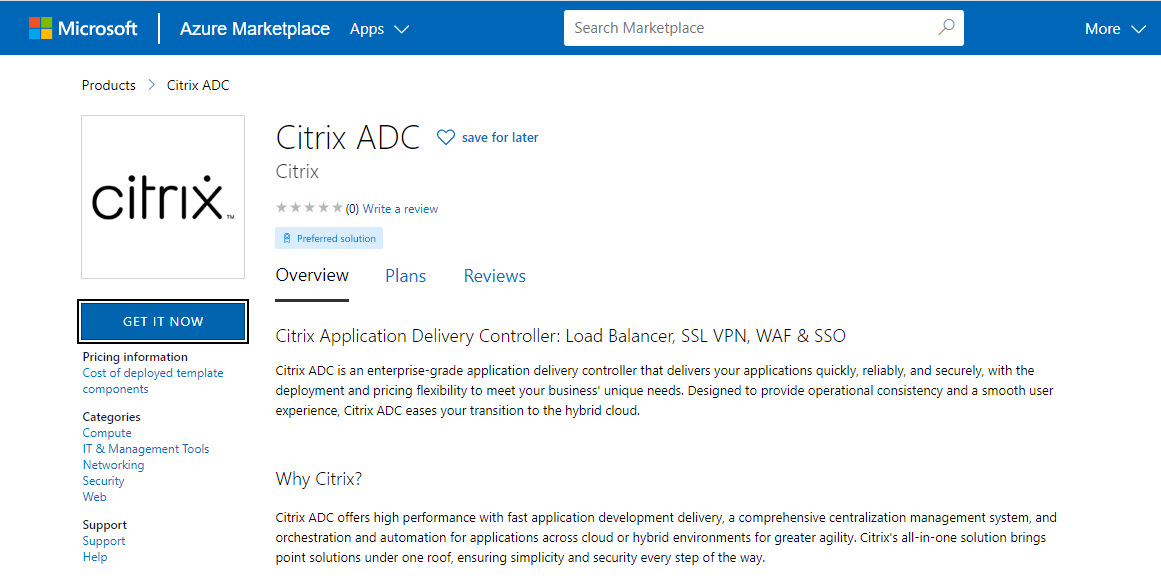
From Azure Marketplace, search NetScaler.
-
Click GET IT NOW.
-
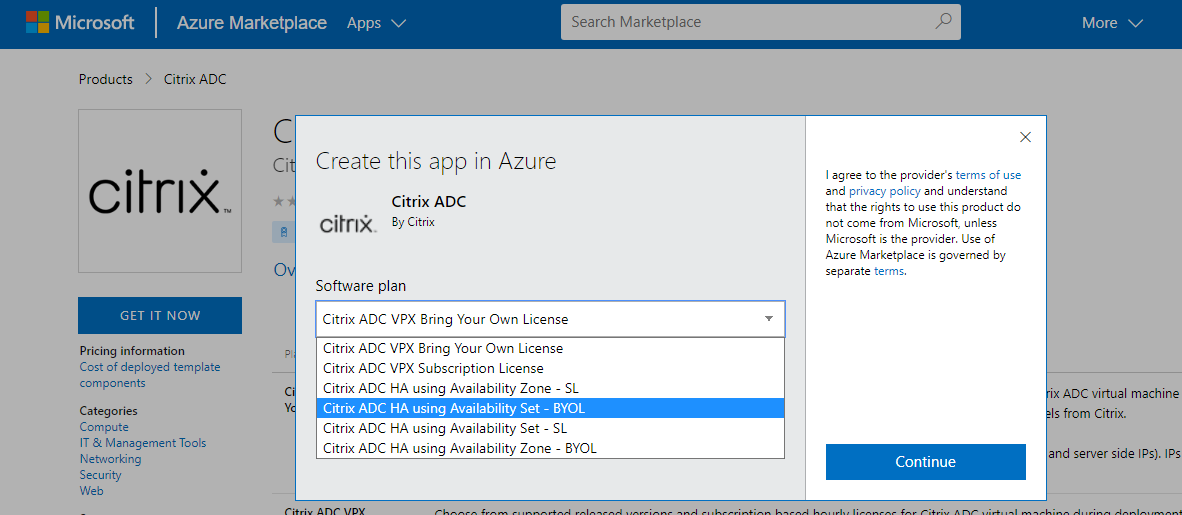
Select the required HA deployment along with license, and click Continue.
-
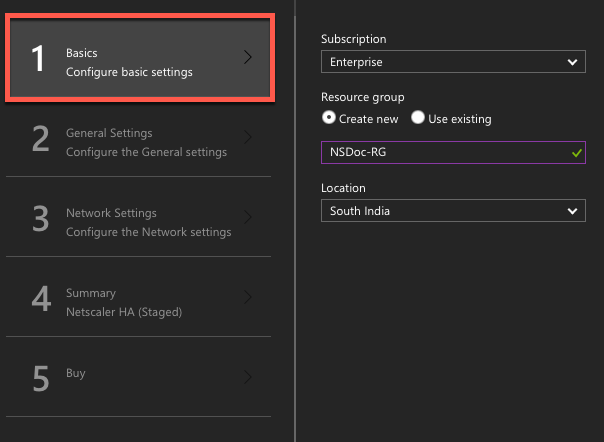
The Basics page appears. Create a Resource Group and select OK.
-
The General Settings page appears. Type the details and select OK.
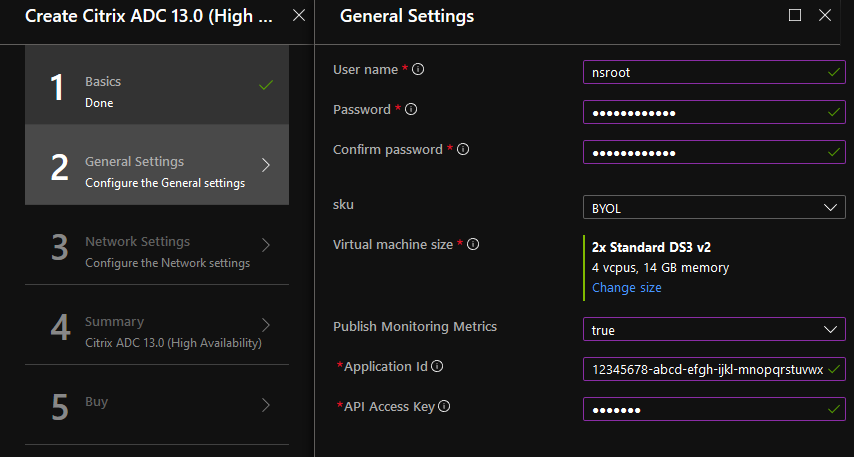 Note:By default, the Publishing Monitoring Metrics option is set to false. If you want to enable this option, select true. Create an Azure Active Directory (ADD) application and service principal that can access resources. Assign contributor role to the newly created AAD application. For more information, see Use portal to create an Azure Active Directory application and service principal that can access resources.
 -
The Network Settings page appears. Check the VNet and subnet configurations, edit the required settings, and select OK.
-
The Summary page appears. Review the configuration and edit accordingly. Select OK to confirm.
-
The Buy page appears. Select Purchase to complete the deployment.
It might take a moment for the Azure Resource Group to be created with the required configurations. After completion, select the Resource Group in the Azure portal to see the configuration details, such as LB rules, back-end pools, health probes. The high availability pair appears as ns-vpx0 and ns-vpx1.
If further modifications are required for your HA setup, such as creating more security rules and ports, you can do that from the Azure portal.
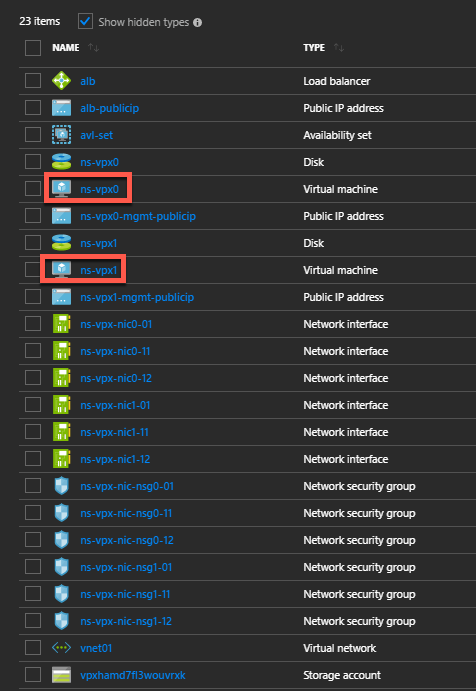
Next, you need to configure the load-balancing virtual server with the ALB's Frontend public IP (PIP) address, on primary node. To find the ALB PIP, select ALB \> Frontend IP configuration.
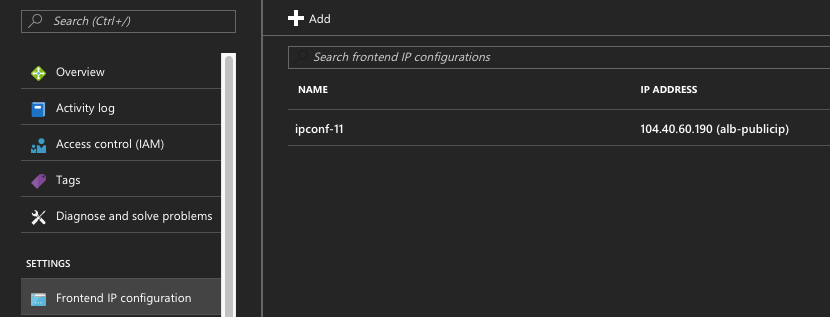
See the Resources section for more information about how to configure the load-balancing virtual server.
Resources:
The following links provide additional information related to HA deployment and virtual server configuration:
Related resources:
High availability using availability zones
Azure Availability Zones are fault-isolated locations within an Azure region, providing redundant power, cooling, and networking and increasing resiliency. Only specific Azure regions support Availability Zones. For more information, see the Azure documentation [What are Availability Zones in Azure.
Diagram: Example of a high availability deployment architecture, using Azure Availability Zones
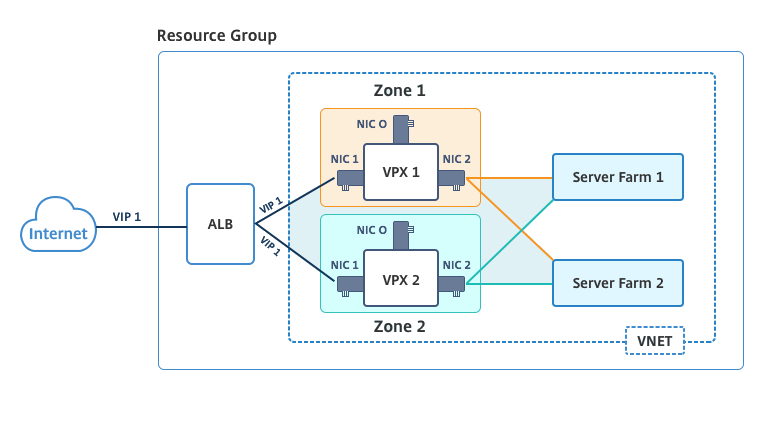
You can deploy a VPX pair in high availability mode by using the template called "NetScaler 13.0 HA using Availability Zones," available in Azure Marketplace.
Complete the following steps to launch the template and deploy a high availability VPX pair, by using Azure Availability Zones.
-
From Azure Marketplace, select and initiate the Citrix® solution template.

-
Ensure deployment type is Resource Manager and select Create.
-
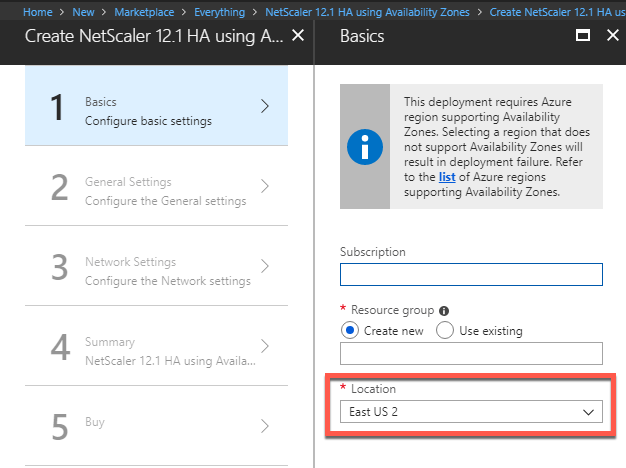
The Basics page appears. Enter the details and click OK.Note:Ensure that you select an Azure region that supports Availability Zones. For more information about regions that support Availability Zones, see Azure documentation What are Availability Zones in Azure?
-
The General Settings page appears. Type the details and select OK.
-
The Network Setting page appears. Check the VNet and subnet configurations, edit the required settings, and select OK.
-
The Summary page appears. Review the configuration and edit accordingly. Select OK to confirm.
-
The Buy page appears. Select Purchase to complete the deployment.It might take a moment for the Azure Resource Group to be created with the required configurations. After completion, select the Resource Group to see the configuration details, such as LB rules, back-end pools, health probes, and so on, in the Azure portal. The high availability pair appears as ns-vpx0 and ns-vpx1. Also, you can see the location under the Location column.
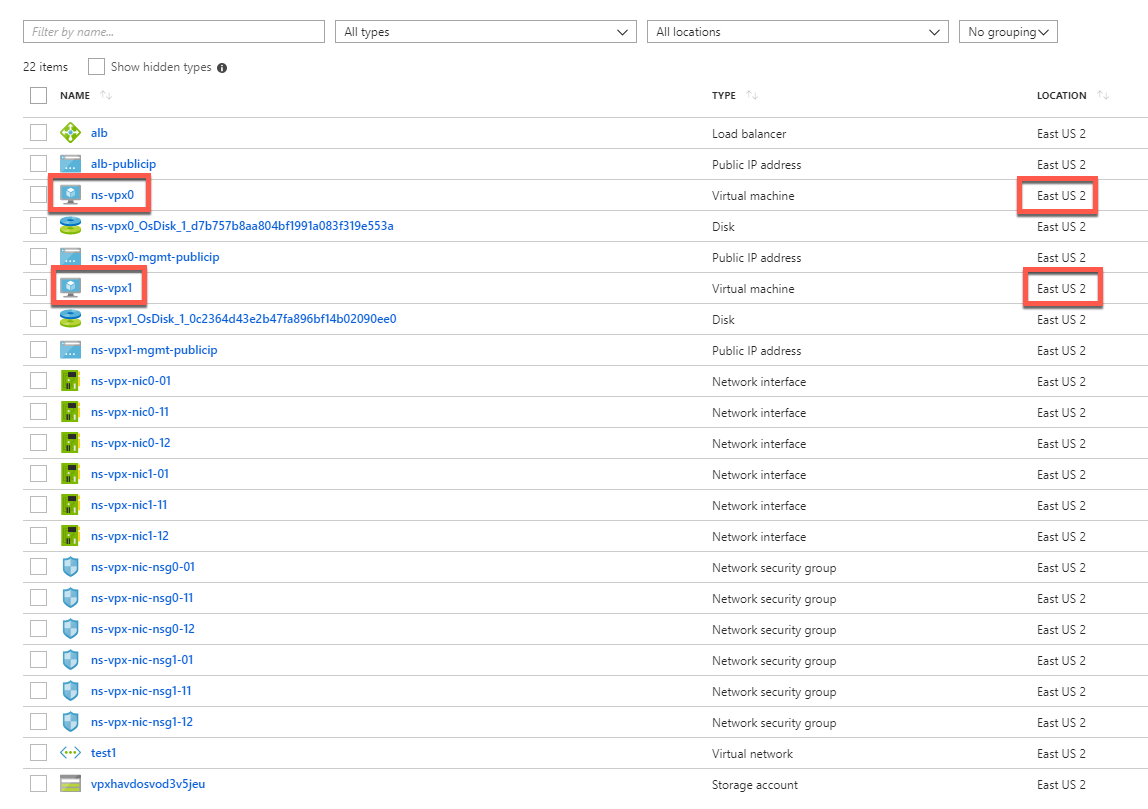
If further modifications are required for your HA setup, such as creating more security rules and ports, you can do that from the Azure portal.
Monitor your instances using metrics in Azure monitor
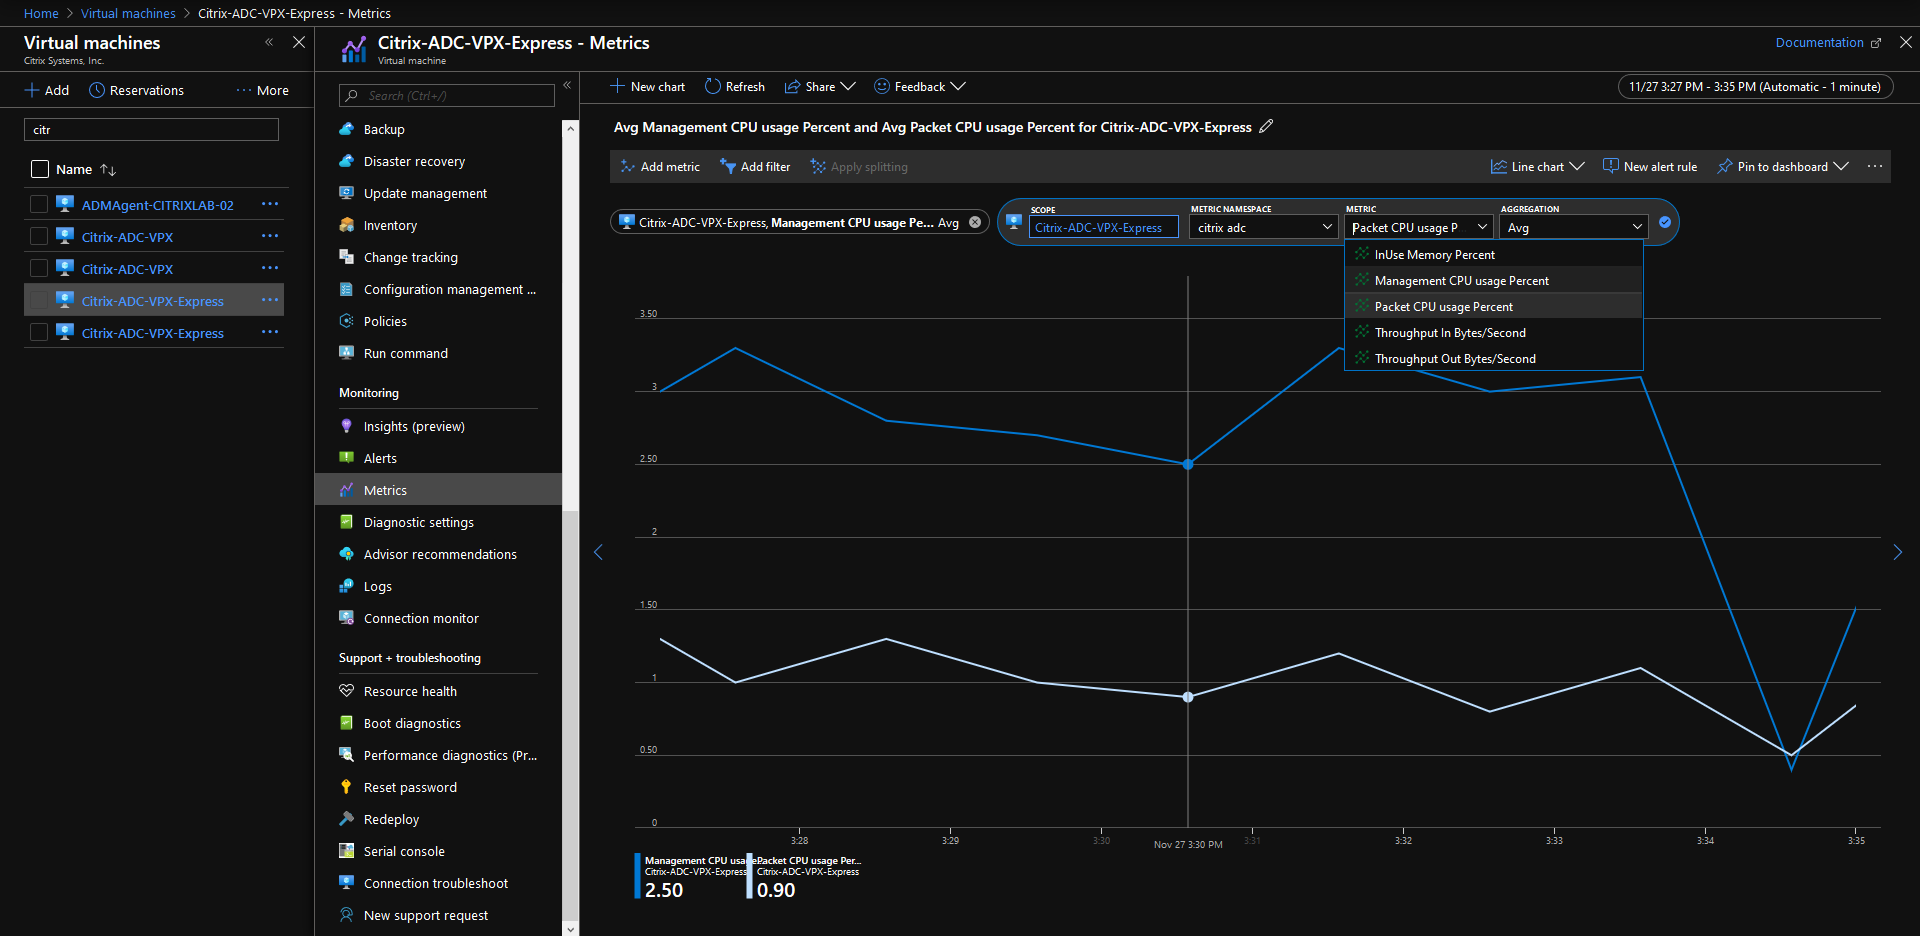
You can use metrics in the Azure monitor data platform to monitor a set of NetScaler VPX resources such as CPU, memory utilization, and throughput. Metrics service monitors NetScaler VPX resources that run on Azure, in real time. You can use Metrics Explorer to access the collected data. For more information, see Azure Monitor Metrics overview.
Points to note
-
If you deploy a NetScaler VPX instance on Azure by using the Azure Marketplace offer, Metrics service is disabled by default.
-
The Metrics service is not supported in Azure CLI.
-
Metrics are available for CPU (management and packet CPU usage), memory, and throughput (inbound and outbound).
How to view metrics in Azure monitor
To view metrics in the Azure monitor for your instance, perform these steps:
-
Log on to Azure Portal > Virtual Machines.
-
Select the virtual machine that is the Primary Node.
-
In the Monitoring section, click Metrics.
-
From the Metric Namespace drop-down menu, click NetScaler.
-
Under All metrics in Metrics drop-down menu, click the metrics you want to view.
-
Click Add metric to view another metric on the same chart. Use the Chart options to customize your chart.