
Download a NetScaler VPX license
After the launch of NetScaler VPX-customer licensed instance from the AWS marketplace, a license is required. For more information on VPX licensing, see Licensing overview.
You have to:
-
Use the licensing portal within the Citrix® website to generate a valid license.
-
Upload the license to the instance.
If this is a paid marketplace instance, then you do not need to install a license. The correct feature set and performance activate automatically.
If you use a NetScaler VPX instance with a model number higher than VPX 5000, the network throughput might not be the same as specified by the instance's license. However, other features, such as SSL throughput and SSL transactions per second, might improve.
5 Gbps network bandwidth is observed in the
c4.8xlarge instance type.
How to migrate the AWS subscription to BYOL
This section describes the procedure to migrate from AWS subscription to Bring your own license (BYOL), and conversely.
Do the following steps to migrate an AWS subscription to BYOL:
Note:
The Step 2 and Step 3 are done on the NetScaler VPX instance, and all other steps are done on the AWS portal.
-
Create a BYOL EC2 instance using NetScaler VPX - Customer Licensed in the same availability zone as the old EC2 instance that has the same security group, IAM role, and subnet. The new EC2 instance must have only one ENI interface.
-
To back up the data on the old EC2 instance using the NetScaler GUI, follow these steps.
-
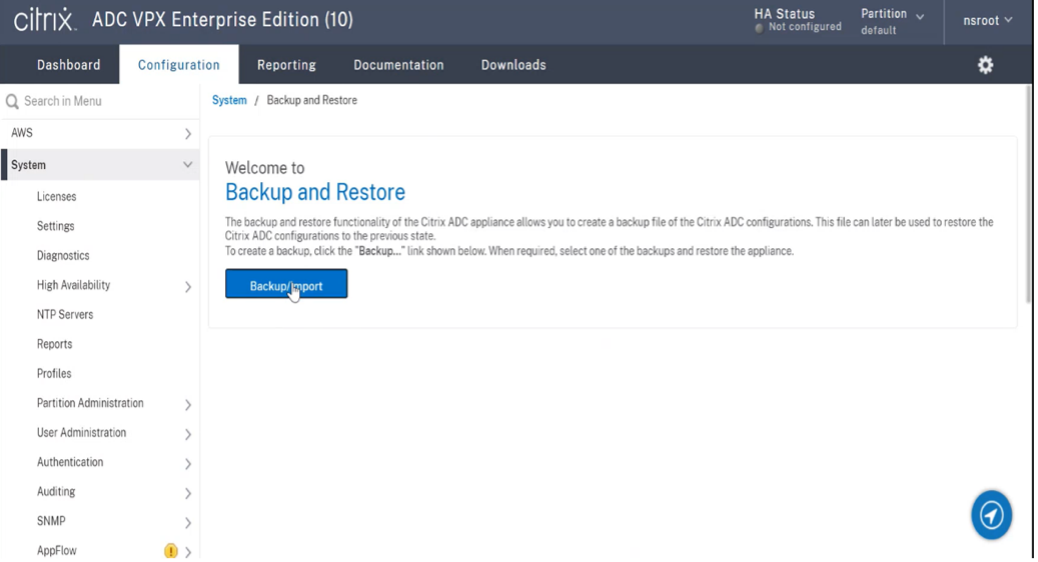
Navigate to System > Backup and Restore.
-
In the Welcome page, click Backup/Import to start the process.
-
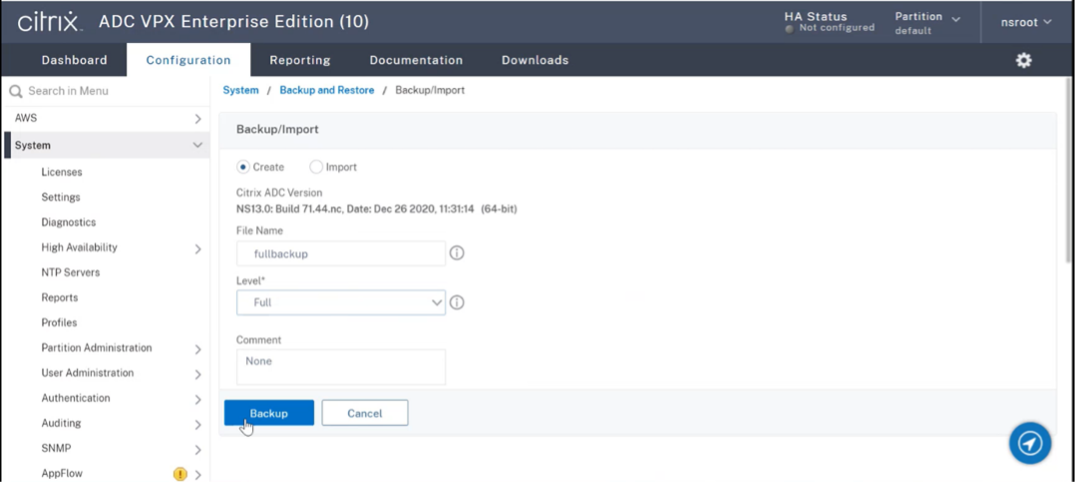
In the Backup/Import page, fill in the following details:
-
Name – Name of the backup file.
-
Level – Select the backup level as Full.
-
Comment – Provide a brief description of the backup.
-
-
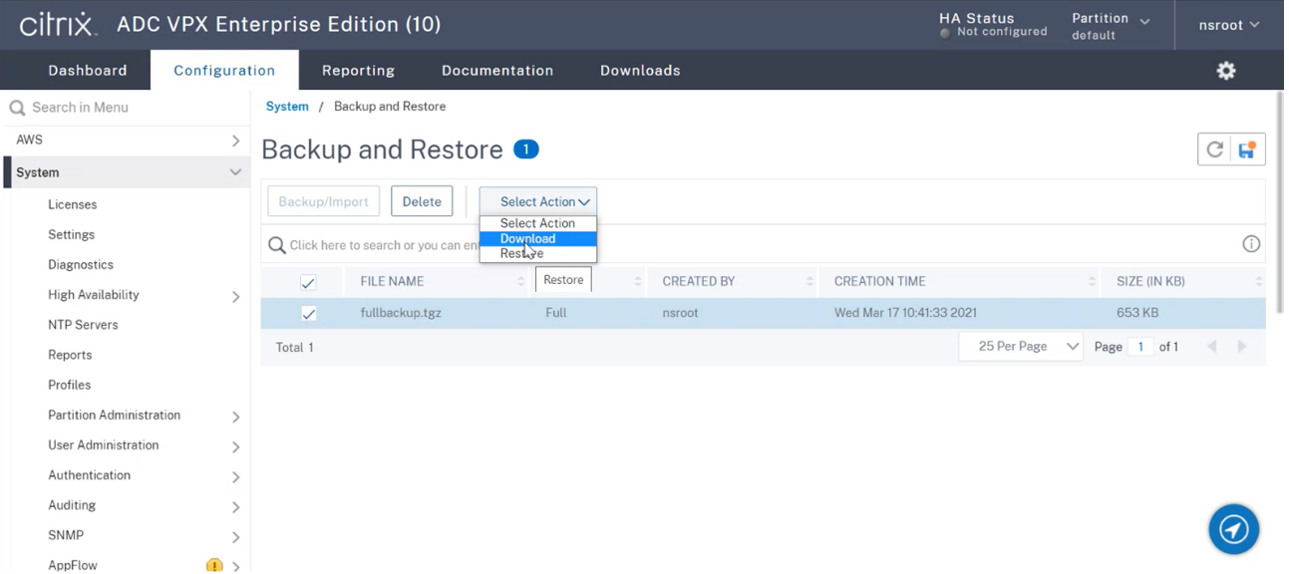
Click Backup. Once the backup is complete, you can select the file and download it to your local machine.
-
-
To restore the data on the new EC2 instance using the NetScaler GUI, follow these steps:
-
Navigate to System > Backup and Restore.
-
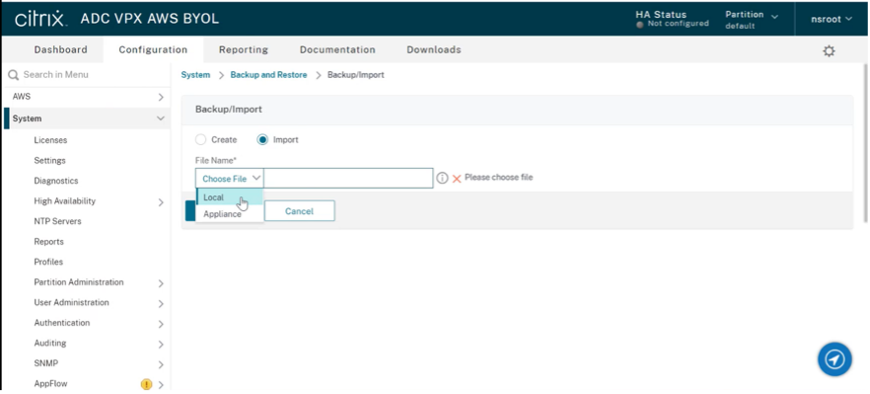
Click Backup/Import to start the process.
-
Select the Import option and upload the backup file.
-
Select the file.
-
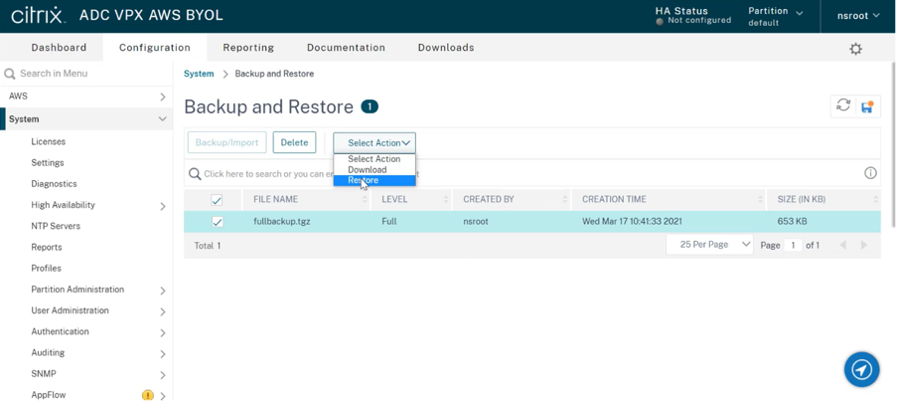
From the Select Action drop-down menu, select Restore.
-
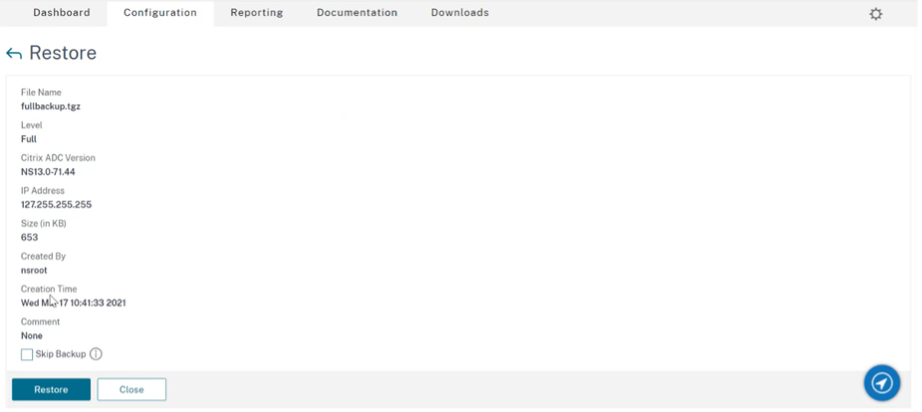
On the Restore page, verify the file details, and click Restore.
-
After the restore, reboot the EC2 instance.
-
-
Move all interfaces (except the management interface to which the NSIP address is bound) from the old EC2 instance to the new EC2 instance. To move a network interface from one EC2 instance to another, follow these steps:
-
In the AWS Portal, stop both the old and new EC2 instances.
-
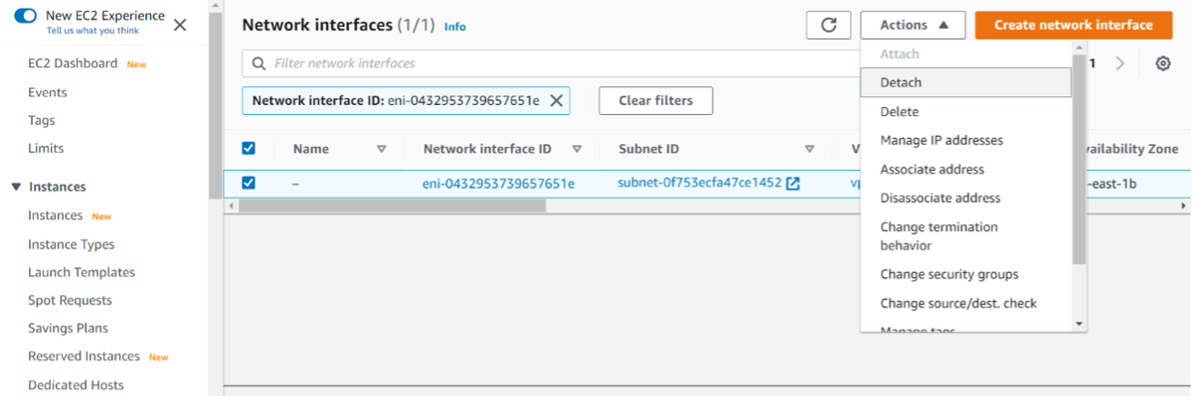
Navigate to Network Interfaces, and select the network interface attached to the old EC2 instance.
-
Detach the EC2 instance by clicking Actions > Detach.
-
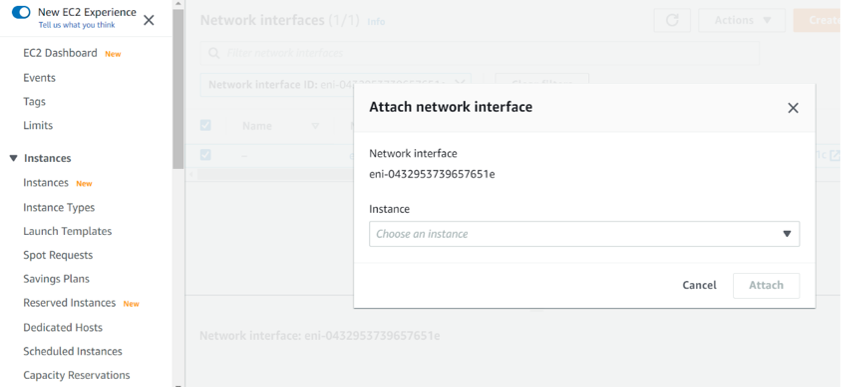
Attach the network interface to the new EC2 instance by clicking Actions > Attach. Enter the EC2 instance name to which the network interface must be attached.
-
Do the Step 1 to Step 4 for all other interfaces that are attached. Make sure to follow the sequence and maintain the interface order. That is, first detach interface 2 and attach it, and then detach interface 3 and attach it, and so on.
-
-
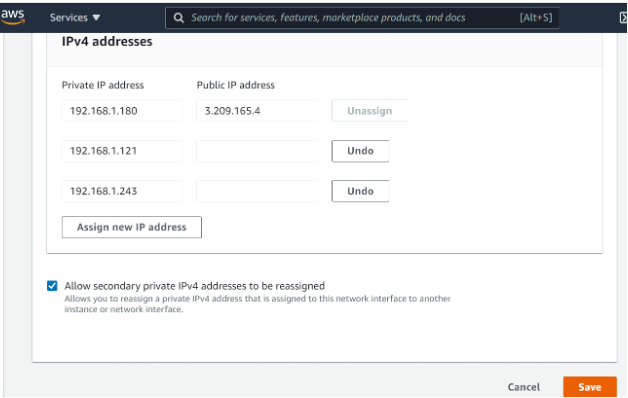
You can't detach the management interface from an old EC2 instance. So, move all the secondary IP addresses (if any) on the management interface (primary network interface) of the old EC2 instance to the new EC2 instance. To move an IP address from one interface to another, follow these steps:
-
In the AWS Portal, make sure that both the old and new EC2 instances are in Stop state.
-
Navigate to Network Interfaces, and select the management network interface attached to the old EC2 instance.
-
Click Actions > Manage IP Address, and make note of all the secondary IP addresses assigned (if any).
-
Navigate to the management network interface or primary interface of the new EC2 instance.
-
Click Actions > Manage IP Addresses.
-
Under IPv4 Addresses, click Assign new IP address.
-
Enter the IP addresses, which are noted in the Step 3.
-
Select Allow secondary private IP addresses to be reassigned check box.
-
Click Save.
-
-
Start the new EC2 instance and verify the configuration. After all the configuration is moved, you can delete or keep the old EC2 instance as per your requirement.
-
If any EIP address is attached to the NSIP address of the old EC2 instance, move the old instance NSIP address to the new instance NSIP address.
-
If you want to revert to the old instance, then follow the same steps in the opposite way between the old and new instance.
-
After you move from subscription instance to BYOL instance, a license is required. To install a license follow these steps:
-
Use the licensing portal in the Citrix website to generate a valid license.
-
Upload the license to the instance.
-
Note:
When you move BYOL instance to subscription instance (paid marketplace instance), you need not install the license. The correct feature set and performance is automatically activated.
Limitations
The management interface can't be moved to the new EC2 instance. So Citrix recommends you manually configure the management interface. For more information, see Step 5 in the preceding procedure. A new EC2 instance is created with the exact replica of the old EC2 instance but only the NSIP address has a new IP address.