
Configuring
You can configure a {{page.netscaler-cpx-short}} instance by accessing the CLI prompt through the Linux Docker host, or by using NetScaler NITRO APIs.
Configuring a {{page.netscaler-cpx-short}} Instance by Using the Command Line Interface
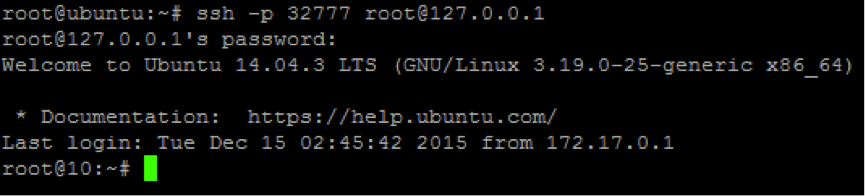
Access the Docker host and log on to the SSH prompt of the instance as shown in the following figure. The default administrator credentials to log on to a {{page.netscaler-cpx-short}} instance are root/linux.
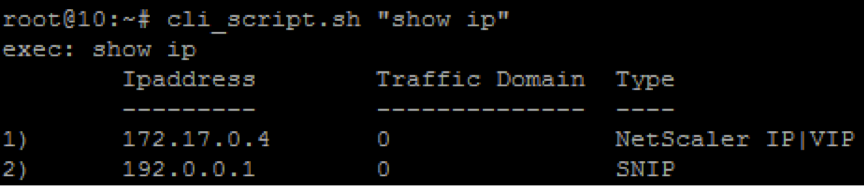
Type the following command to use the command line prompt of the instance to run CLI commands: cli\_script.sh “\<command\>”
Example:
To log out of the instance prompt, type logout.
Configuring a {{page.netscaler-cpx-short}} Instance by Using the NITRO API
You can use the NetScaler NITRO API to configure {{page.netscaler-cpx-short}} instances.
To configure {{page.netscaler-cpx-short}} instances by using the Nitro API, in a web browser, type:
http://<host_IP_address>:<port>/nitro/v1/config/<resource-type\
To retrieve statistics by using the Nitro API, in a web browser, type:
http://<host\_IP\_address\>:\<port\>/nitro/v1/stat/\<resource-type\
For more information about using the NITRO API, see REST Web Services. For {{page.netscaler-cpx-short}}, use
CPX IP address:port where netscaler-ip-address is mentioned.
Configuring a {{page.netscaler-cpx-short}} Instance by Using Jobs
You can configure {{page.netscaler-cpx-short}} instances by creating and executing jobs in Citrix ADM. You can use the configurations from configuration templates, extract configurations available on other devices, and use configurations saved in text files. You can also record configurations done by using the configuration utility of another instances. Citrix ADM then displays the corresponding CLI commands for you to use on your {{page.netscaler-cpx-short}} instance. After you select the configuration, you must select {{page.netscaler-cpx-short}} instances on which you want to load the configuration, specify the variable values, and execute the job.
To configure {{page.netscaler-cpx-short}} instances by using Jobs:
-
Log on to Citrix® ADM by using the administrative credentials.
-
Navigate to Networks \> Configuration Jobs, and then click Create Job.
-
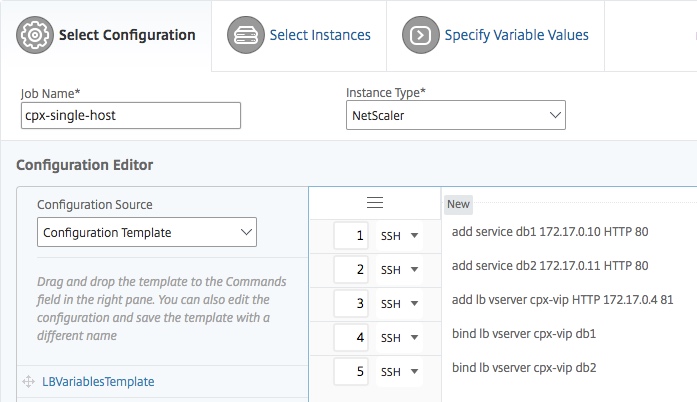
Specify the required values, and select the configuration source. You can also type the commands you want to run.
-
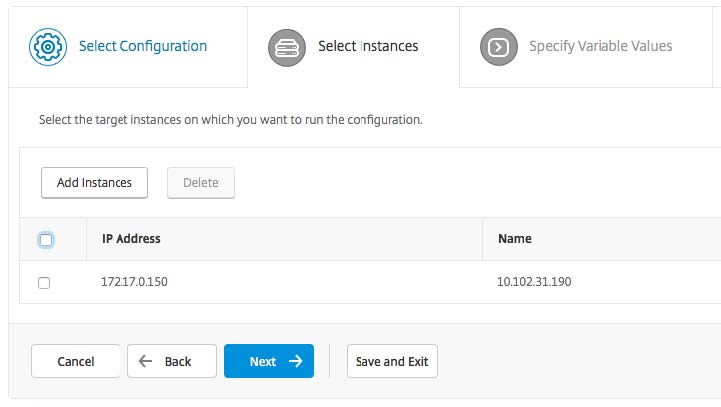
Select the {{page.netscaler-cpx-short}} instances on which you want to run the configuration and click Next.
-
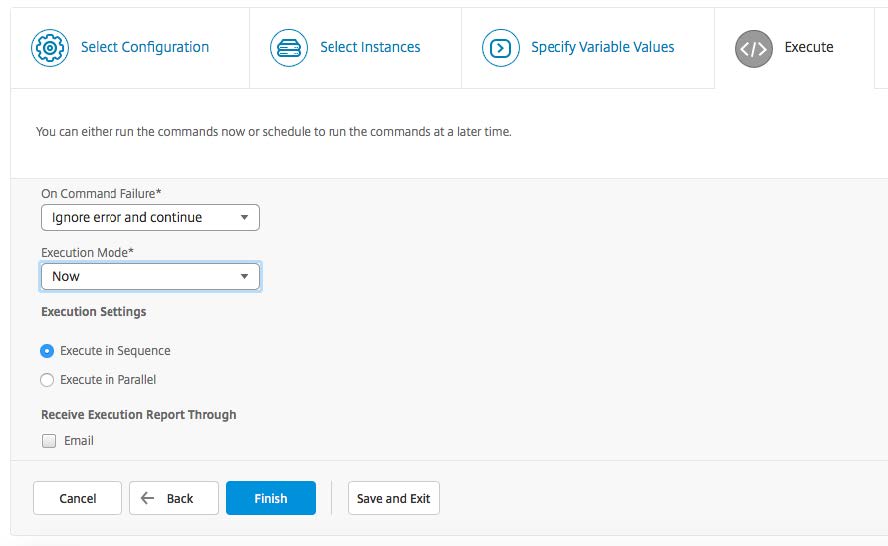
Specify the execution settings and click Finish to run the commands on the {{page.netscaler-cpx-short}} instance. If you want to save the configuration and run it later, click Save and Exit.
Configuring Log Streaming on a {{page.netscaler-cpx-short}} Instance
You can configure log streaming on a {{page.netscaler-cpx-short}} instance to collect webpage performance data, flow and user-session level information, and database information required for application performance monitoring and analytics. These data records are sent to Citrix ADM where you can view real-time and historical reports for all your applications.
To configure log streaming on a {{page.netscaler-cpx-short}} instance, you must first enable the AppFlow feature and the
ulfd daemon on the {{page.netscaler-cpx-short}} instance. When you enable the ulfd daemon, you must specify the IP address of Citrix ADM where you want to monitor the real-time and historical reports. You must then configure an AppFlow collector, action, policy, and bind the AppFlow policy globally.
The ulfd daemon sends all the flow records to Citrix ADM in a single unified logging format.
You can configure log streaming either by using the command line interface of a {{page.netscaler-cpx-short}} instance, or by using the Jobs feature in Citrix ADM.
Before you can monitor the records, you must add the {{page.netscaler-cpx-short}} instance to Citrix ADM. For more information about adding a {{page.netscaler-cpx-short}} instance to Citrix ADM, see Installing a {{page.netscaler-cpx-short}} Instance by Using Citrix ADM.
To configure log streaming on a {{page.netscaler-cpx-short}} Instance:
-
Enable the AppFlow feature by running the following command:
enable ns feature AppFlow -
Enable the ulfd daemon by using the following command:
set ns param -ulfd ENABLED -loggerip <NUMS_IP_Address> -
Run the following commands to configure an AppFlow® collector, action, and policy, and to bind the policy globally:
    add appflow collector <name> -IPAddress <ipaddress>`

     set appflow param -templateRefresh 3600 -httpUrl ENABLED -httpCookie ENABLED -httpReferer ENABLED -httpMethod ENABLED -httpHost ENABLED -httpUserAgent ENABLED -httpContentType ENABLED -httpAuthorization ENABLED -httpVia ENABLED -httpXForwardedFor ENABLED -httpLocation ENABLED -httpSetCookie ENABLED -httpSetCookie2 ENABLED -connectionChaining ENABLED -httpDomain Enabled

     add appflow action <name> --collectors <string> ... [-clientSideMeasurements (Enabled|Disabled) ]

     add appflow policy <name> true <action>

     bind appflow global <policyName> <priority> [<gotoPriorityExpression [-type <type>]
Note: You must configure the AppFlow collector with a dummy IP address.